

Air Barrier Types
Quick Building Science Basic
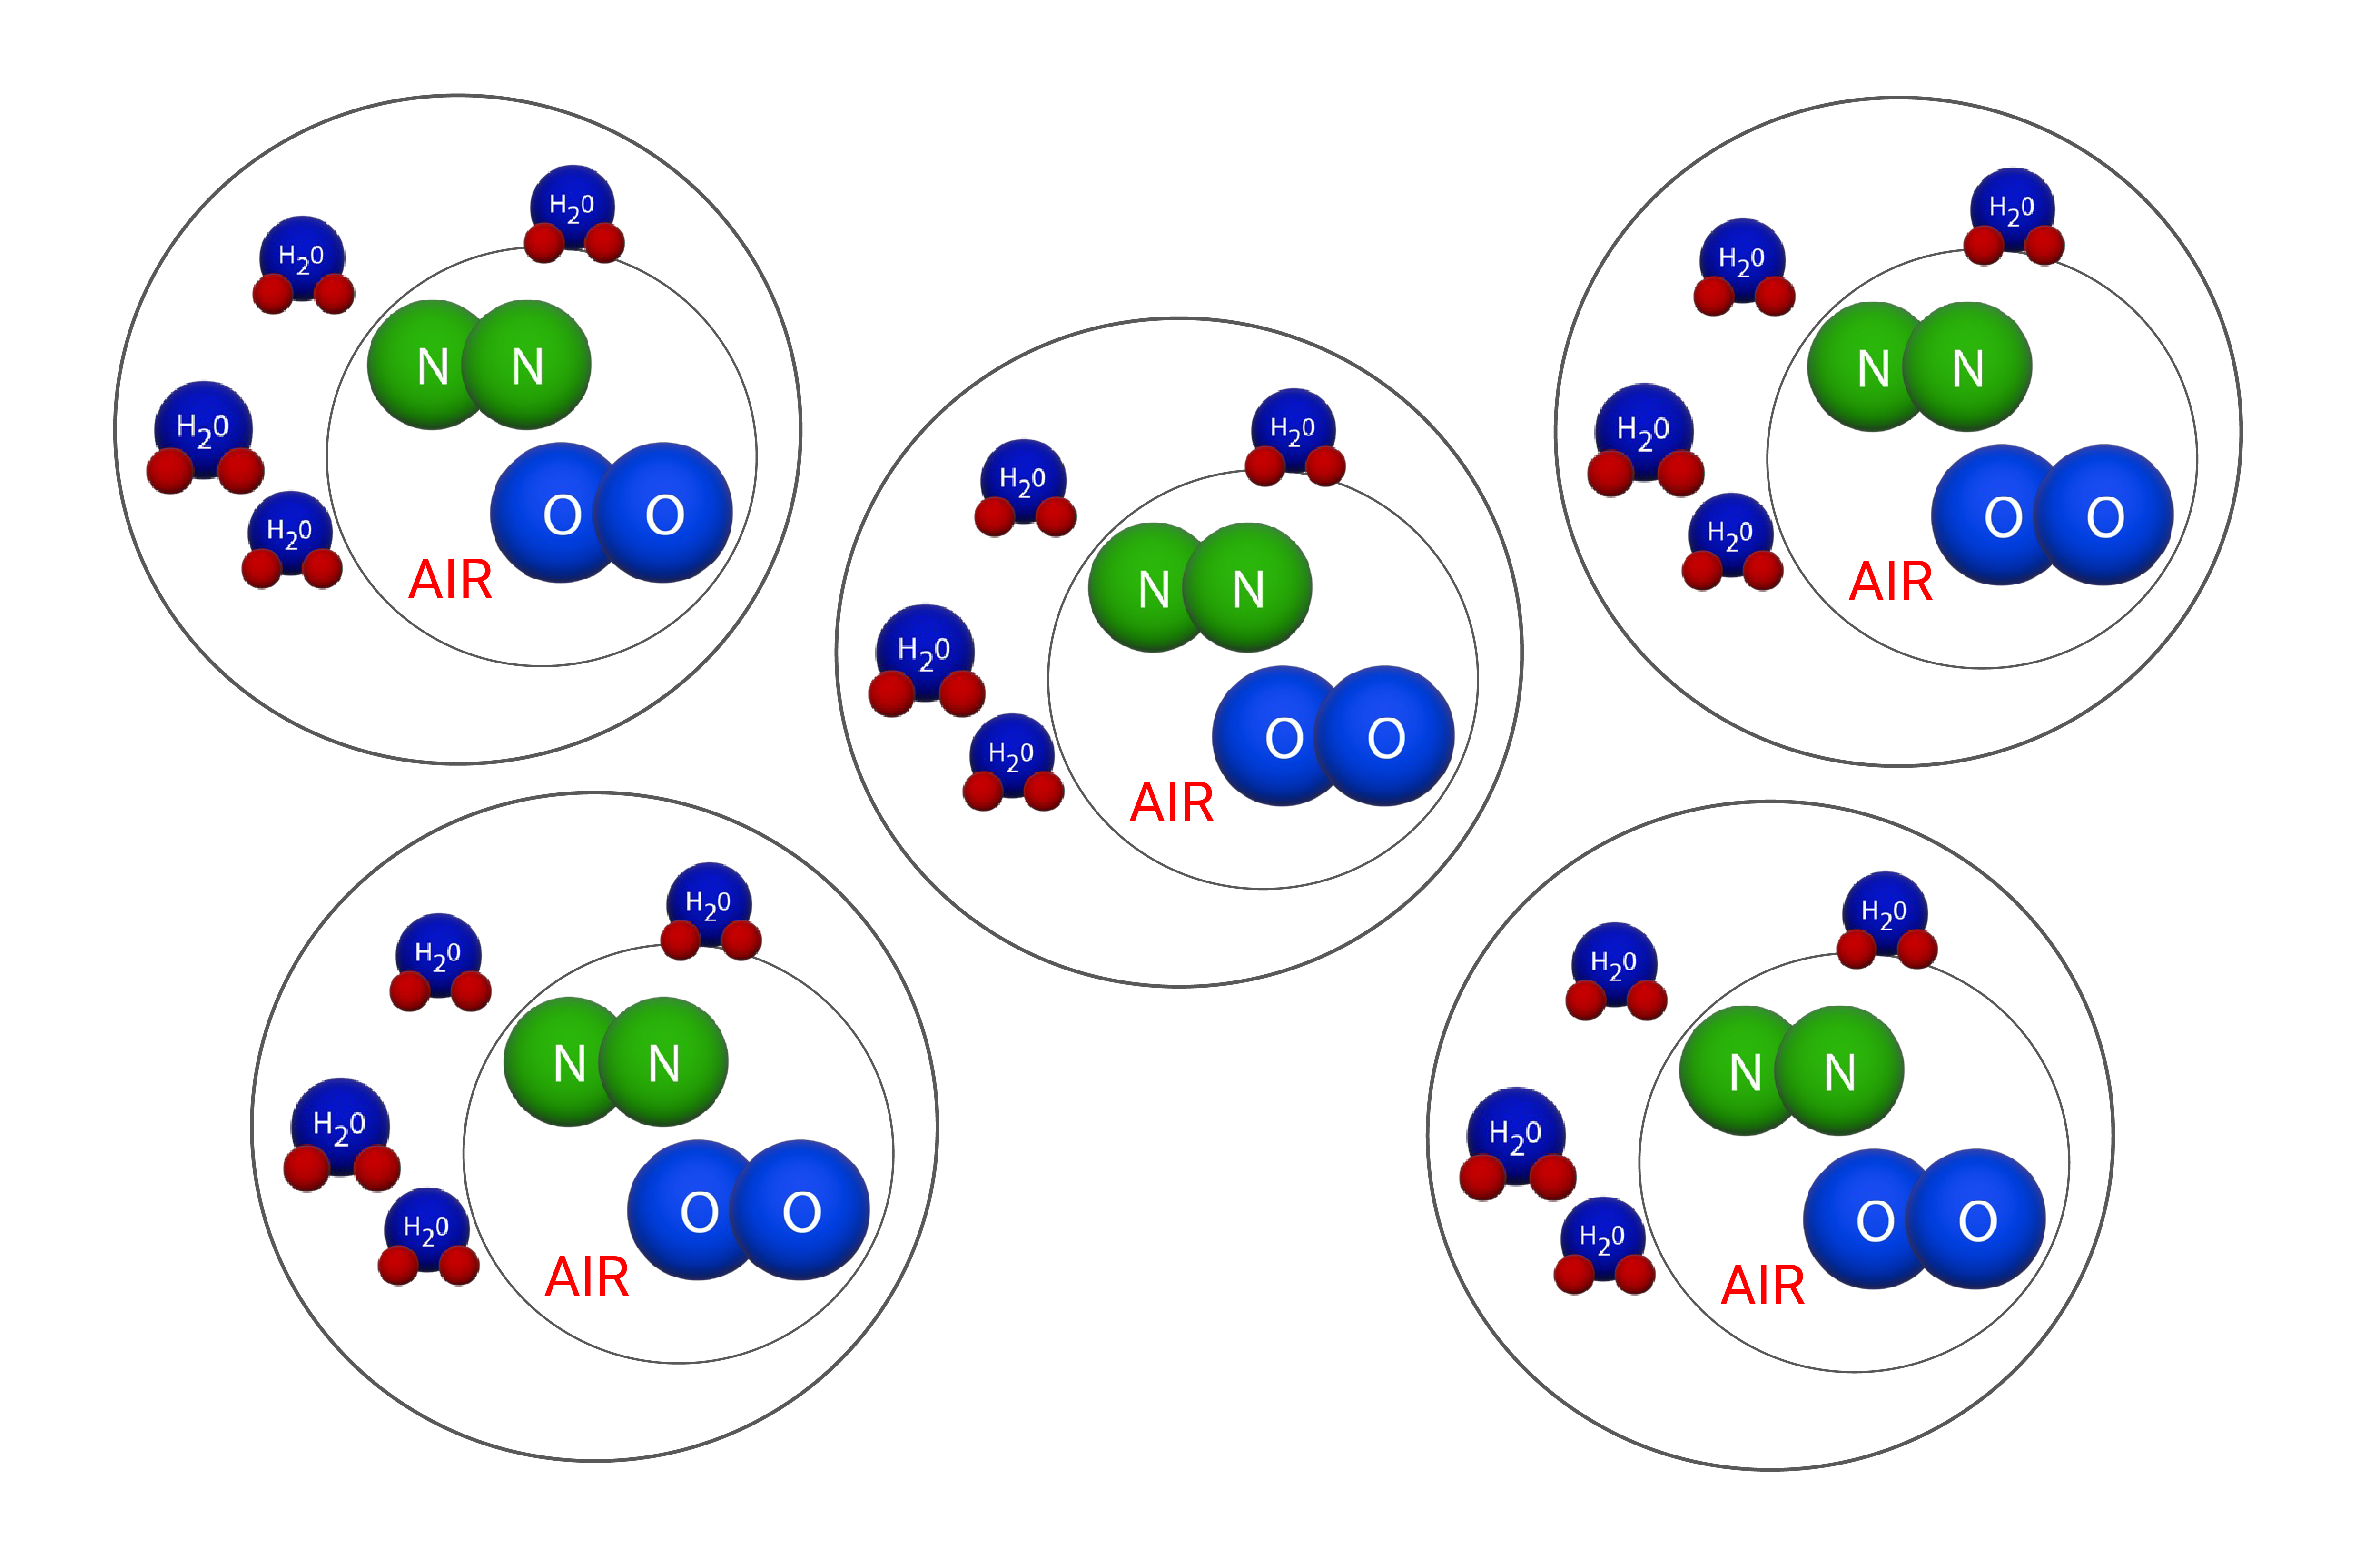
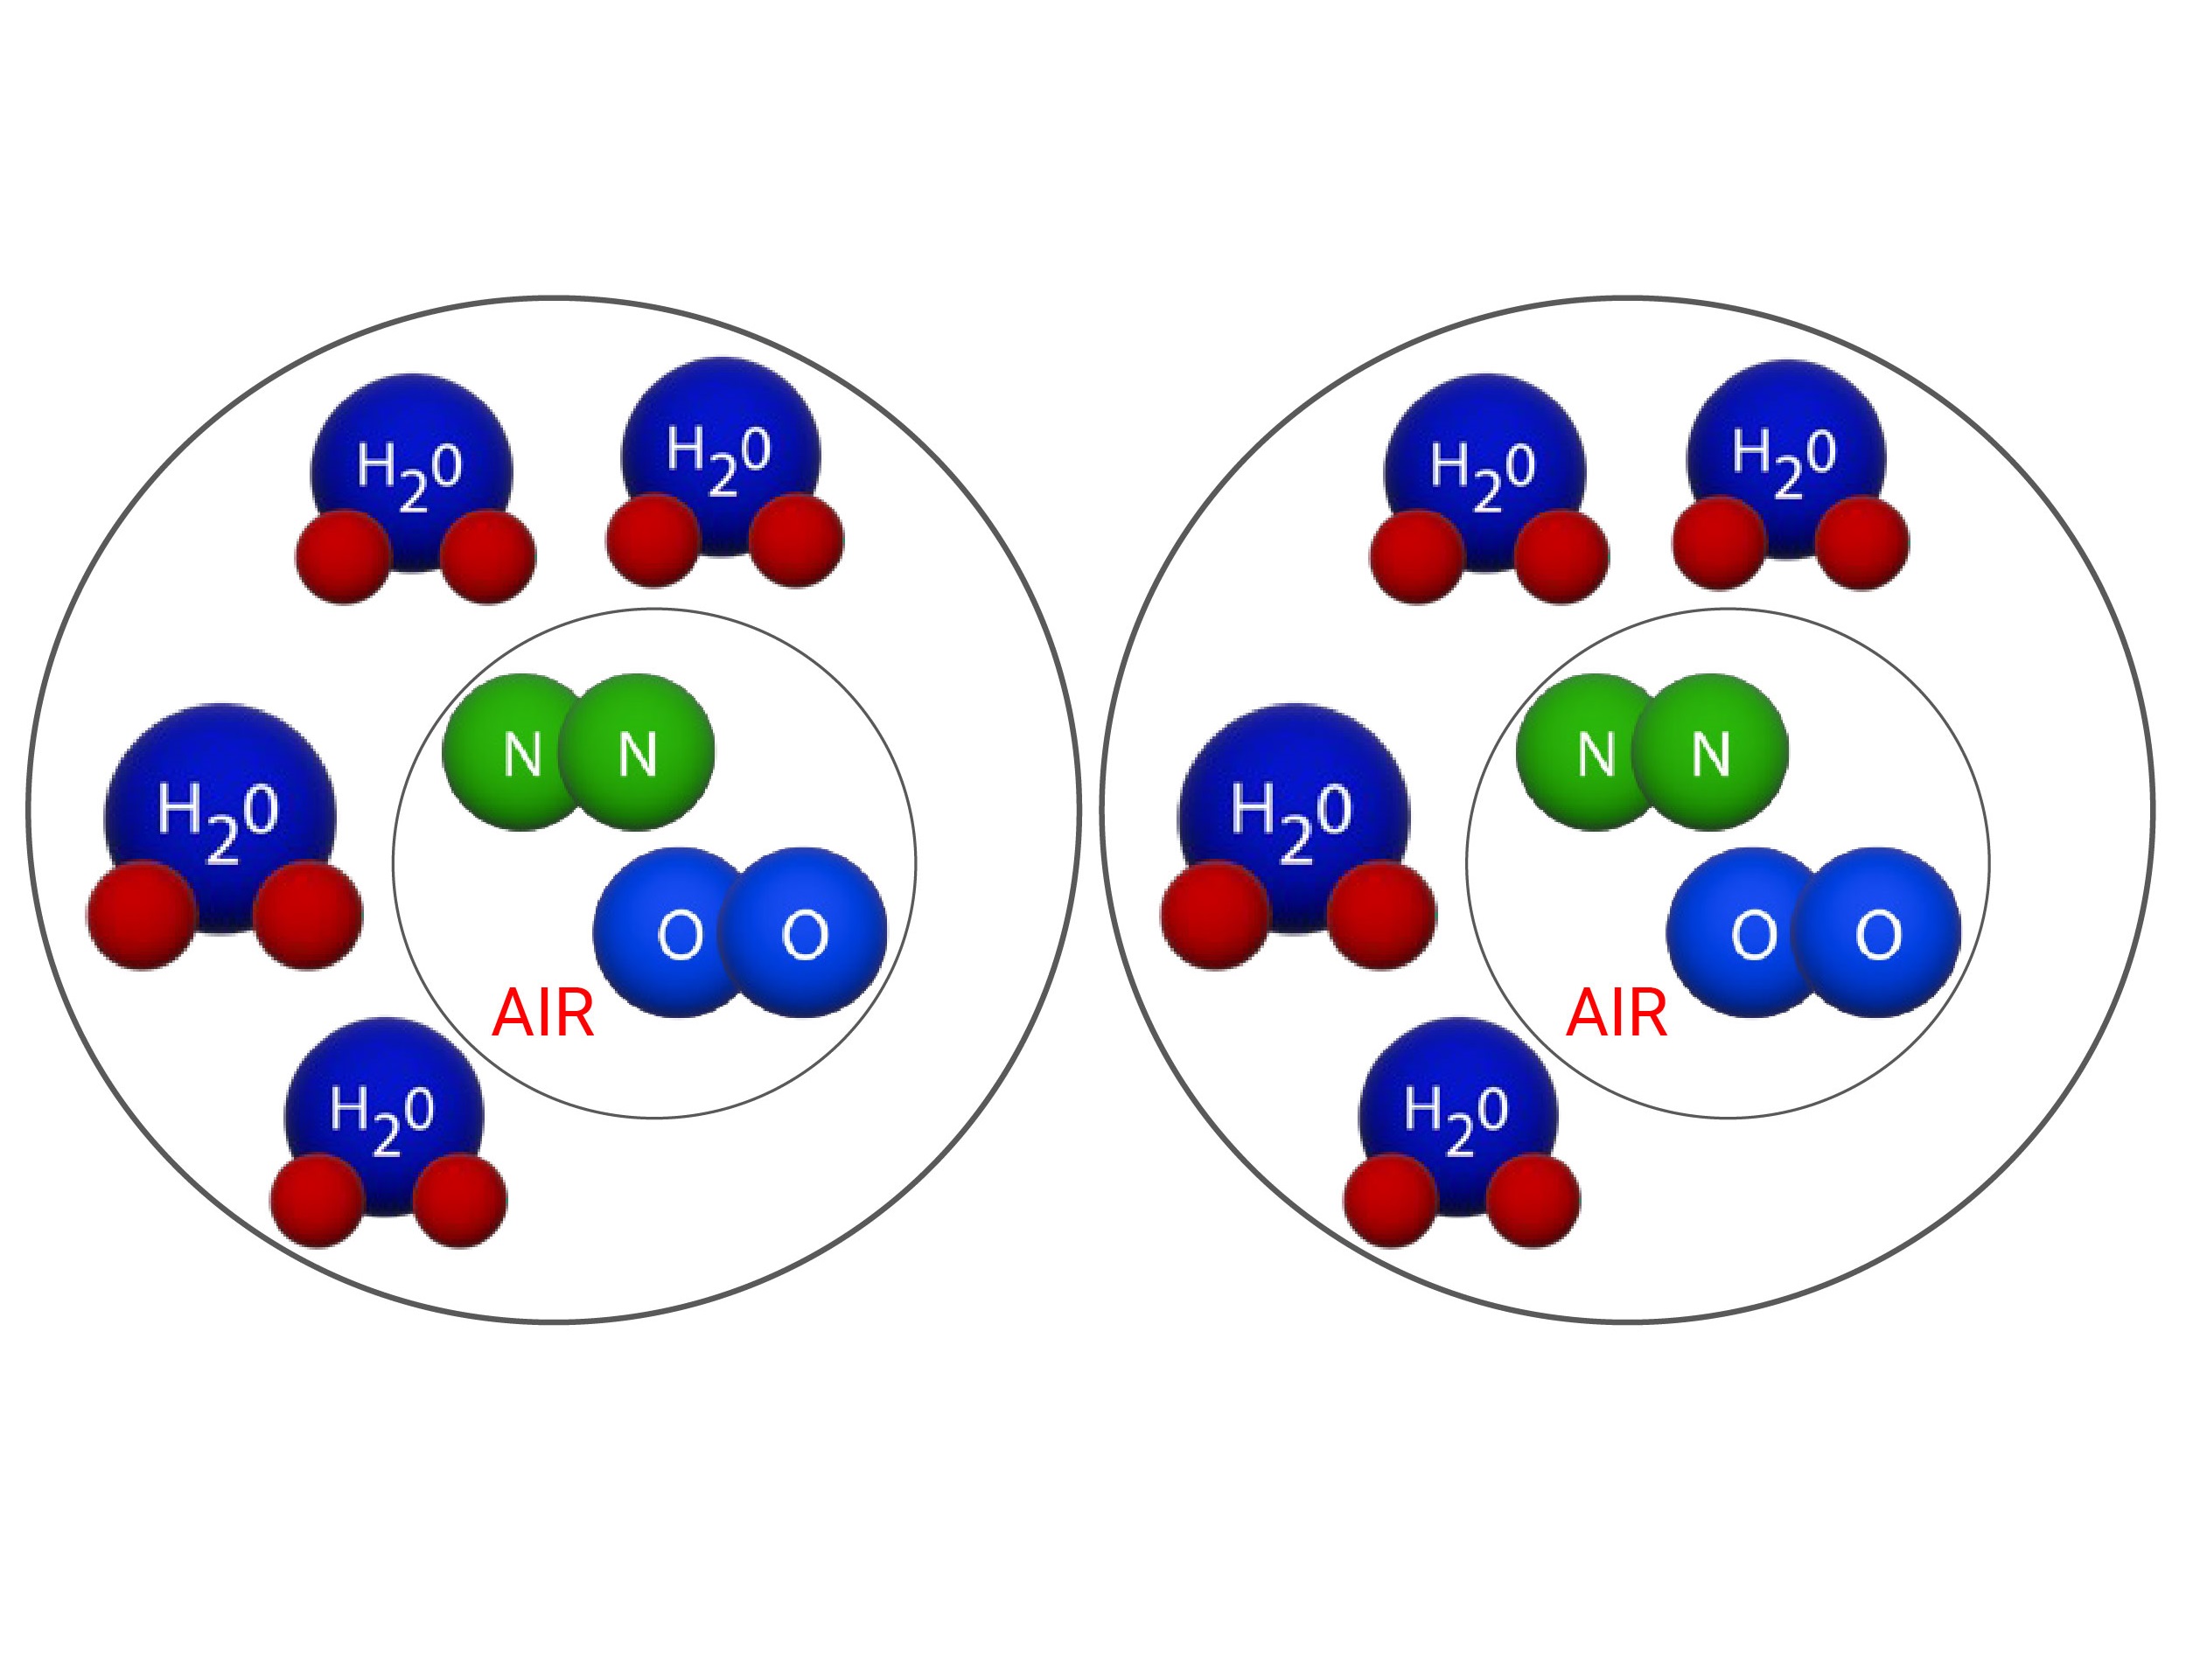
When Air Moves So Does Moisture
|
|
 |
| Water piggybacks on air - when air moves, so does moisture. Air movement accounts for 70-90 percent of moisture vapor transport, making it the primary driver of moisture movement. | 95% more water vapor is transported by air flow. |
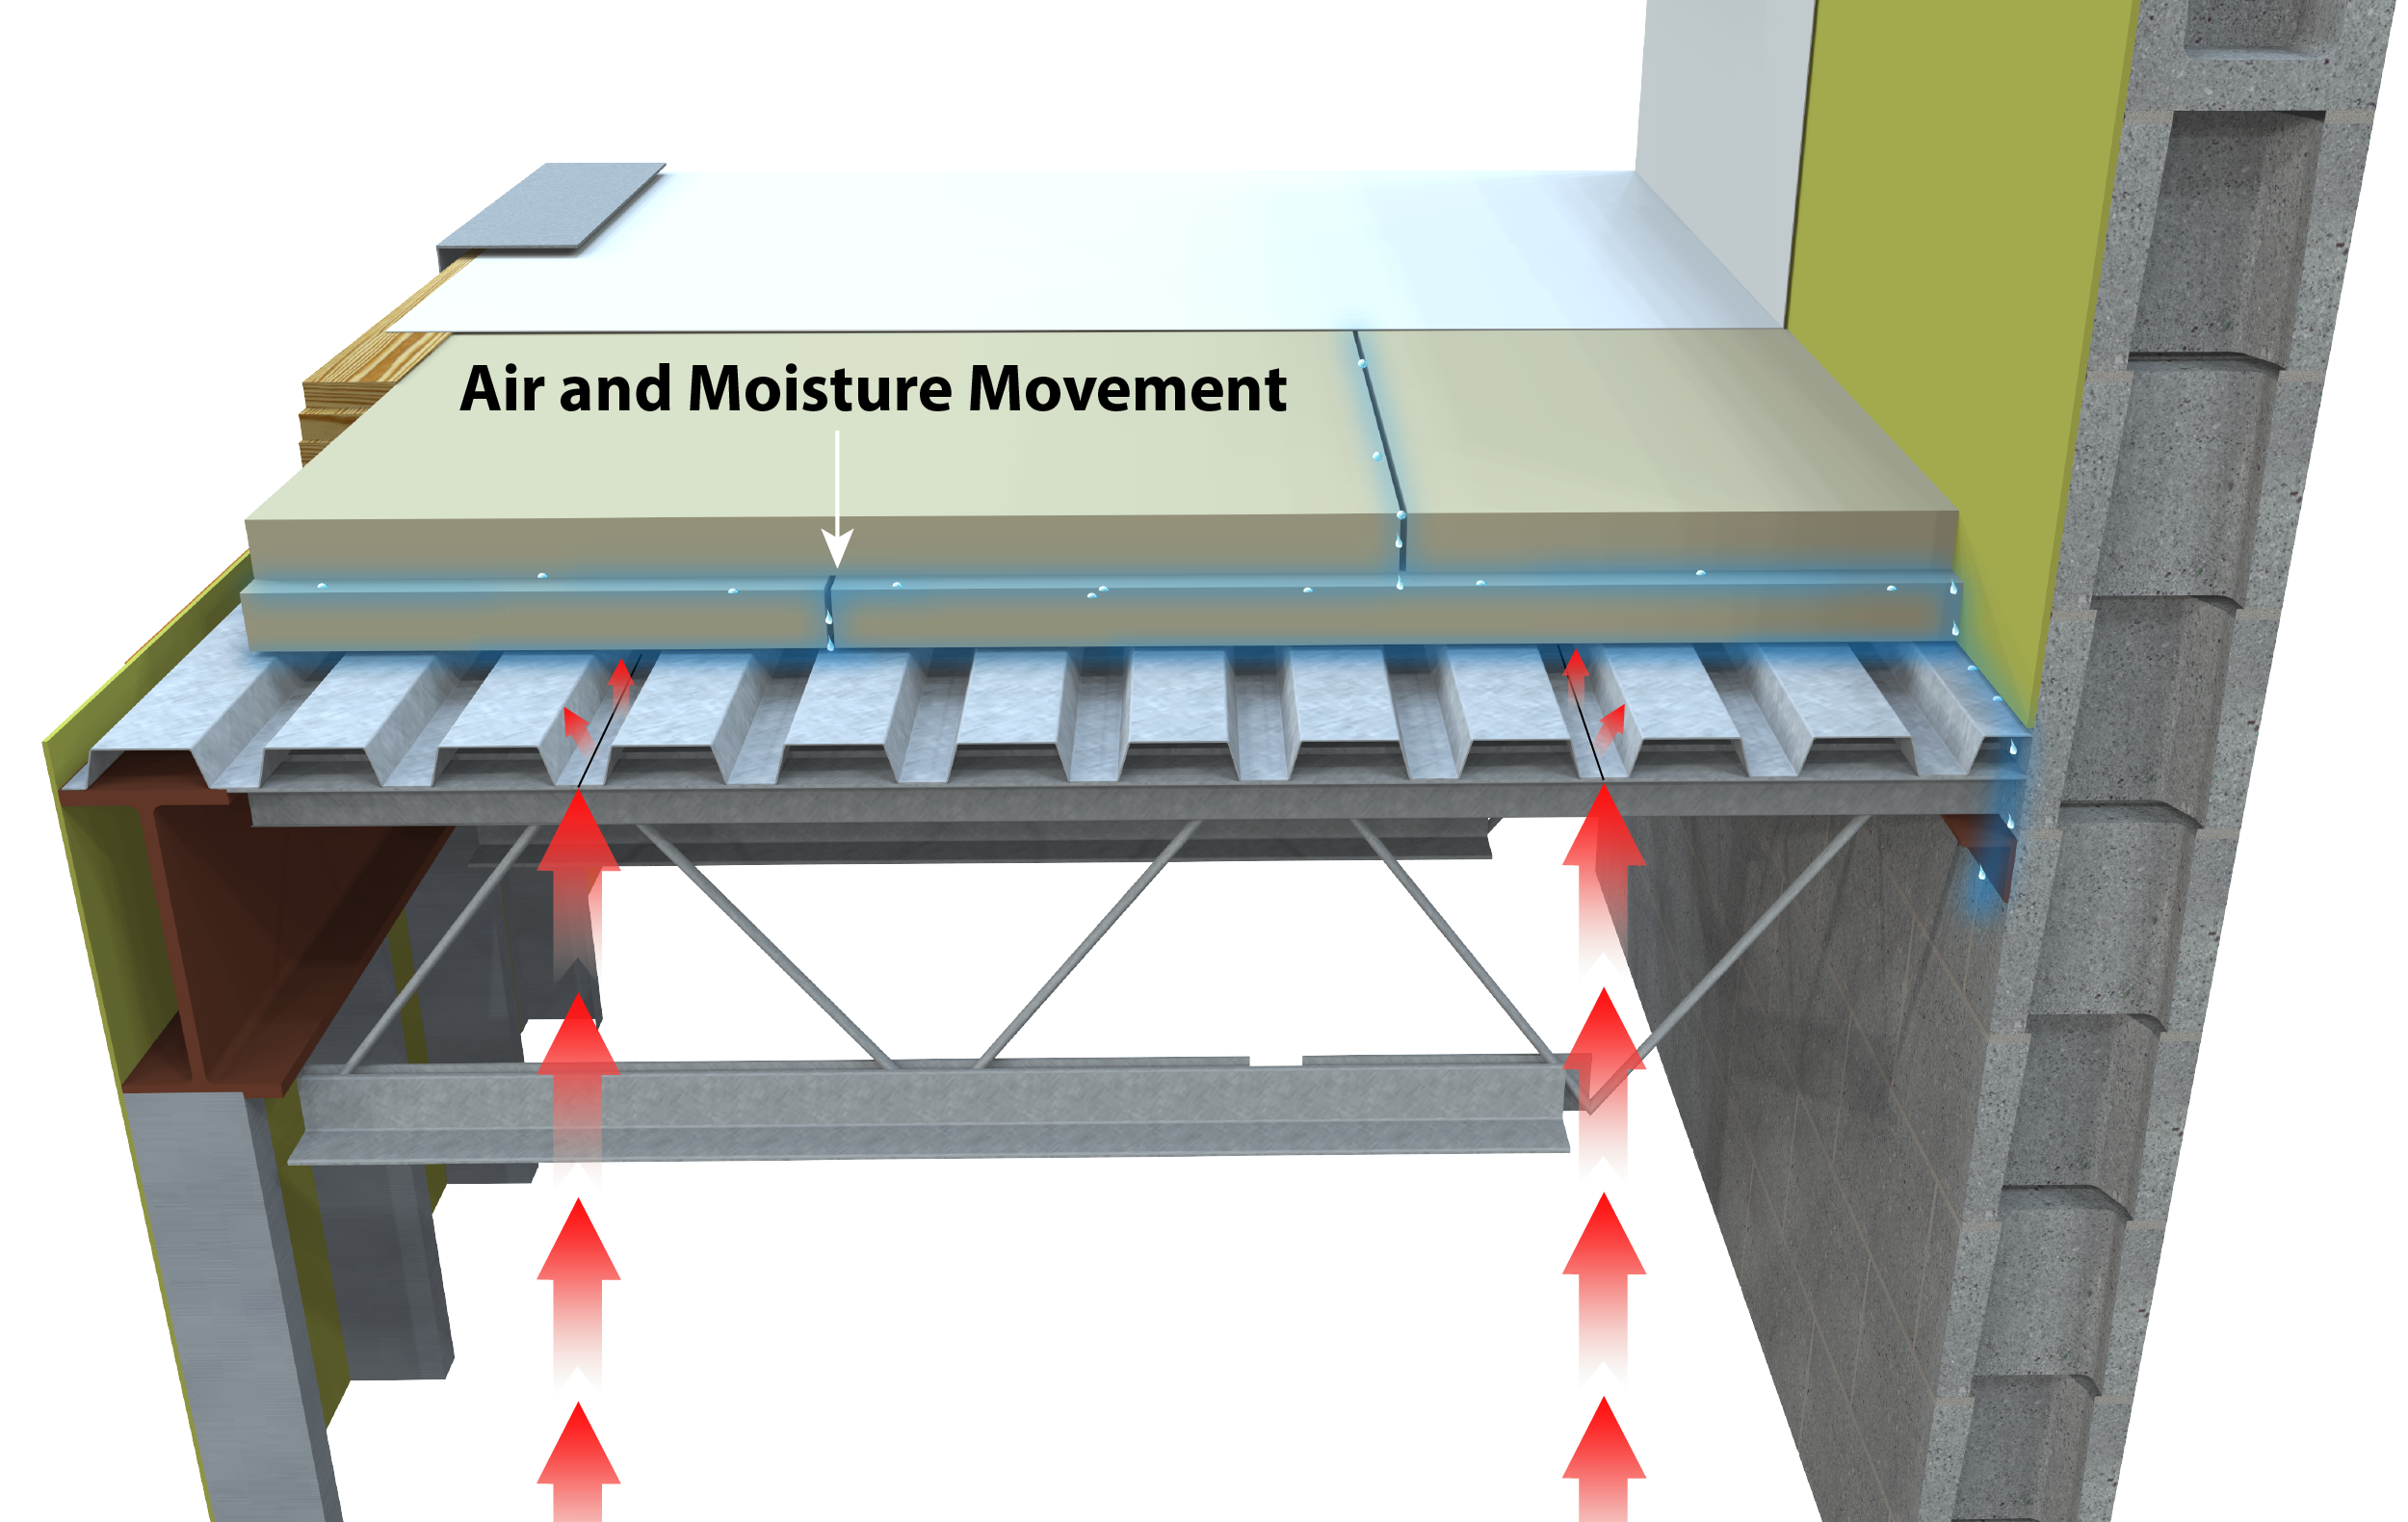
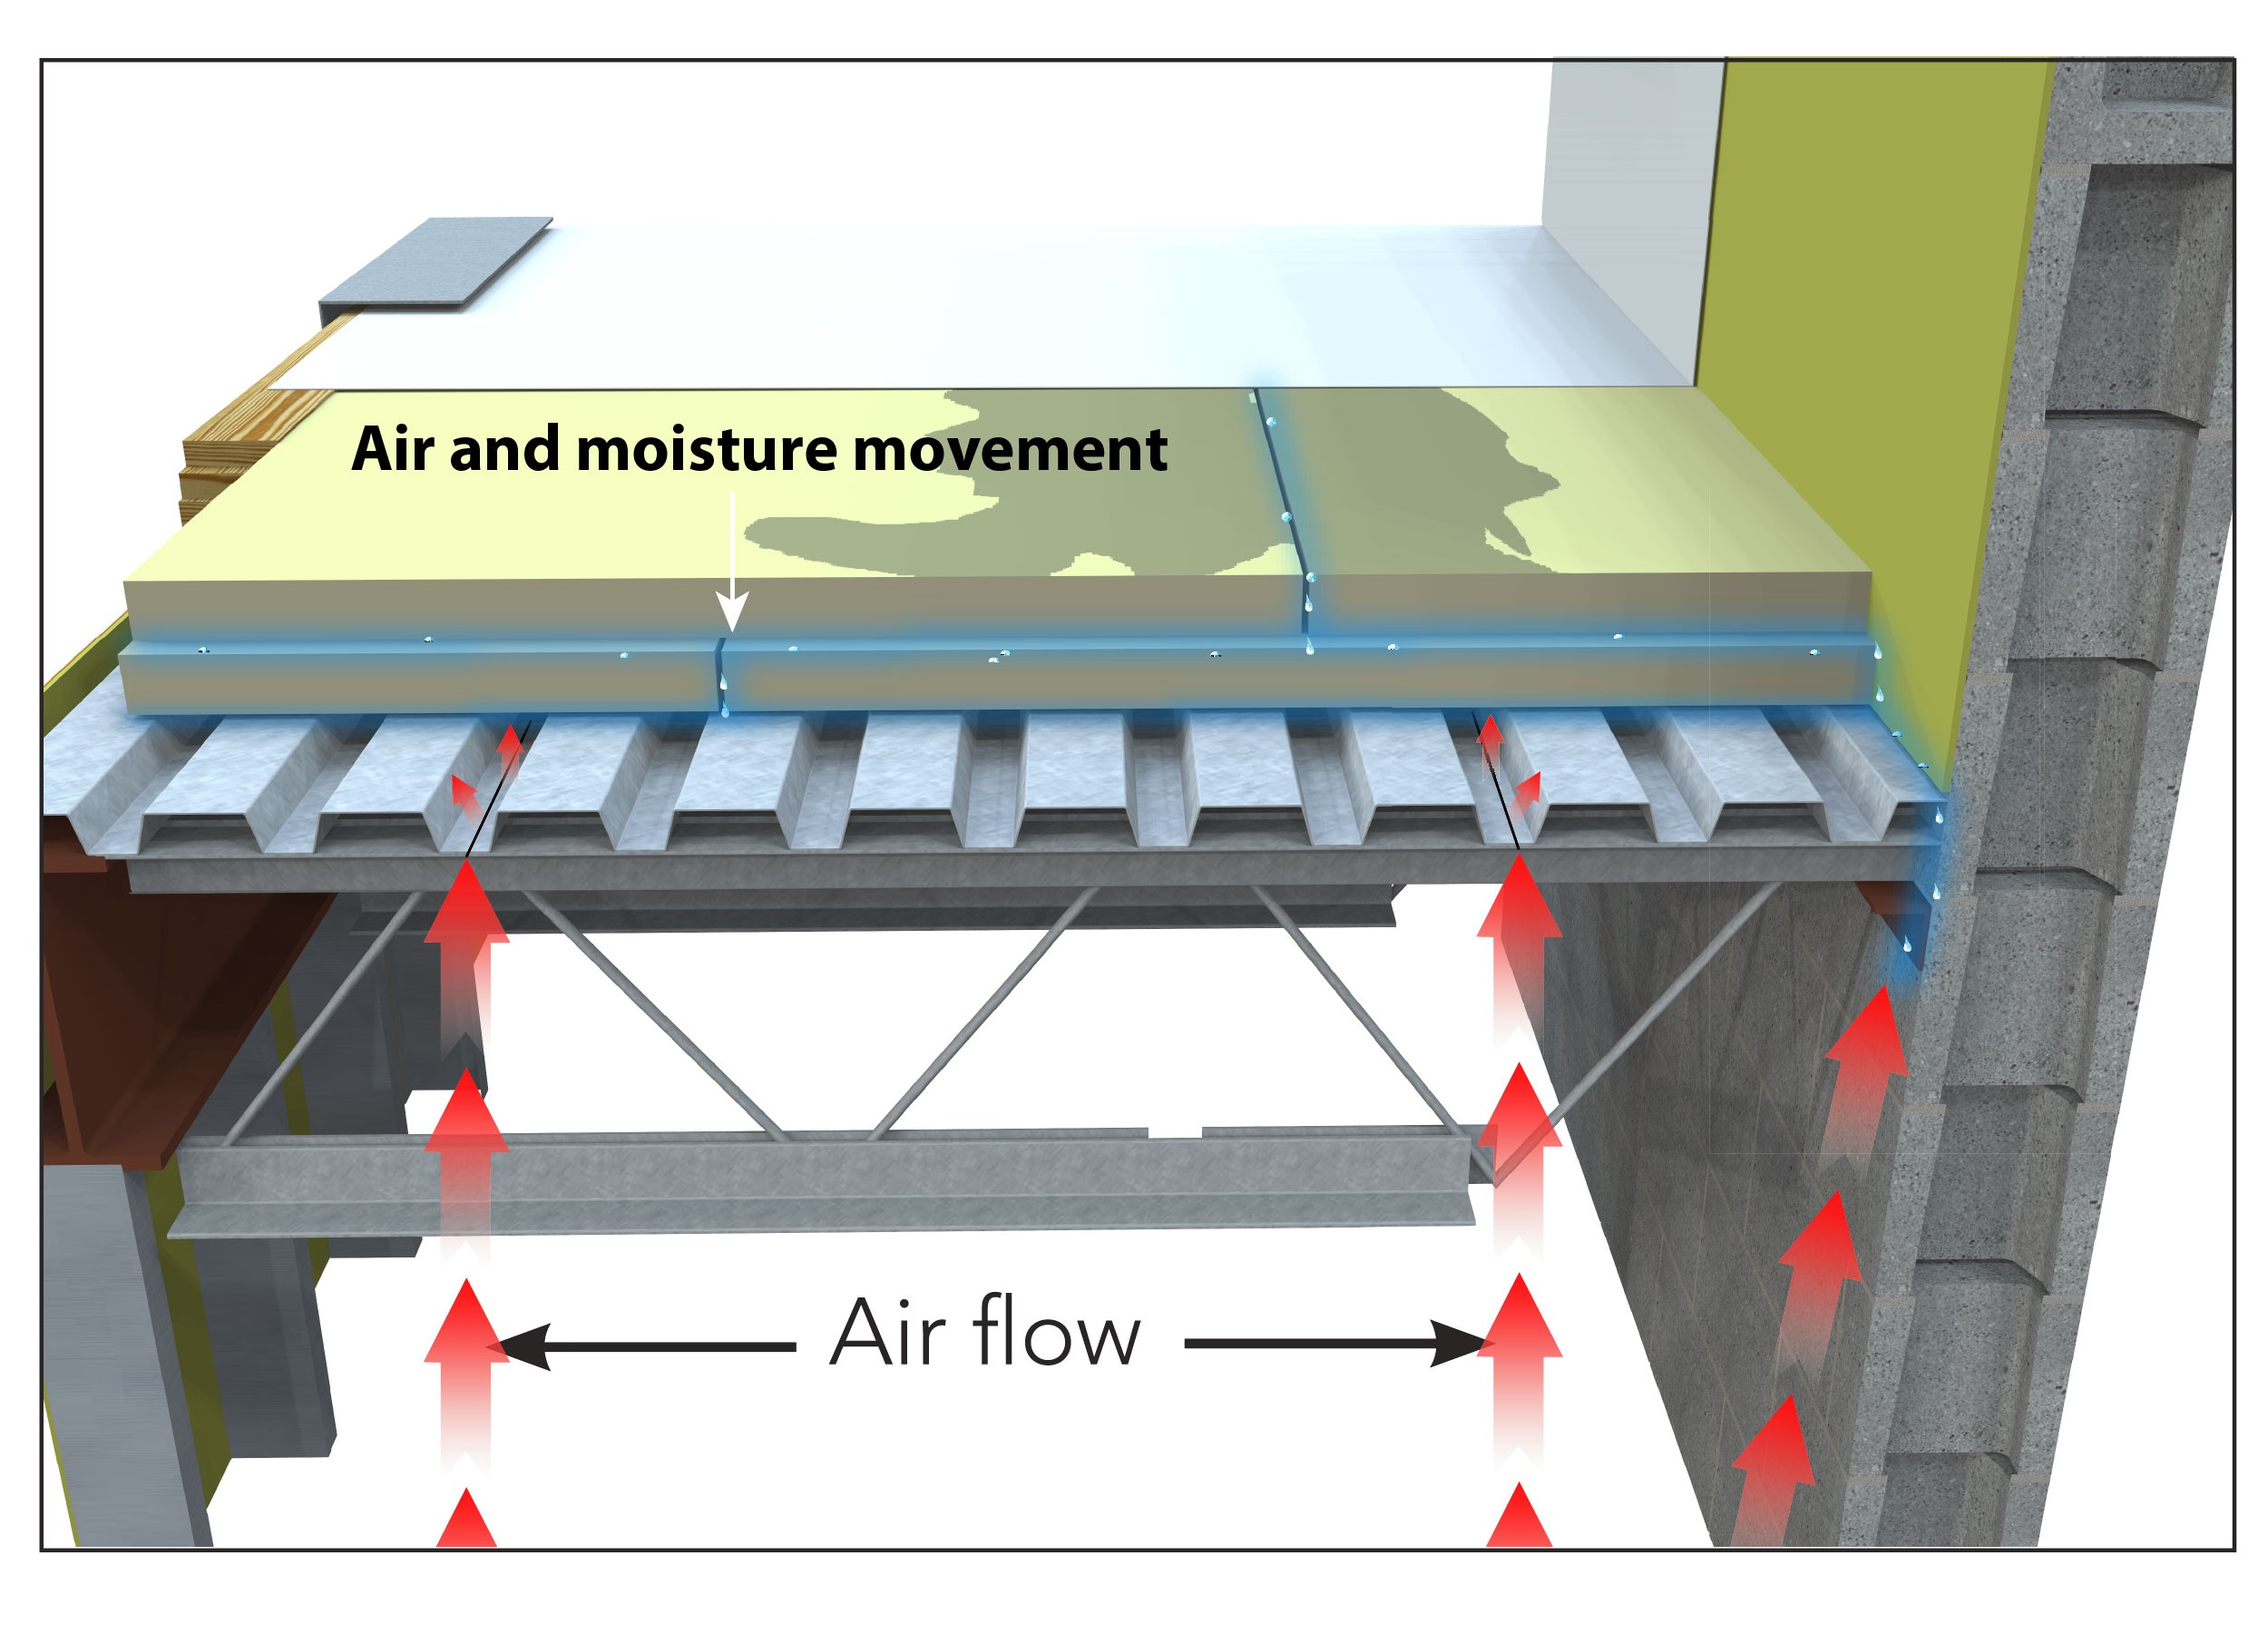
More Gaps = More Moisture Transported into Roof Assembly
 |
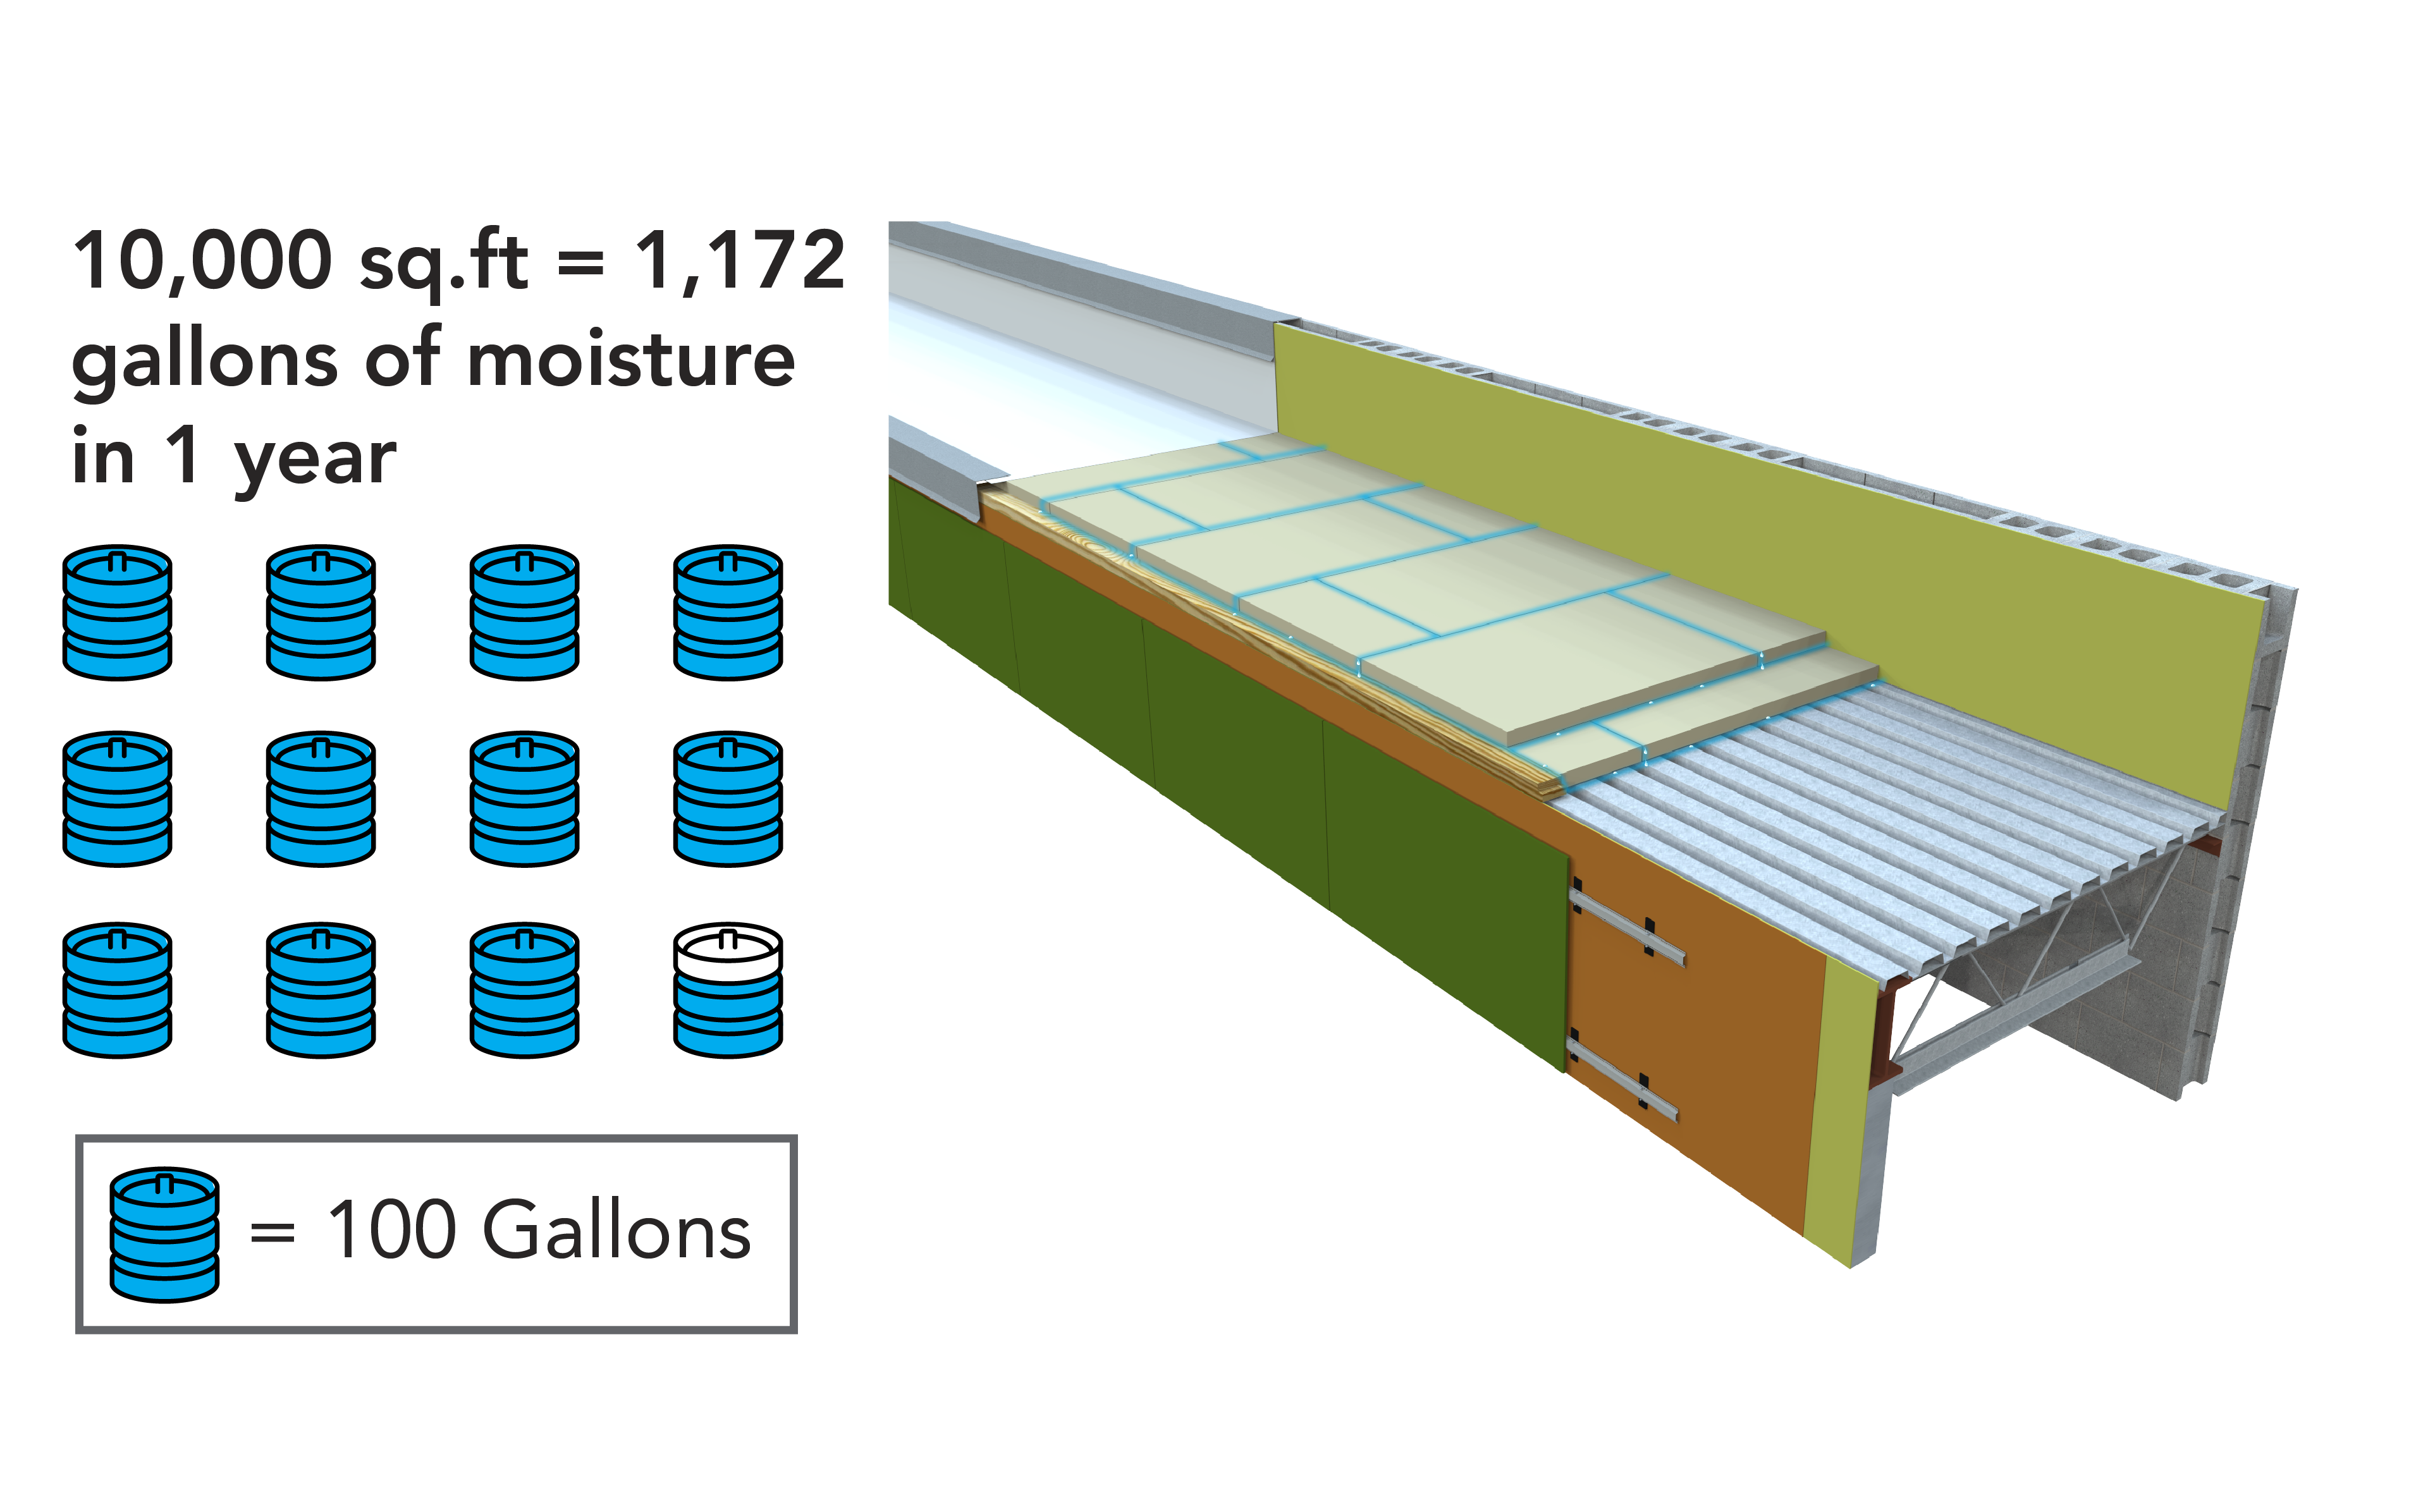 |
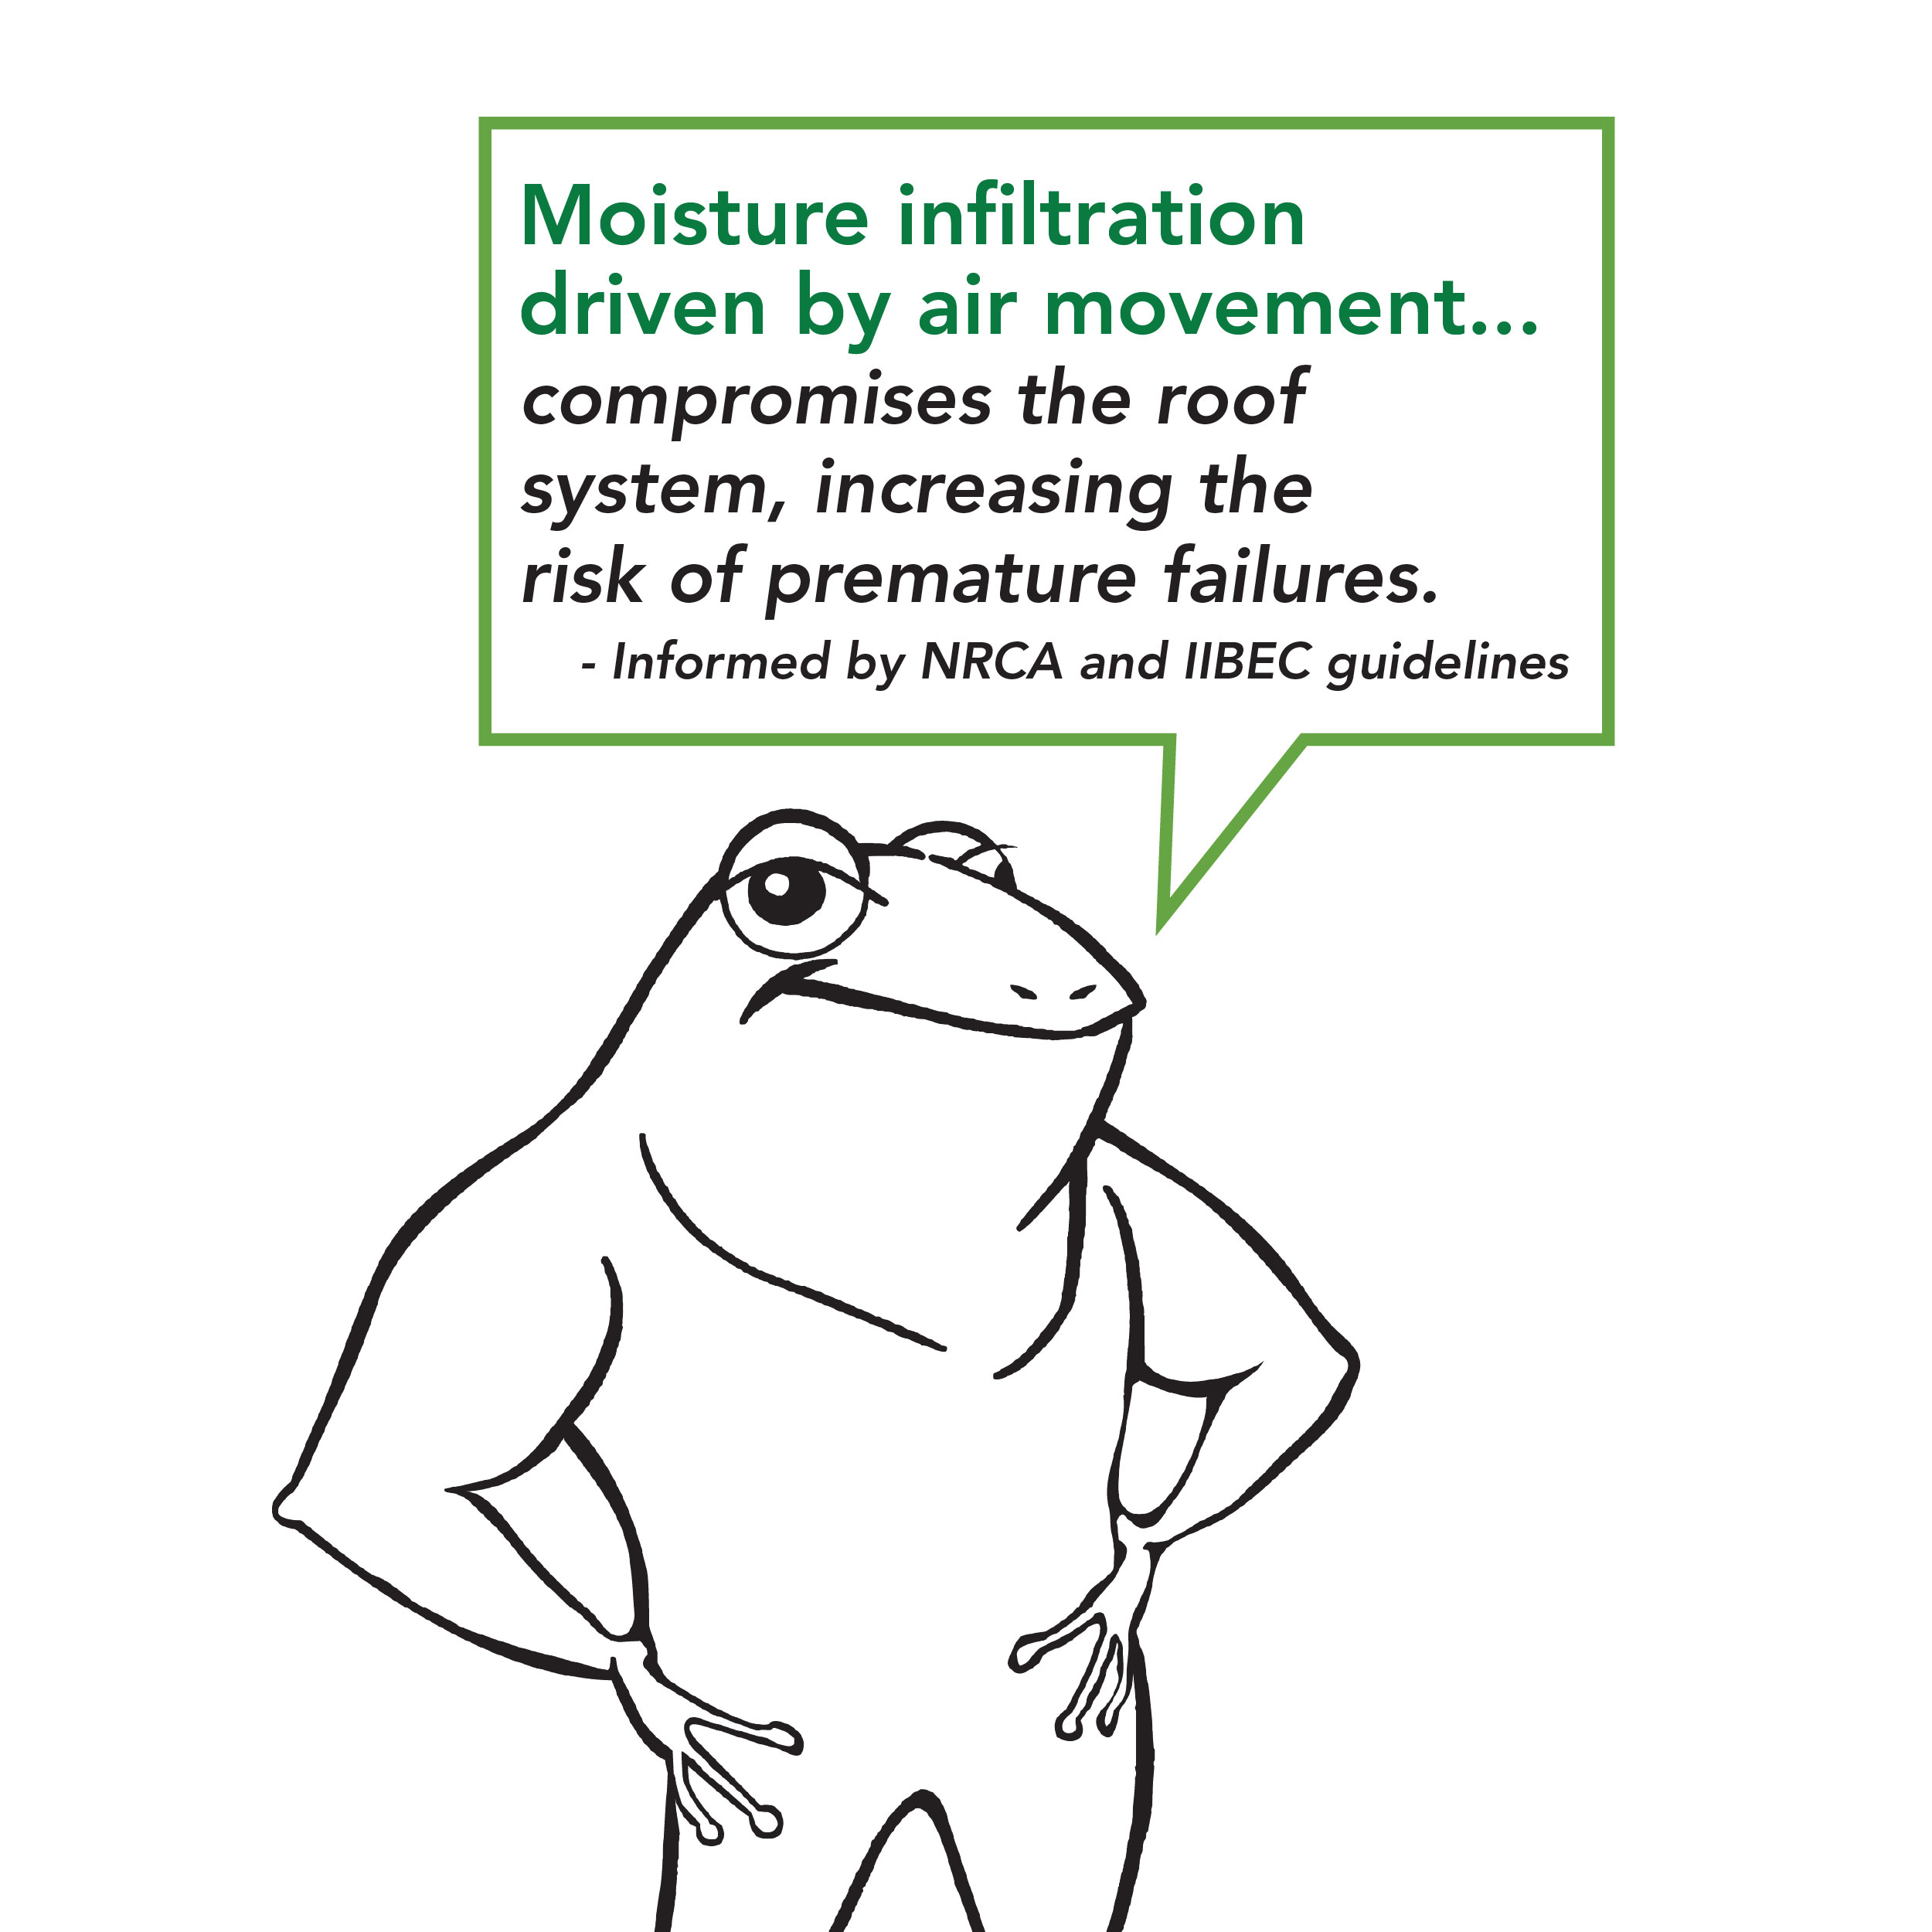
| Using conventional staggered ISO as an air barrier allows significant moisture transfer from interior spaces into the roofing assembly, leading to compromised performance due to water-related issues or damage. | In a 10,000 sq.ft. roof those gaps would allow 1,172 gallons of condensation in the roofing envelope assembly, resulting in damp roofing components, unable to dry out. |
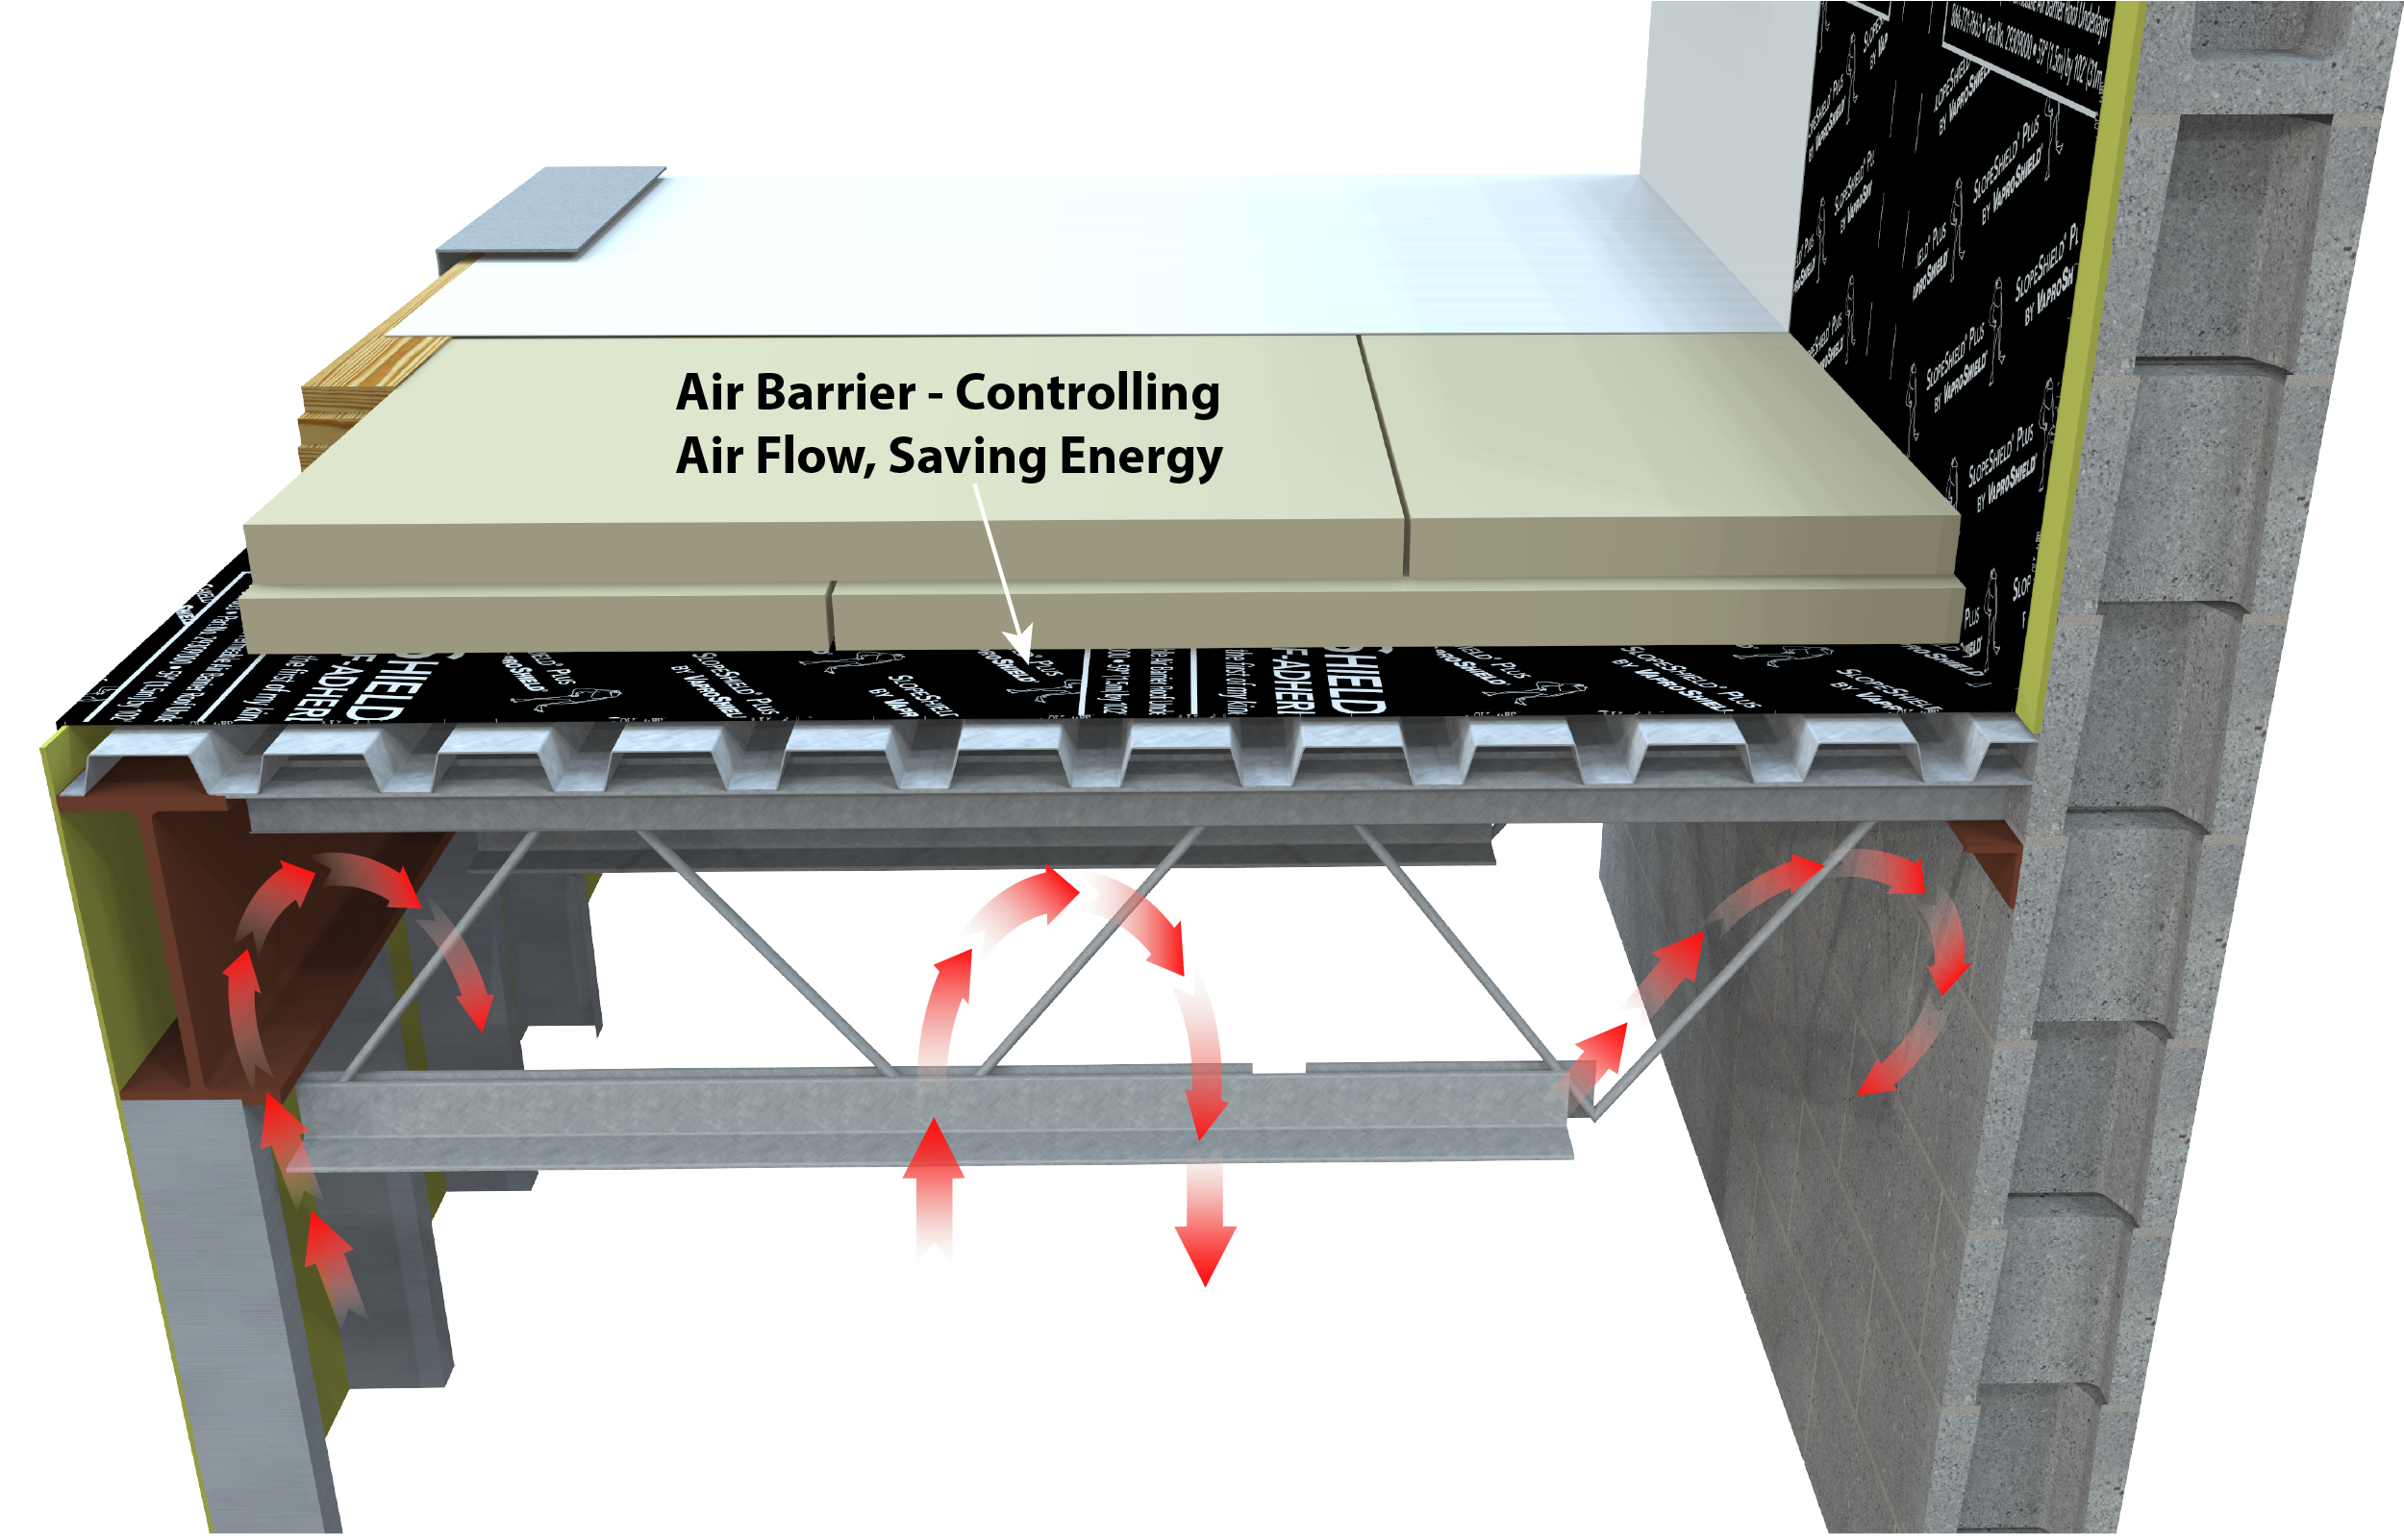
Reduce moisture transfer up to 90 percent
Using SlopeShield Plus SA as Your Continuous Air Barrier Reduces Moisture to Approximately 0.075 Gallons per Year
 |
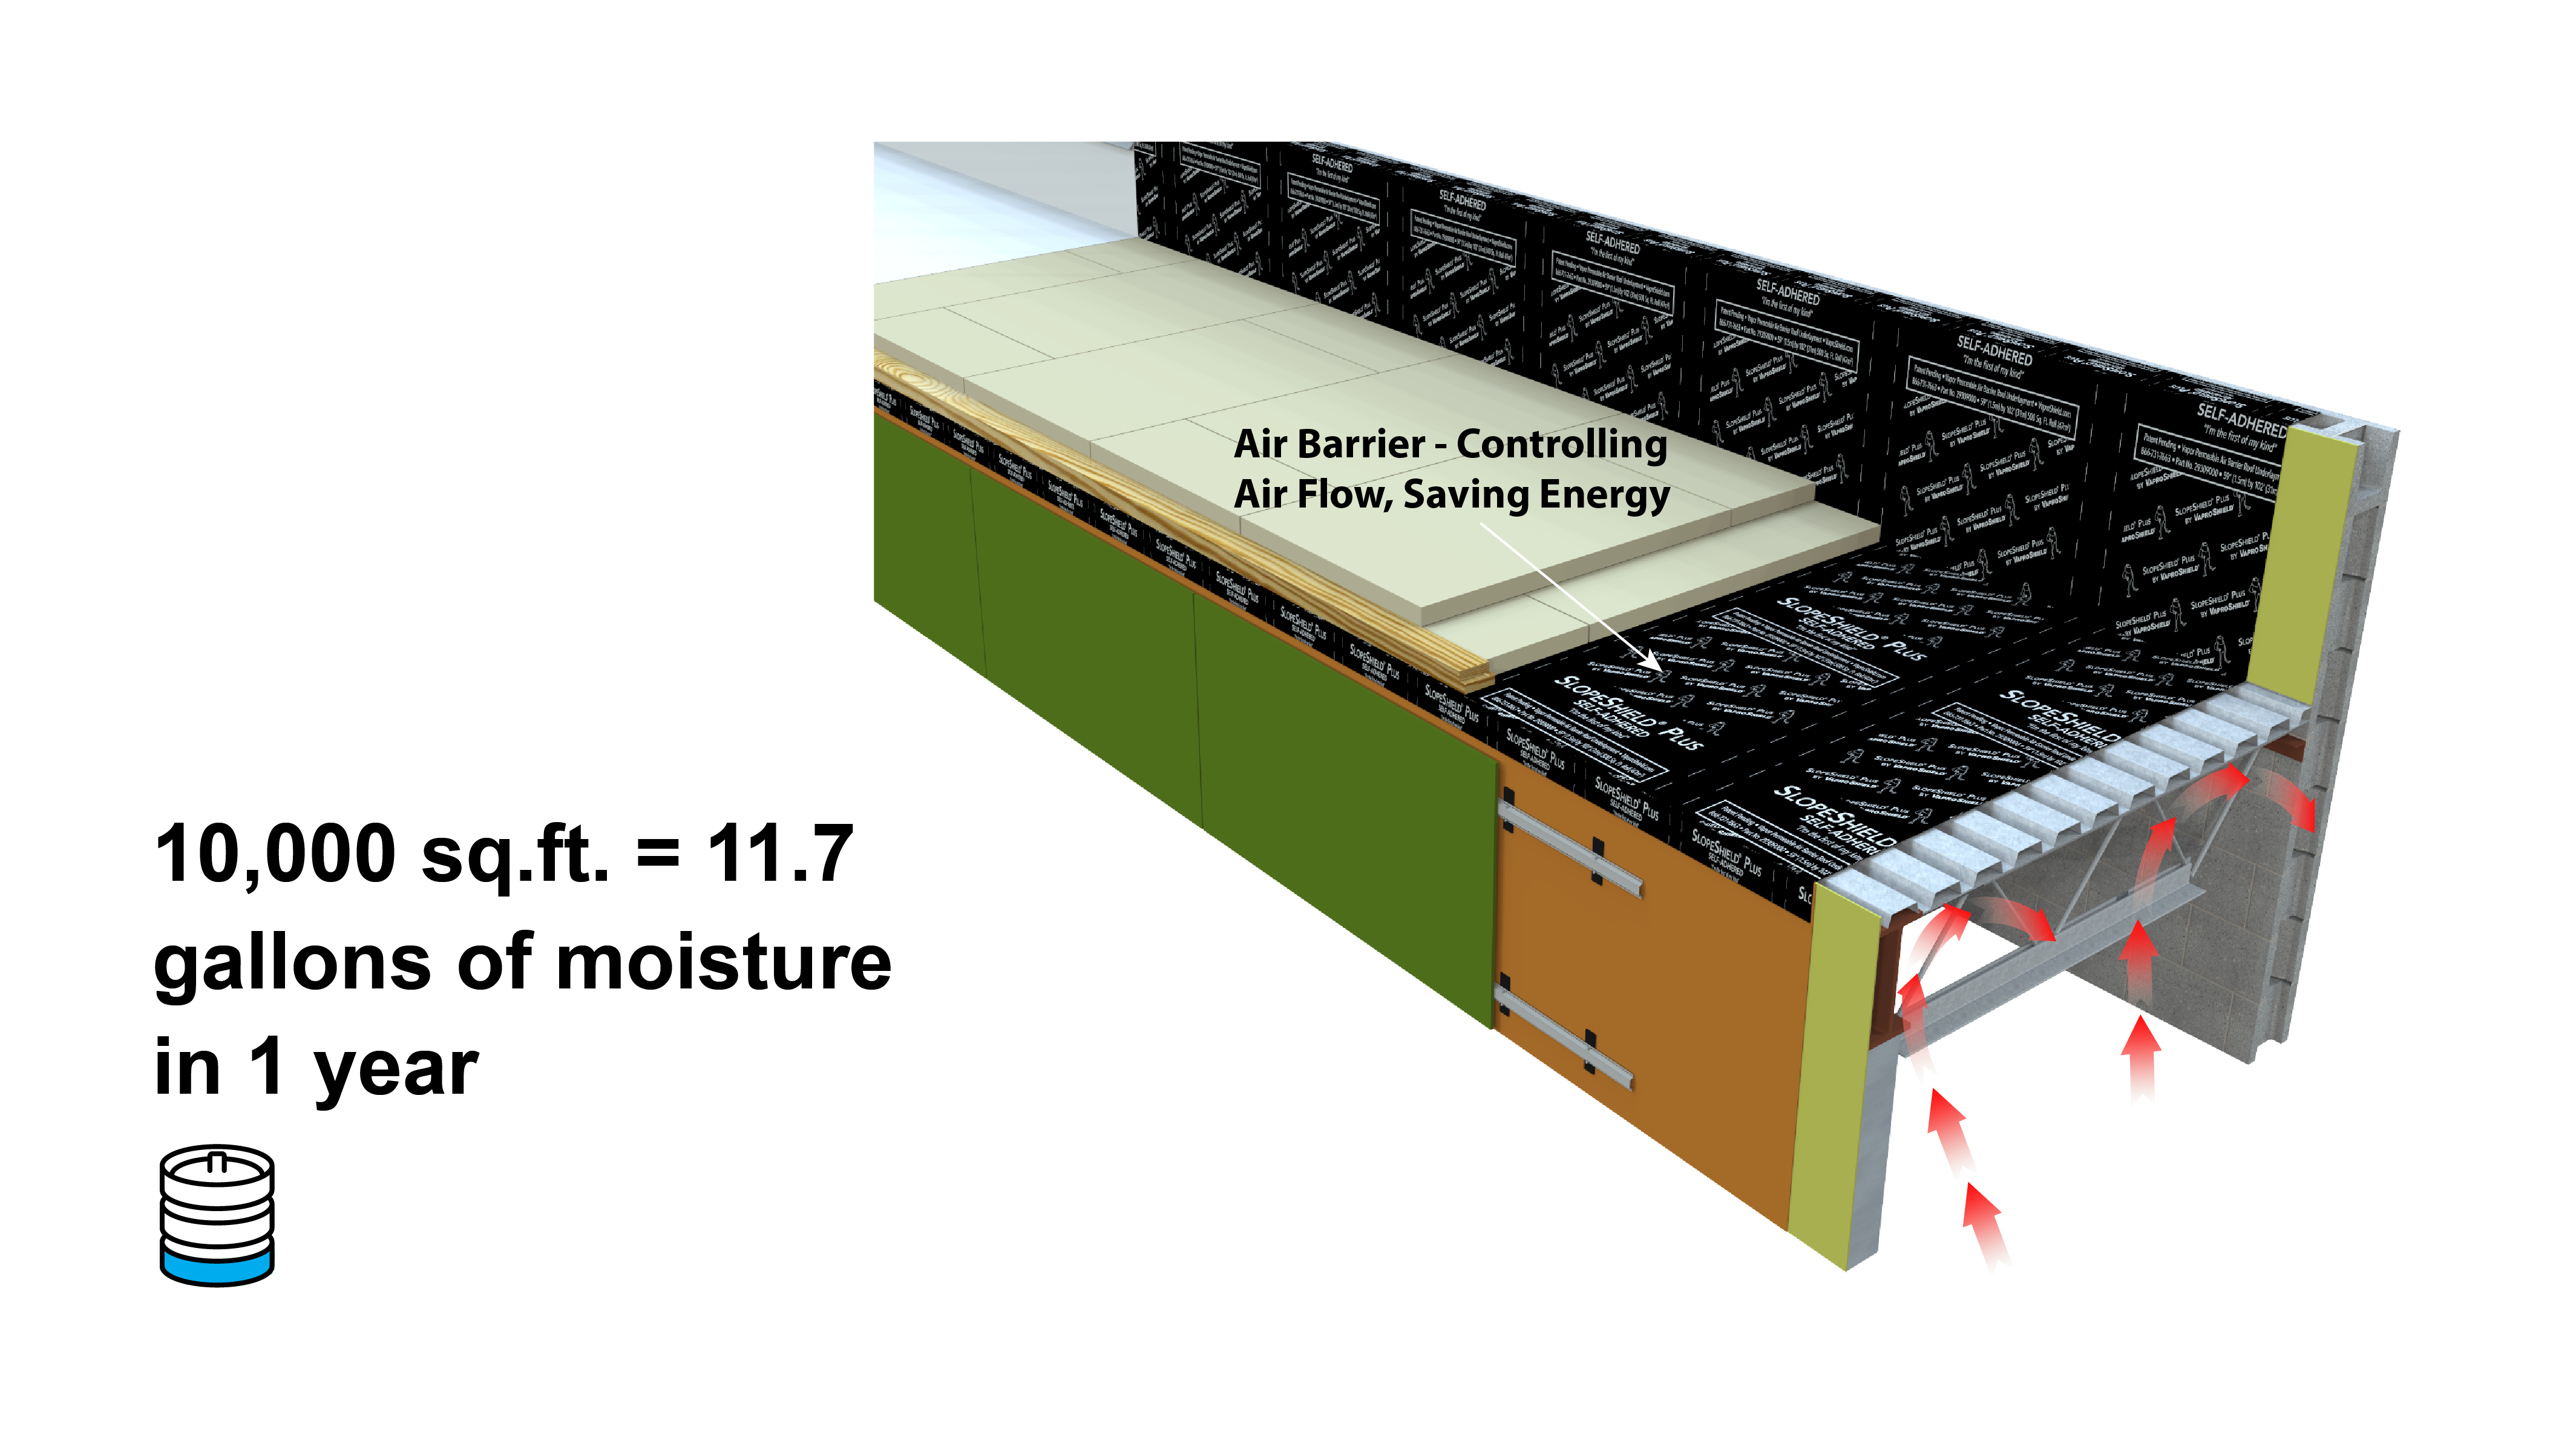 |
| Using SlopeShield Plus SA as a continuous air barrier and vapor retarder, you can achieve long-lasting roof integrity by reducing air and moisture infiltration by over 90%. | With a 10,000 sq.ft. roof, the HVAC system quickly absorbs the minimal moisture, preventing it from remaining in the roofing envelope assembly. |
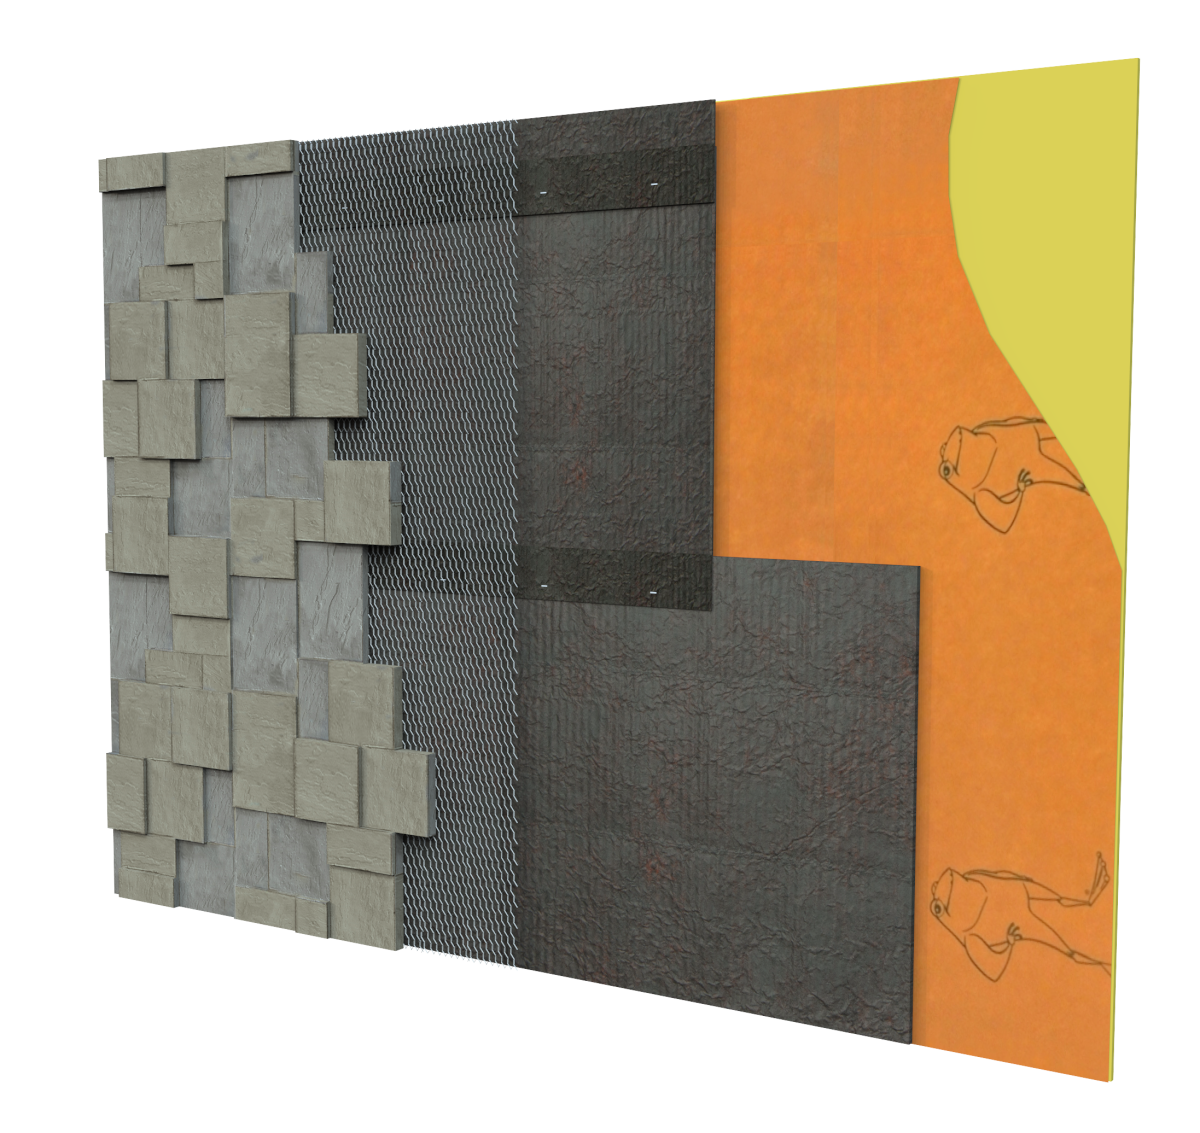
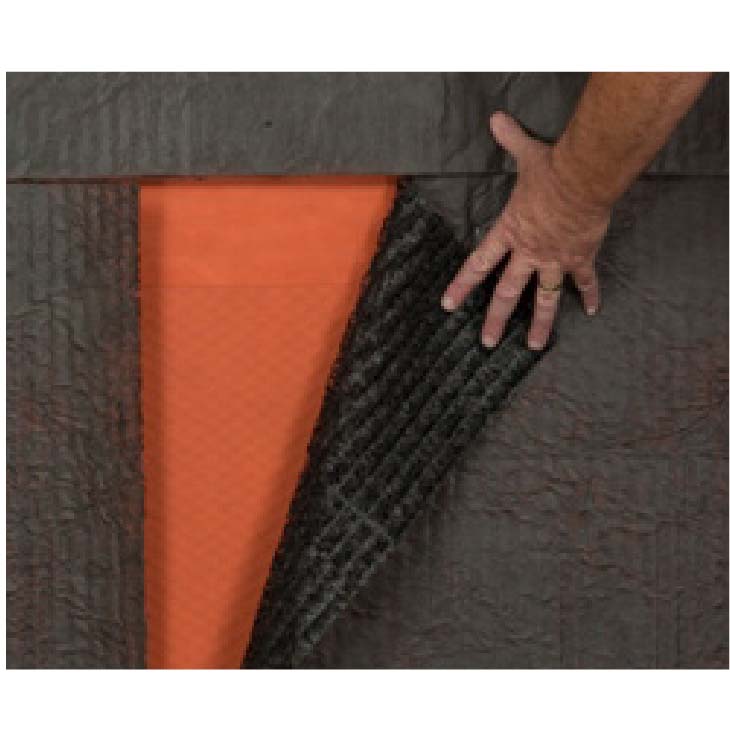
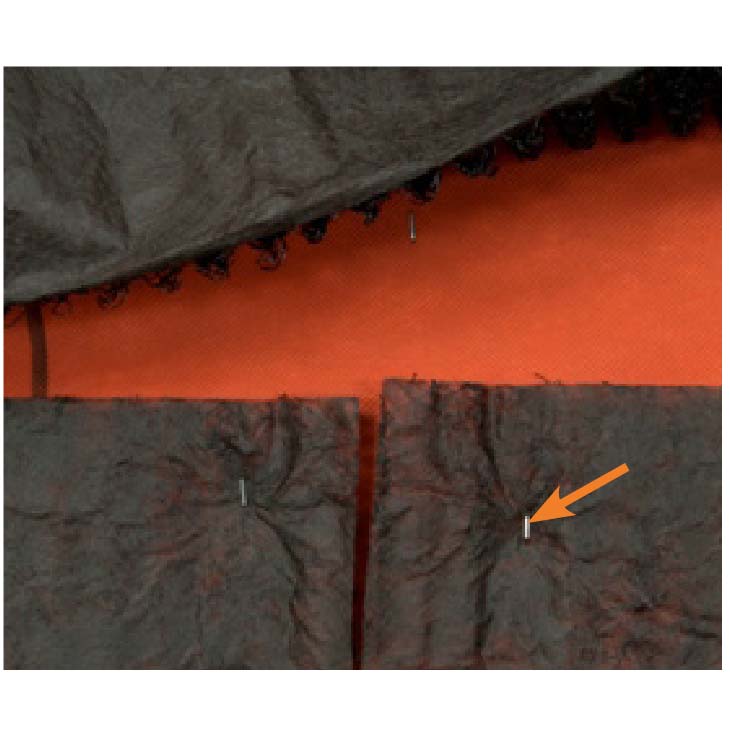
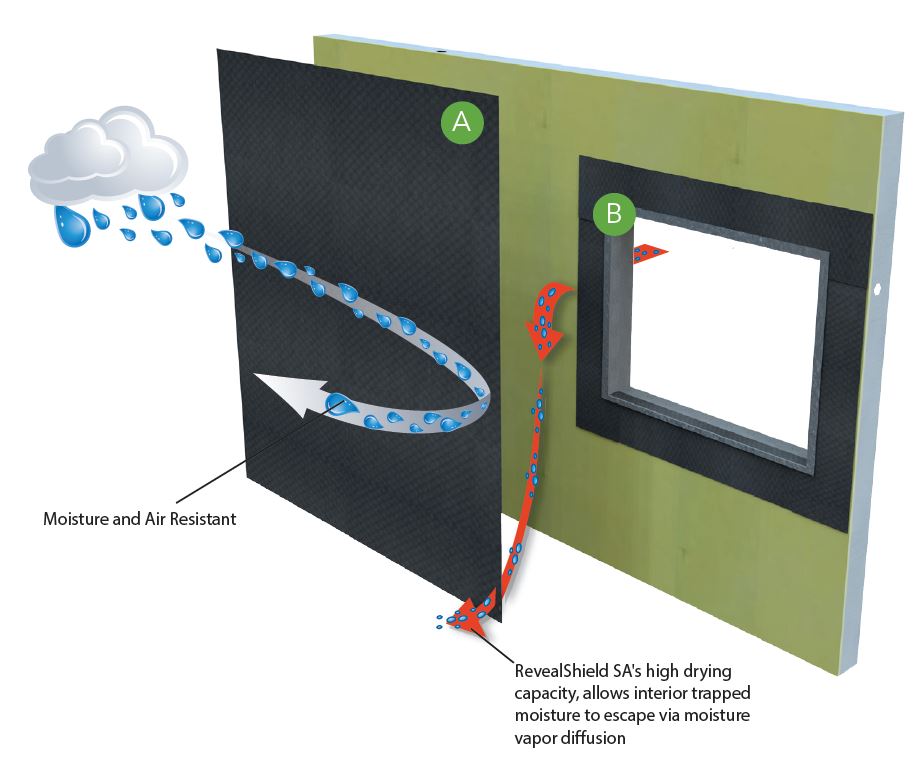
The SlopeShield Plus SA Difference
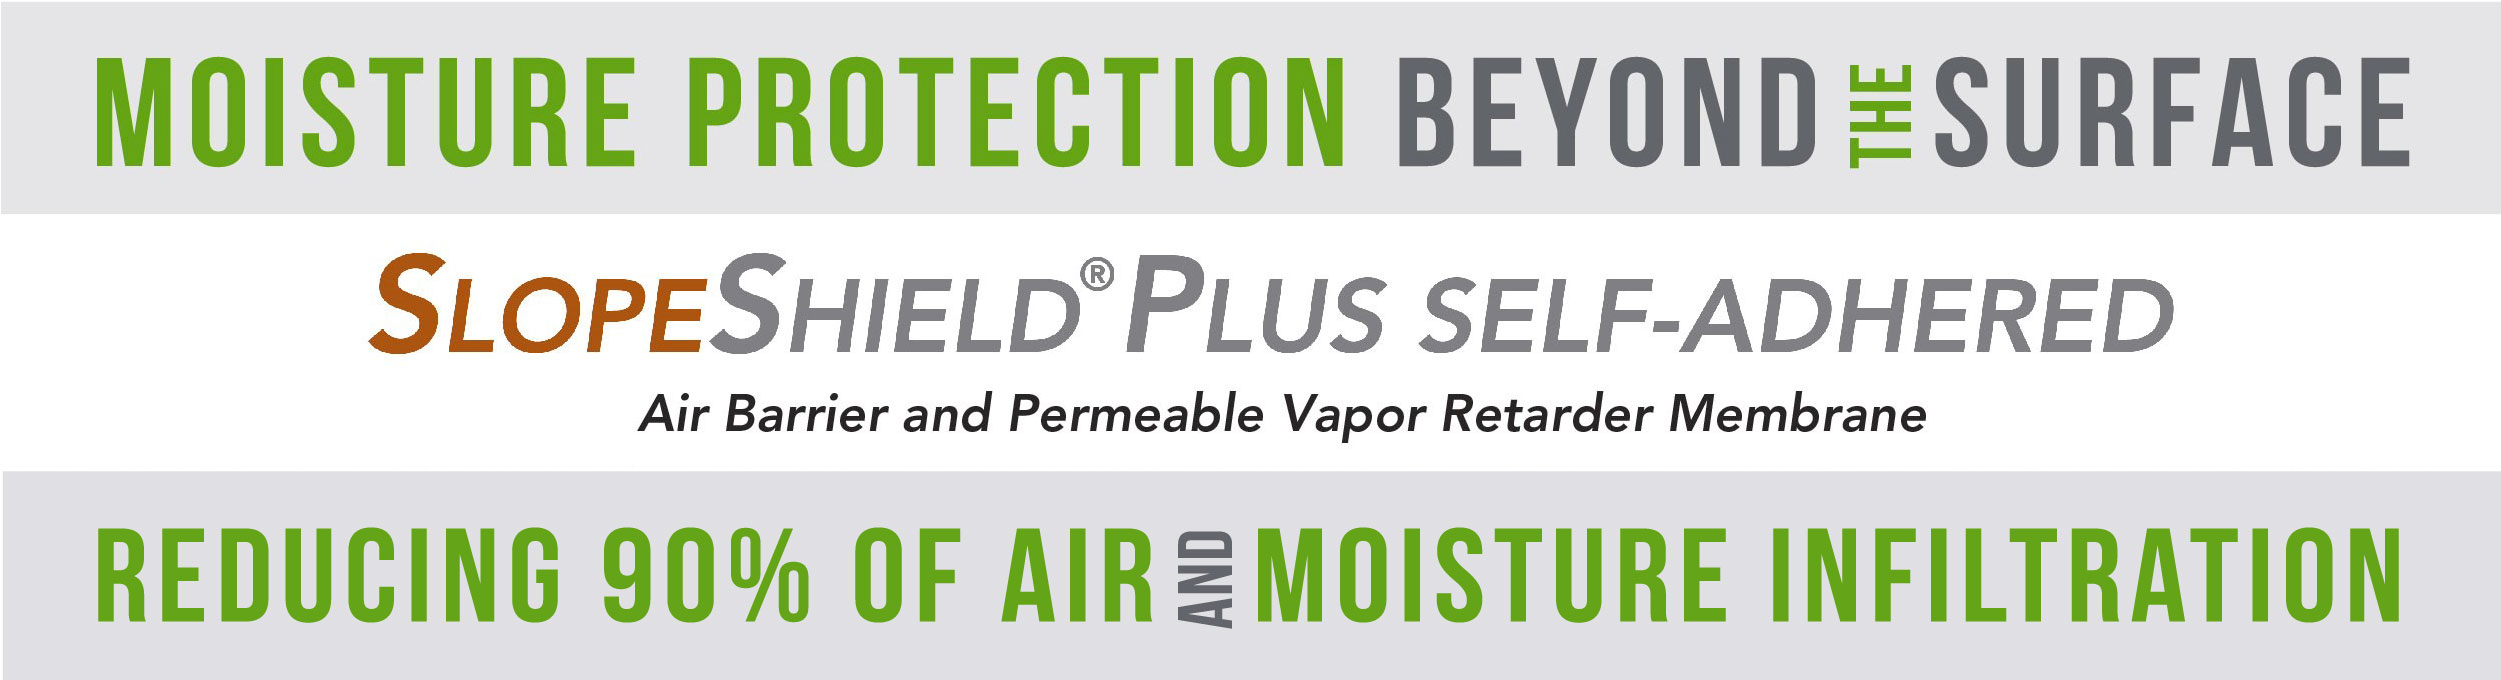
Moisture Protection Beyond the Surface
|
SlopeShield Plus SA functions as a continuous air barrier and permeable vapor retarder membrane:
|
 |
Learn More About SlopeShield Plus SA for Your Application
Specify SlopeShield Plus SA in DIV 07 as Your Preferred Code-Compliant Continuous Air Barrier
 |
 |
 |
 |
|
|

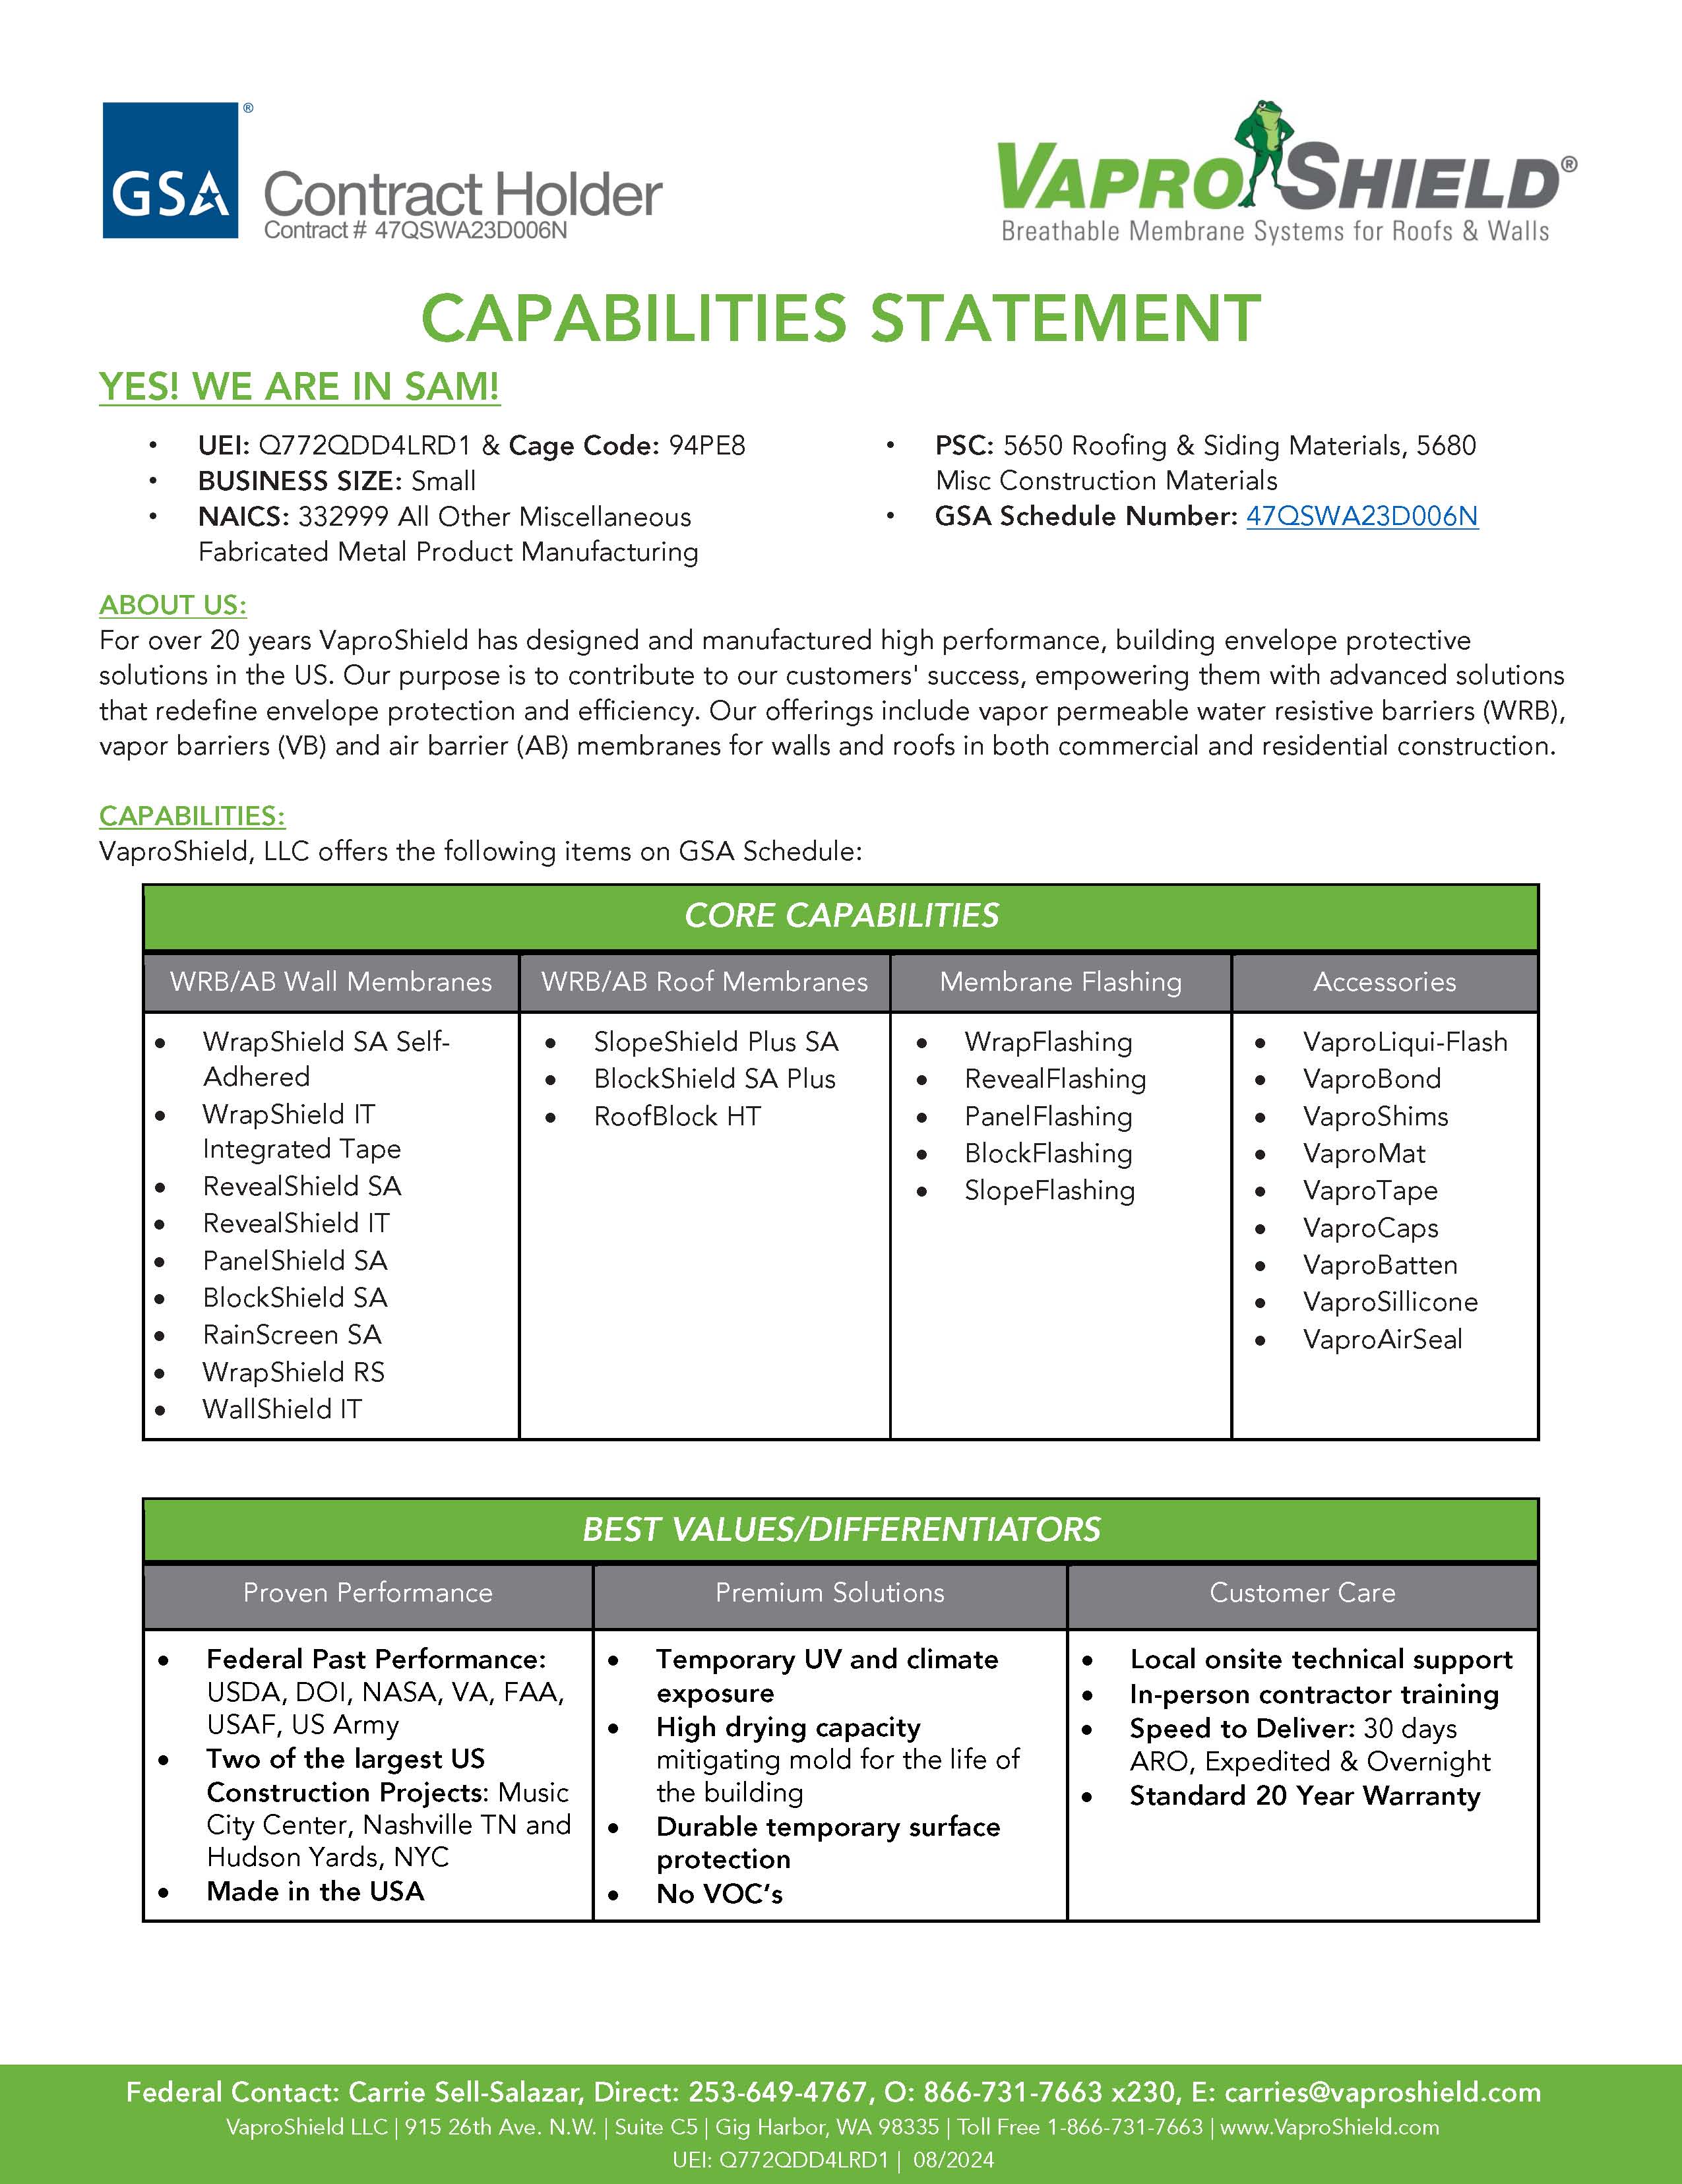
Yes! We are in Sam!
| UEI: Q772QDD4LRD1 & Cage Code: 94PE8 | NAICS: 332999 All Other Miscellaneous Fabricated Metal Product Manufacturing |
| BUSINESS SIZE: Small | PSC: 5650 Roofing & Siding Materials, 5680Misc Construction Materials |
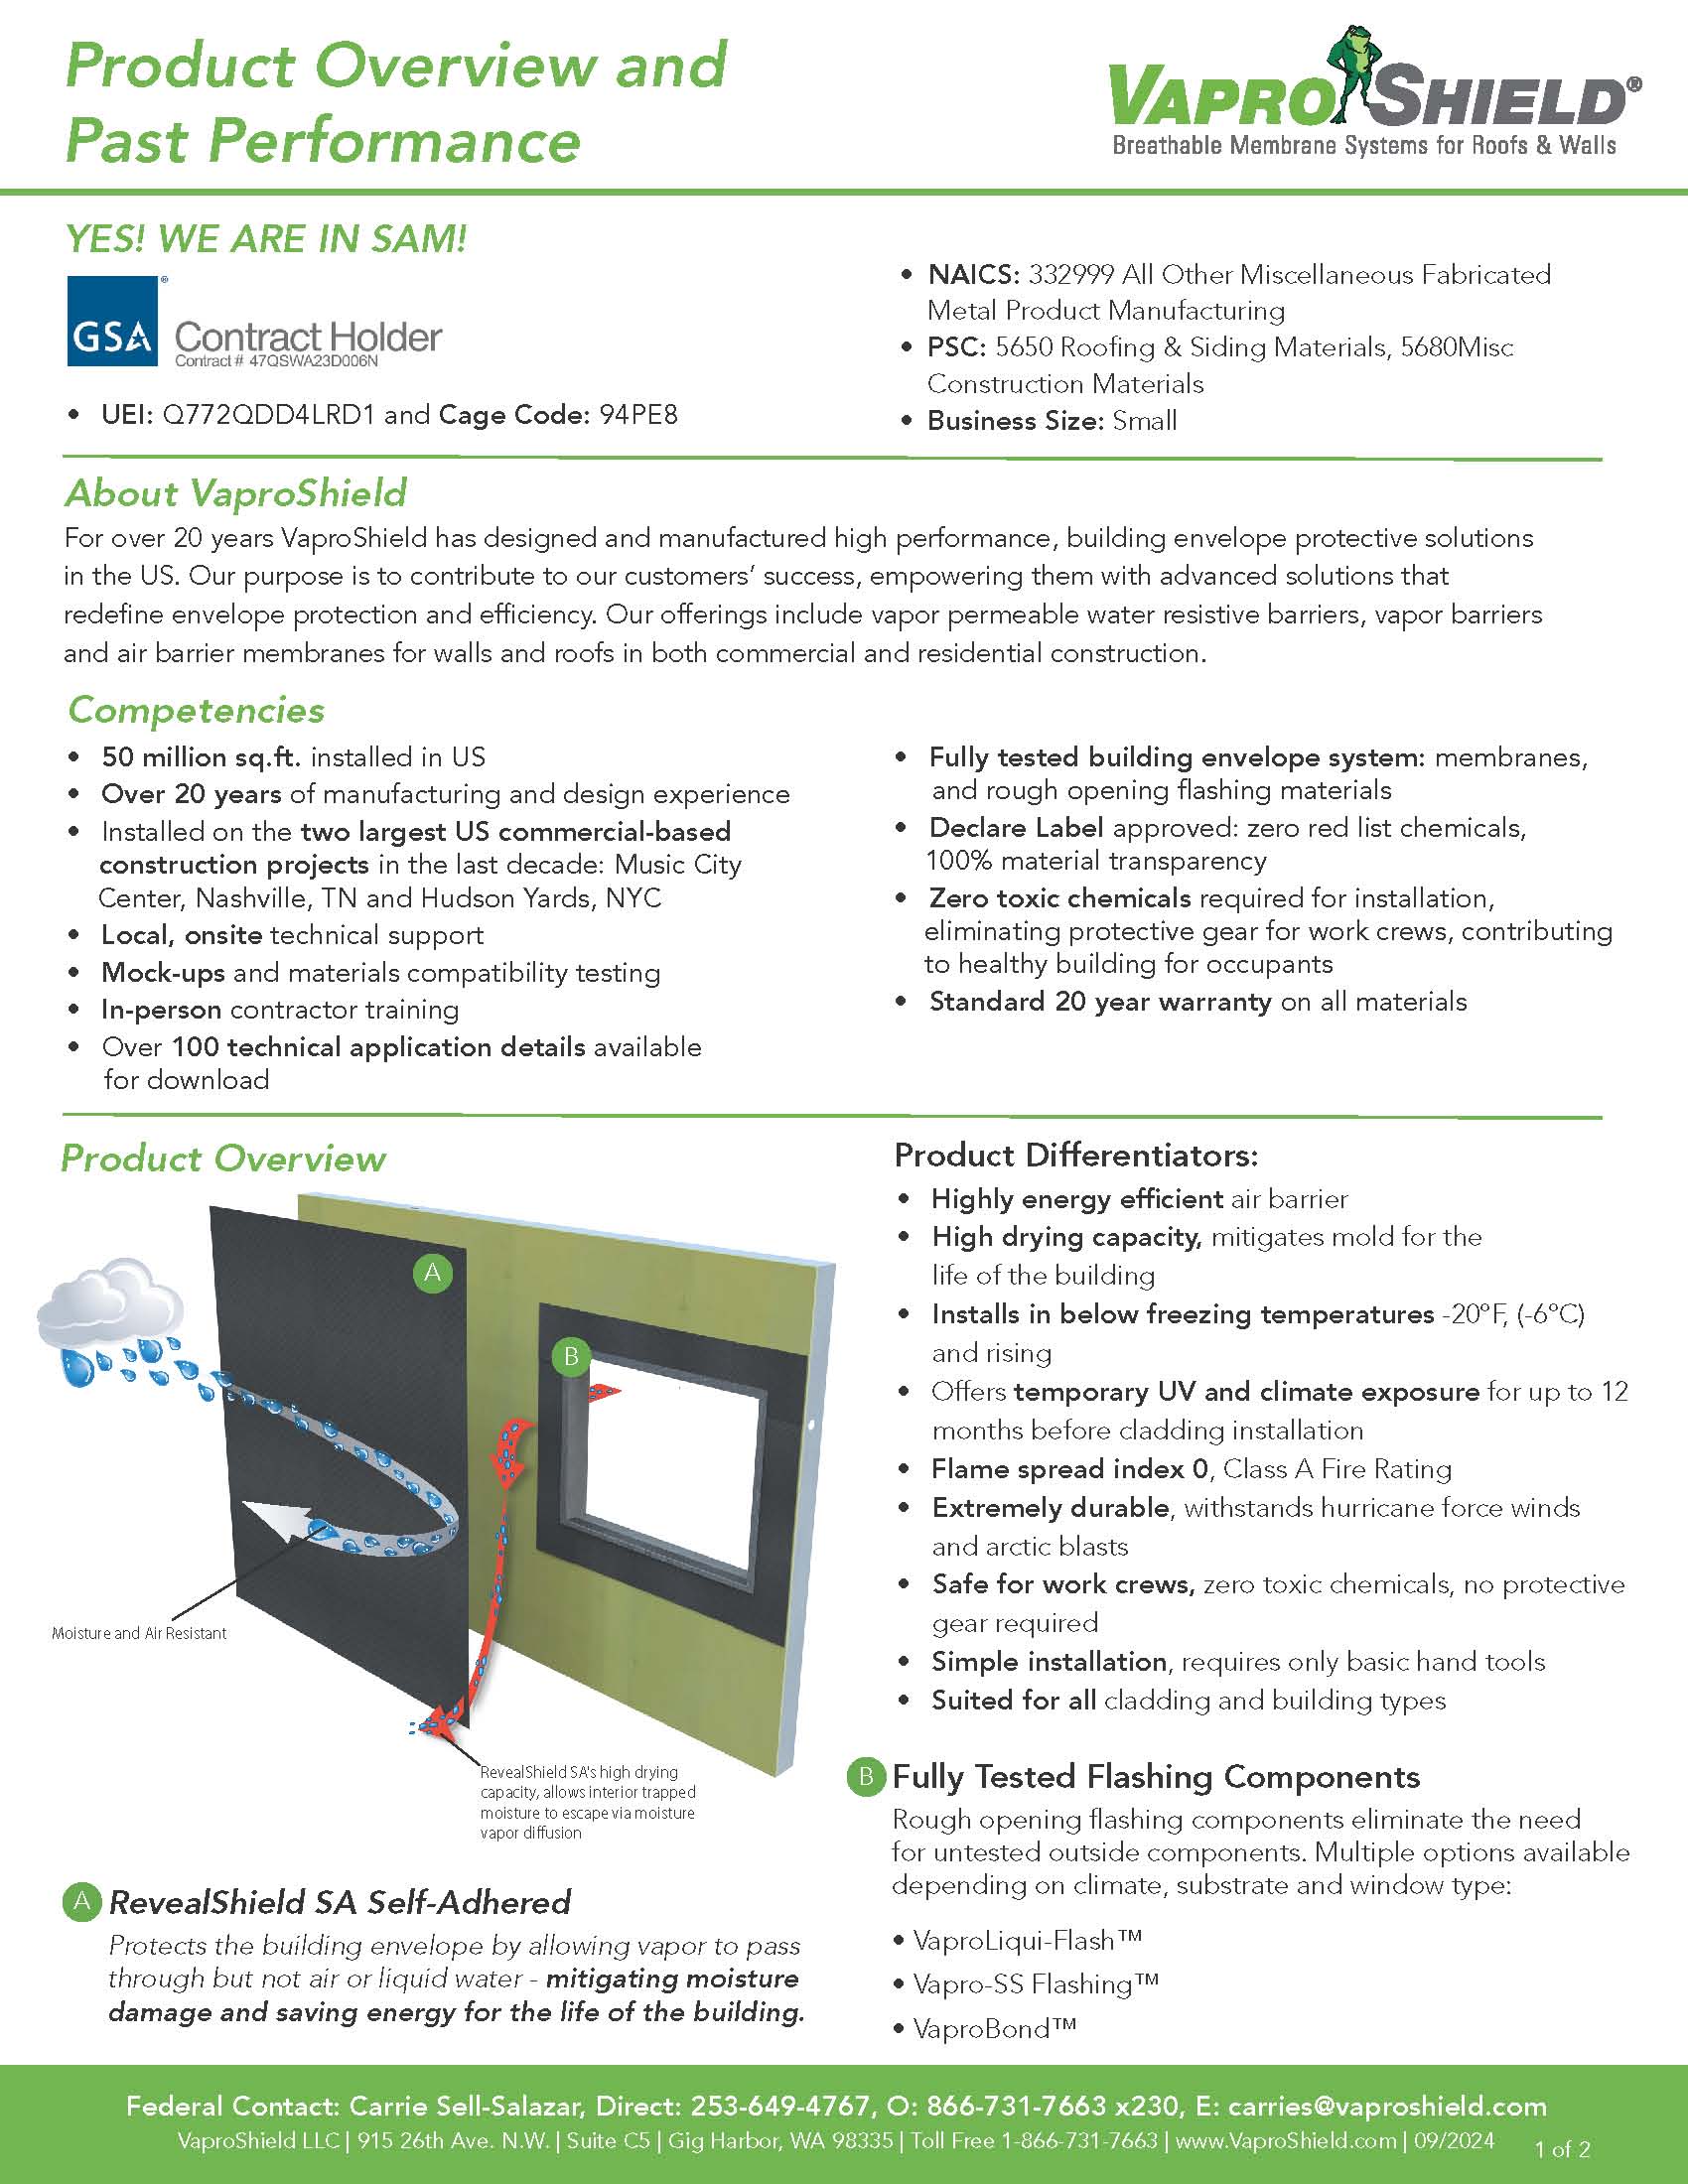
About VaproShield
For over 20 years VaproShield has designed and manufactured high performance, building envelope protective solutions in the US. Our purpose is to contribute to our customers’ success, empowering them with advanced solutions that redefine envelope protection and efficiency. Our offerings include vapor permeable water resistive barriers, vapor barriers and air barrier membranes for walls and roofs in both commercial and residential construction.
Competencies
|
|
Product Overview
|
|
Product Differentiators:
|
|
|
Experience
VaproShield Membranes have been installed on over 50 government and municipal projects
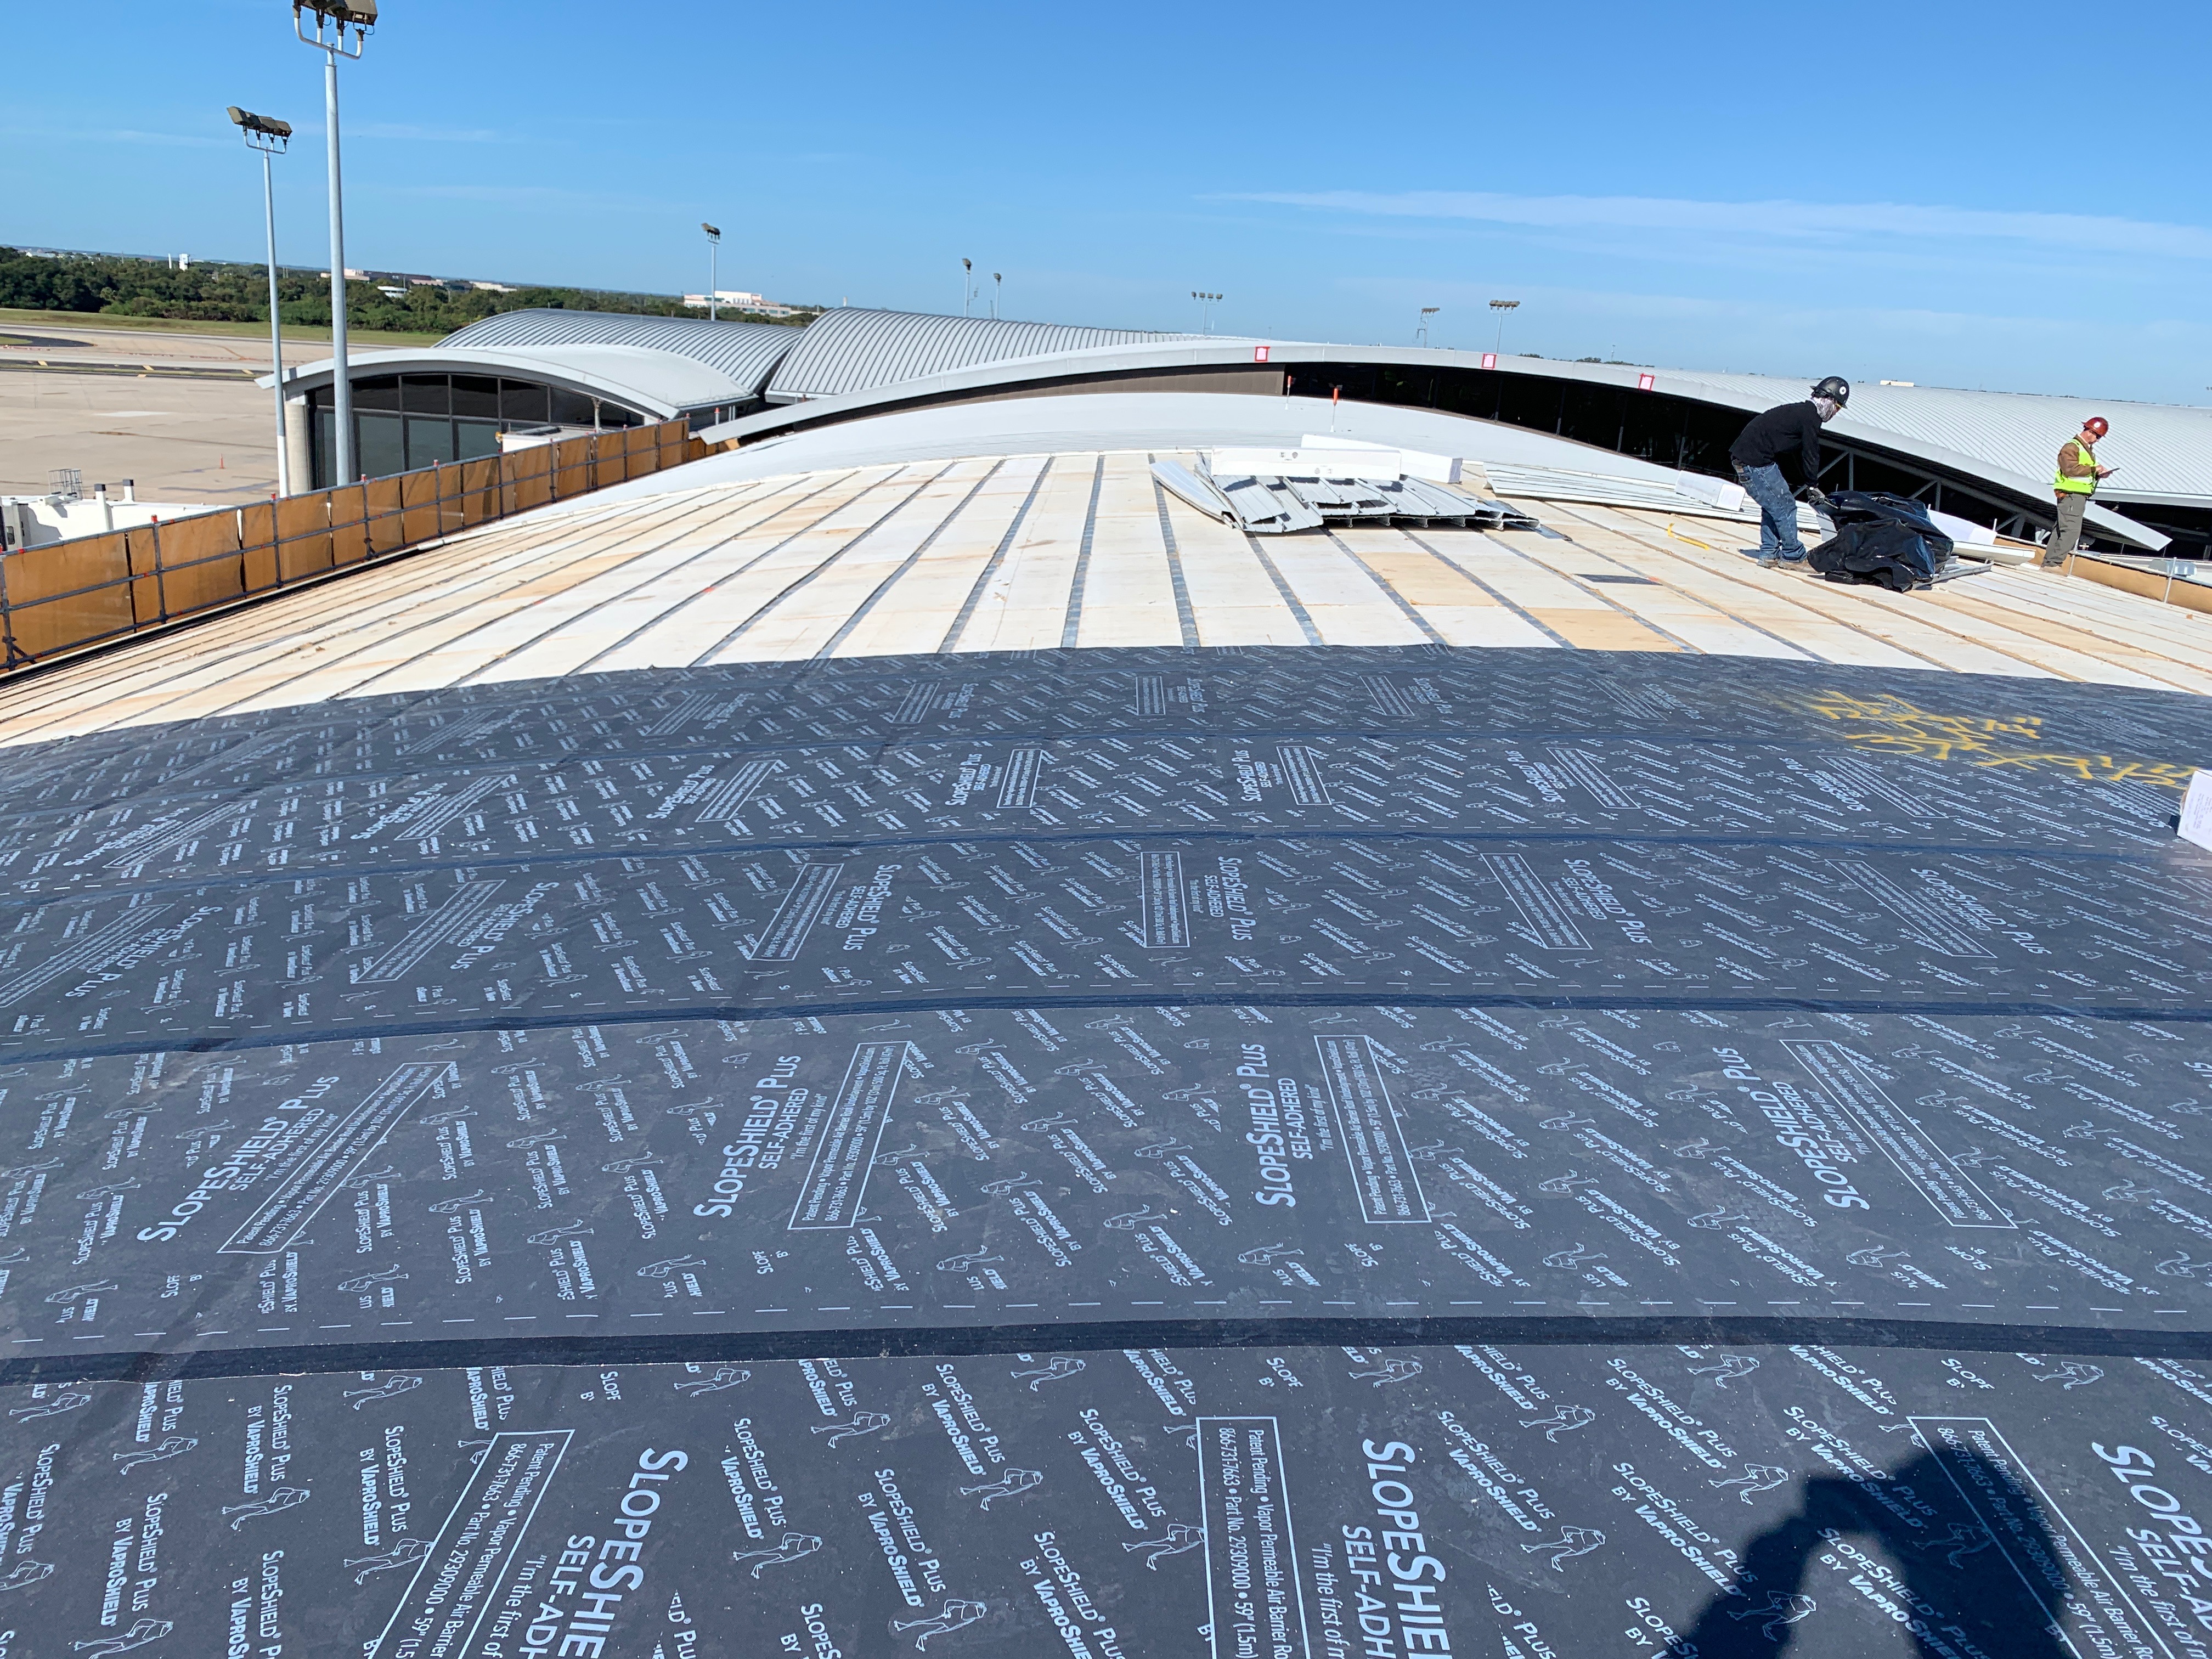
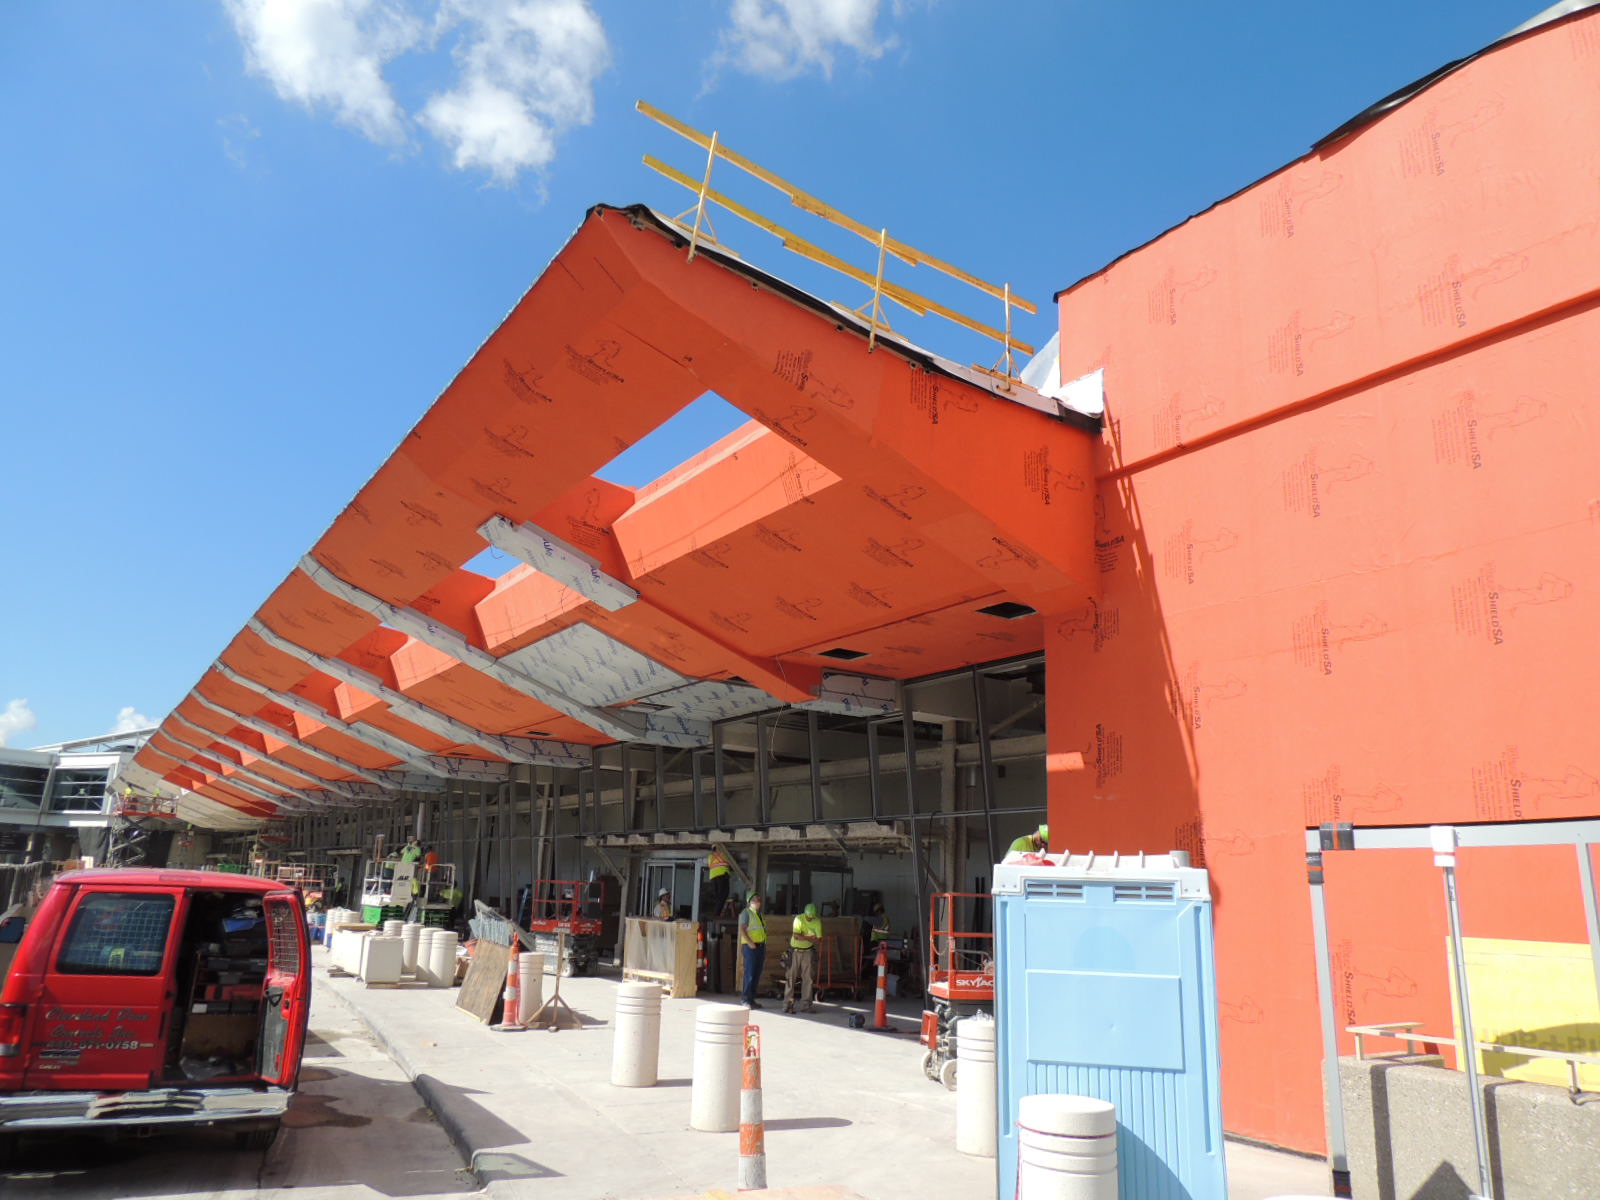
| Tampa Airport, HCAA Project No. 6545 19 TAP Airside F Re-Roof | Southeast Michigan Veterans Home | Cleveland Hopkins International Airport |
 |
 |
 |
|
90,000 sq.ft. breathable roofing underlayment, SlopeShield Plus SA, was installed saving millions of materials from being dumped into a landfill. (2020) |
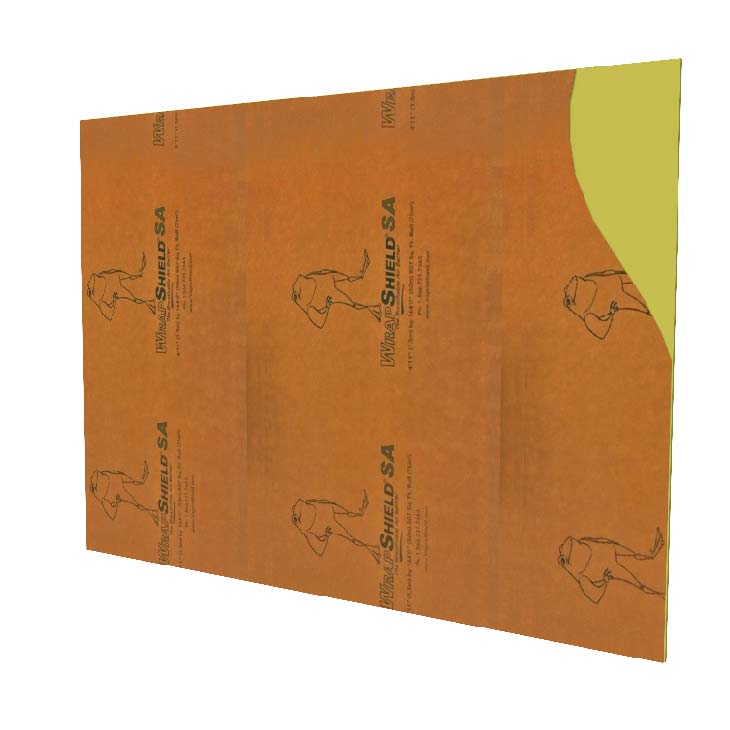
Over 90,000 sq.ft. of WrapShield SA Self-Adhered, air barrier and highly vapor permeable water resistive barrier, was installed on prefabricated panels. (2019) |
Free of harmful VOC’s, VaproShield’s WrapShield SA was easily installed on the overhead soffit structures. Conventional |
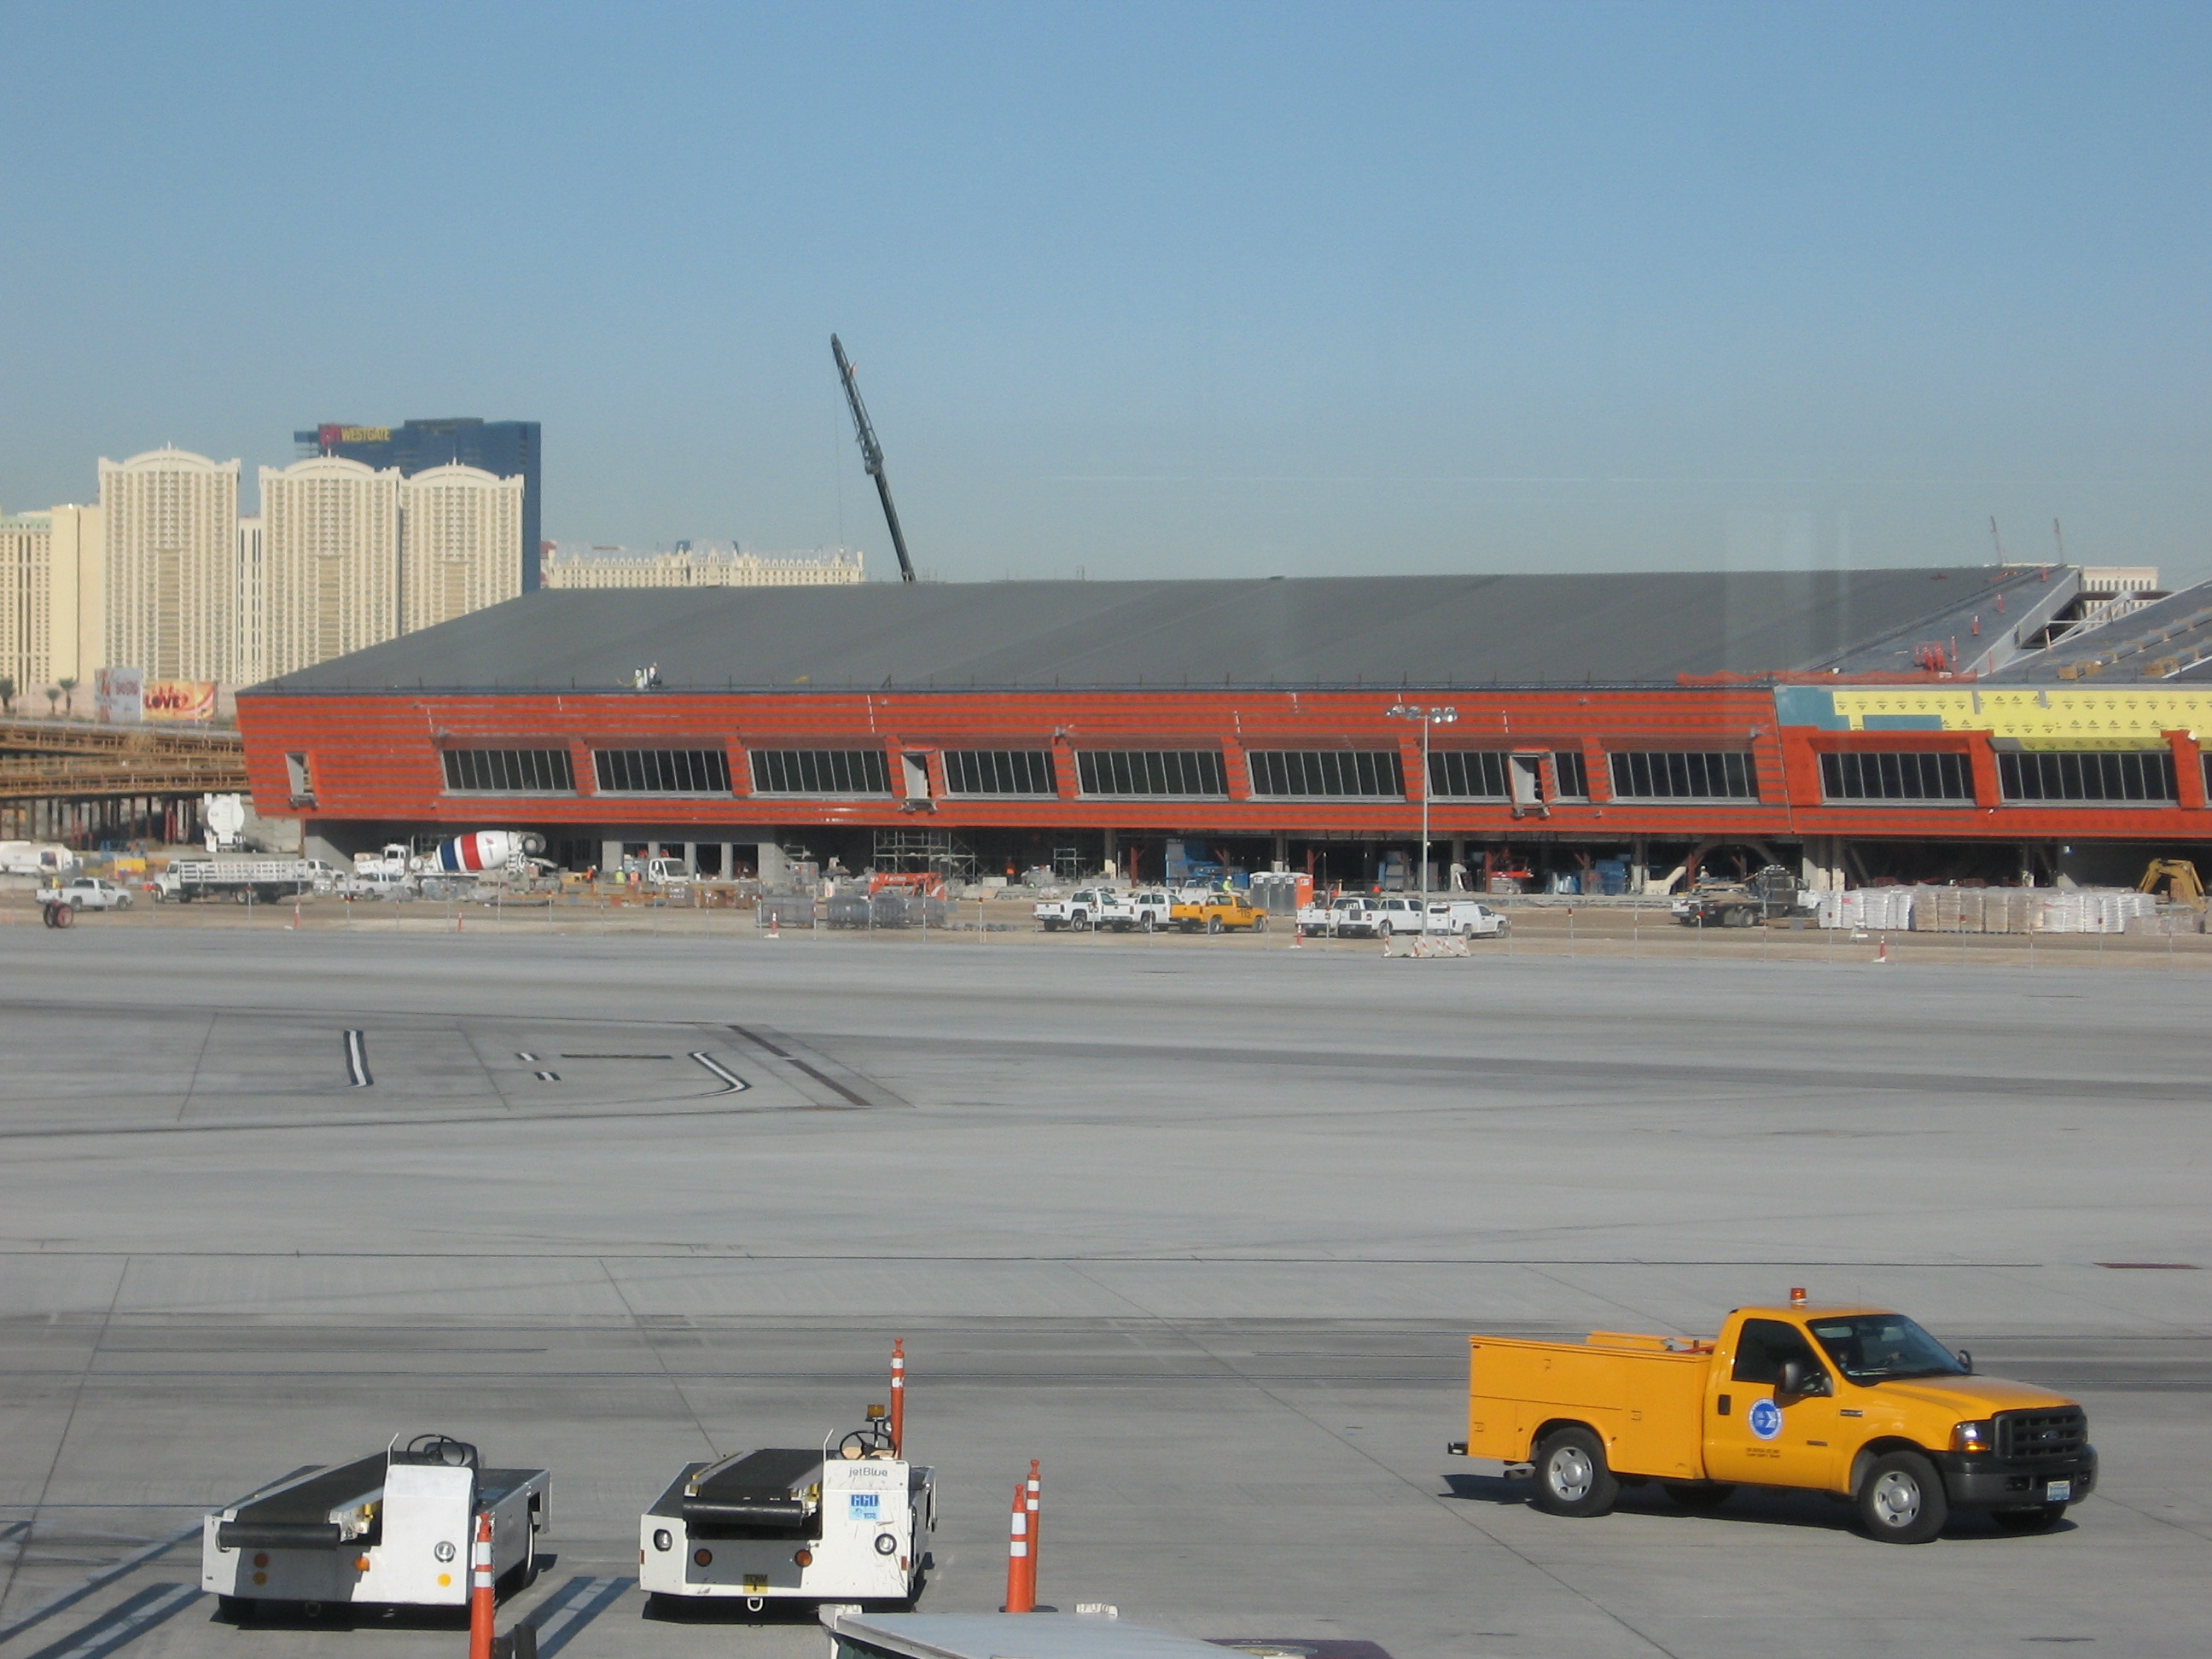
| Federal Center South Building 1202, Seattle, WA | Las Vegas McCarran International Airport Terminal 3 | NOAA Global Climate Change Research Facility, Utqiagvik (Barrow), Alaska |
 |
 |
 |
|
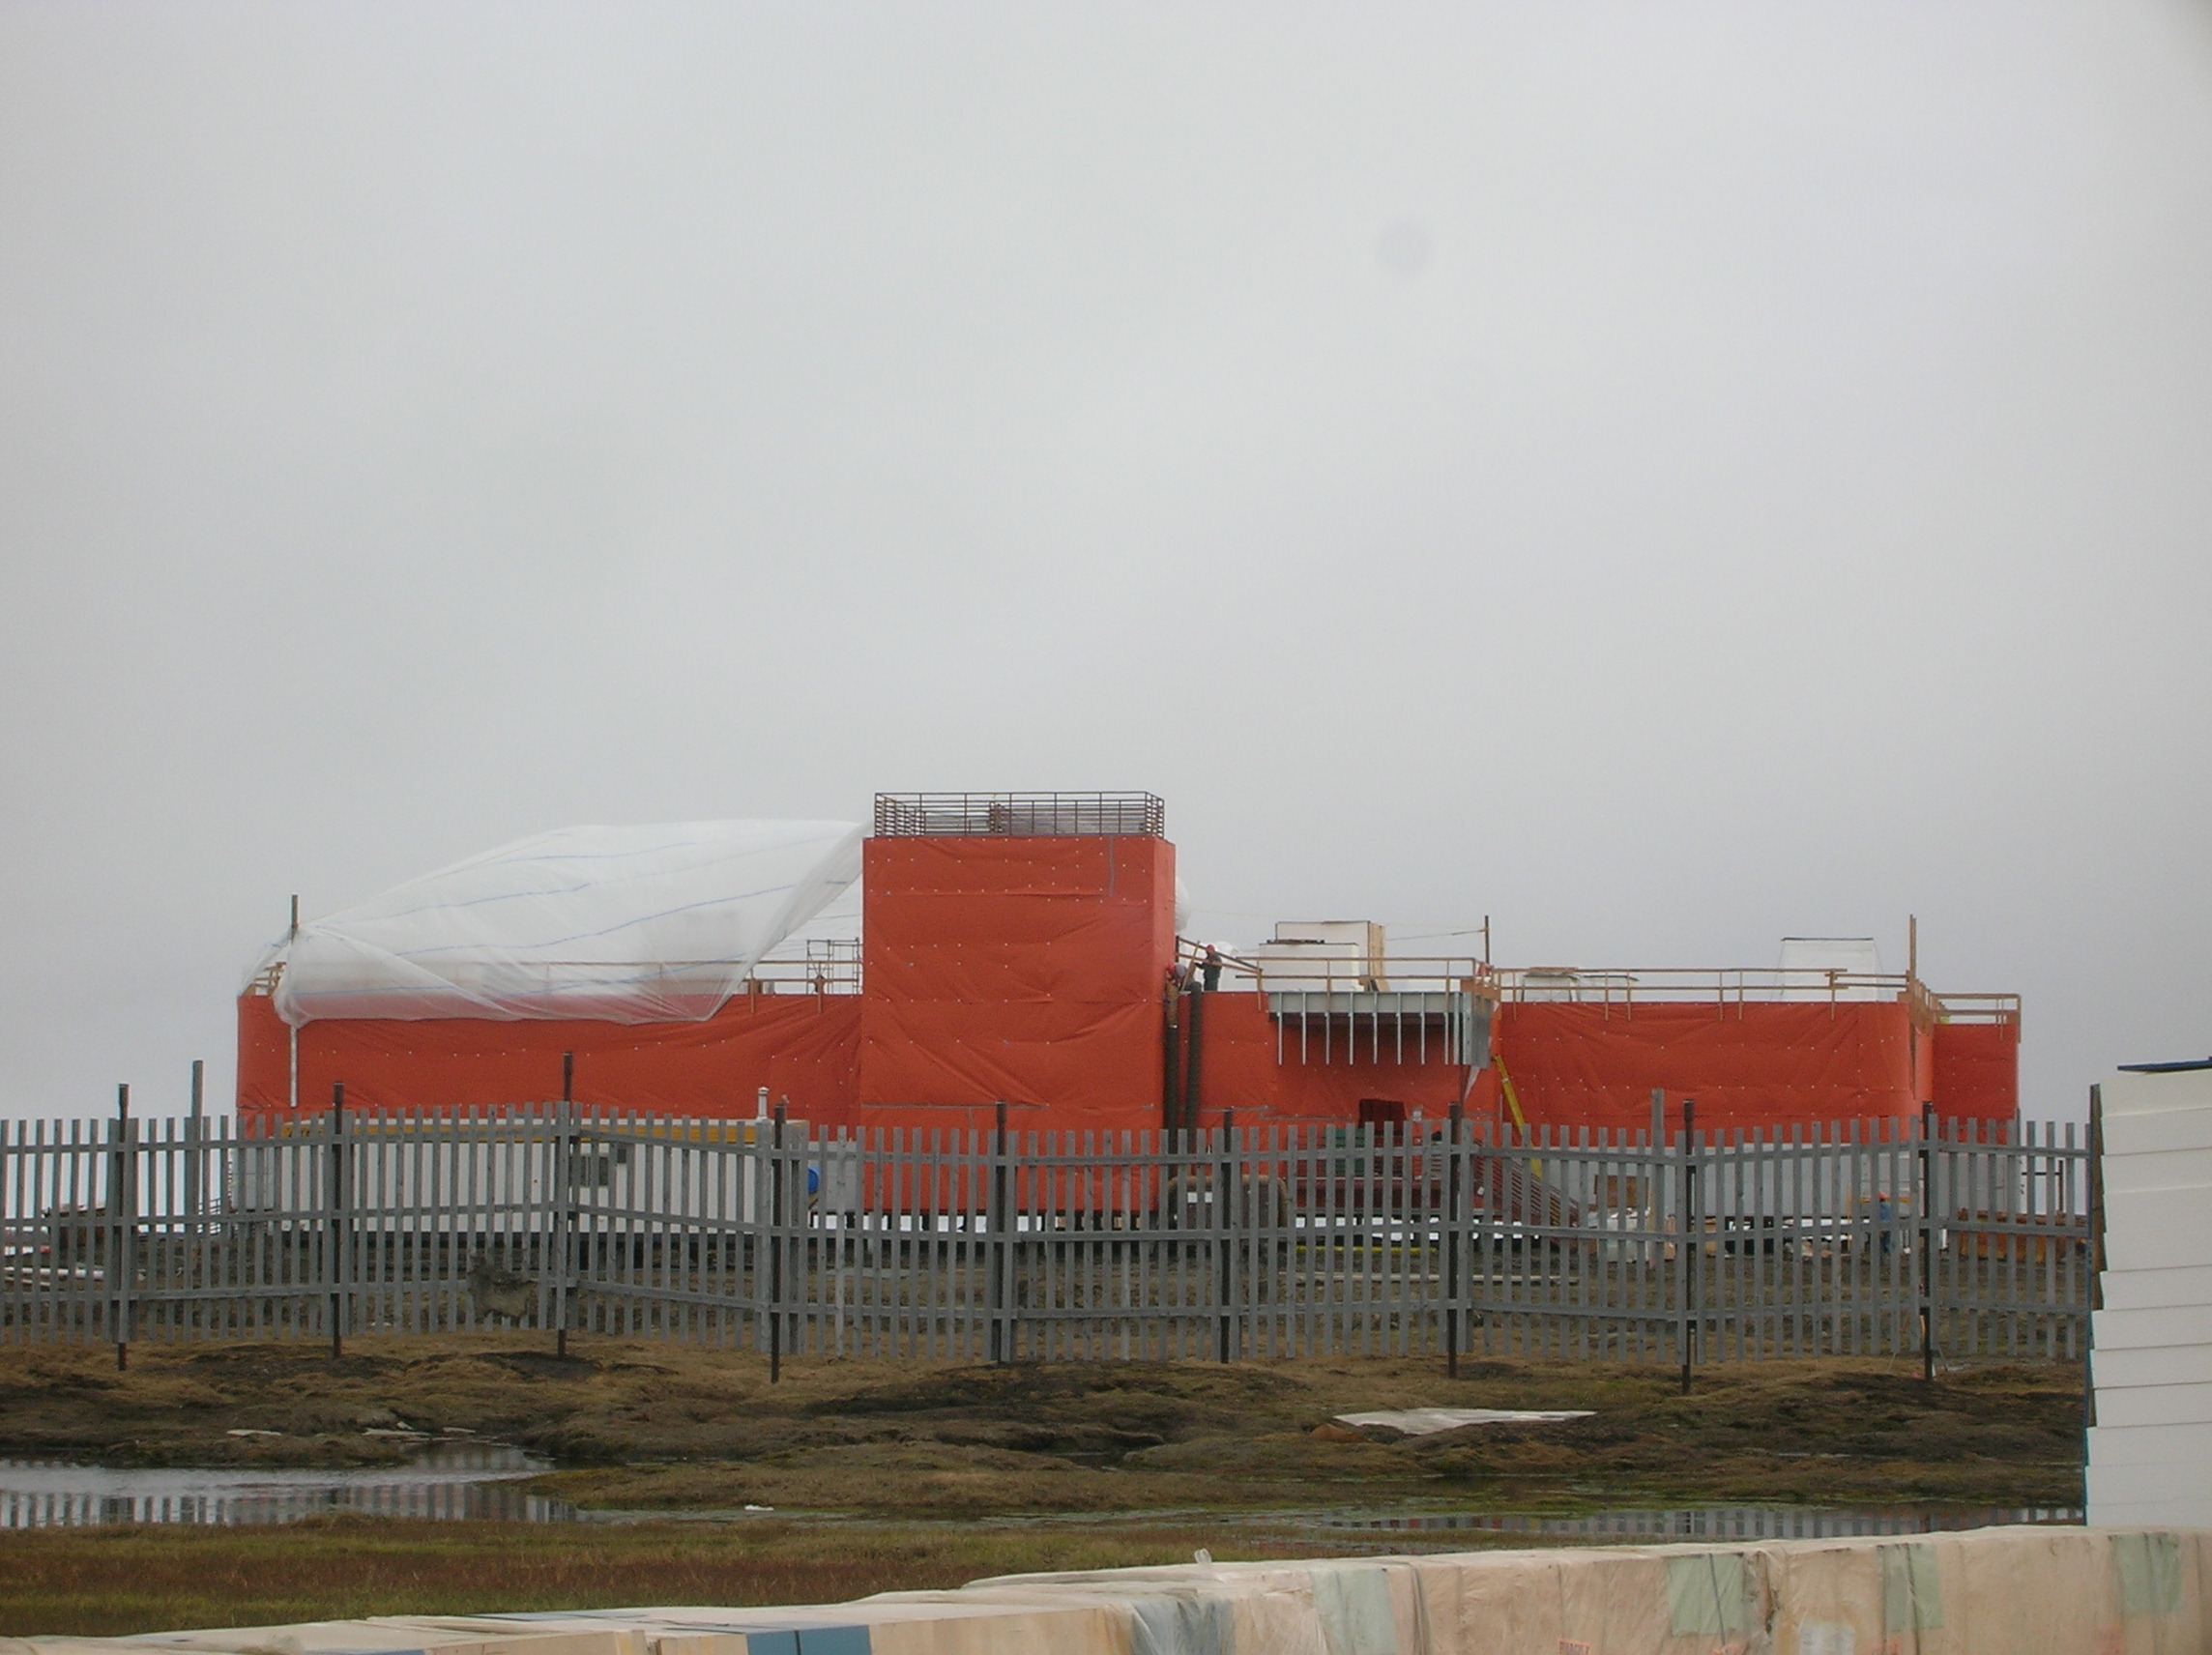
40,000sq.ft. of WrapShield SA air barrier was installed helping the project to achieve an energy level at the top 1% of all US buildings. (2014) |
An impressive 800,000 sq.ft. of WrapShield SA air barrier was installed on the 2 million sq.ft. Terminal 3. (2009) |
20,000 sq.ft. of VaproShield membrane endured months long arctic winds and frigid temperatures. (2006) |
Additional Experience
|
Department of Agriculture |
Department of the Interior |
National Aeronautics and Space Administration NASA, CA, MD |
| Department of Veterans Affairs National Energy Business Center, CA Central Texas Health Care System, TX Medical Centers, NY, VA, FL, MI, CA National Cemetery Association, VA, FL |
Federal Aviation Administration Southeast Region Logistics Division, TX Northwest-Mountain Region, AK Ops Support Wing Roof Replacement, AK |
U.S. Air Force/U.S. Army 319th Air Base Wing, ND Air Combat Command, VA Whiteman AFB, MO Luke AFB Building, AZ Tactical Response Force Alert Facility, MT |
Notable Industry Affiliations
|
|
Resources
Issue: Moisture Intrusion in the Roof Assembly
Relying on Staggered ISO as an Air Barrier Causes Moisture Intrusion
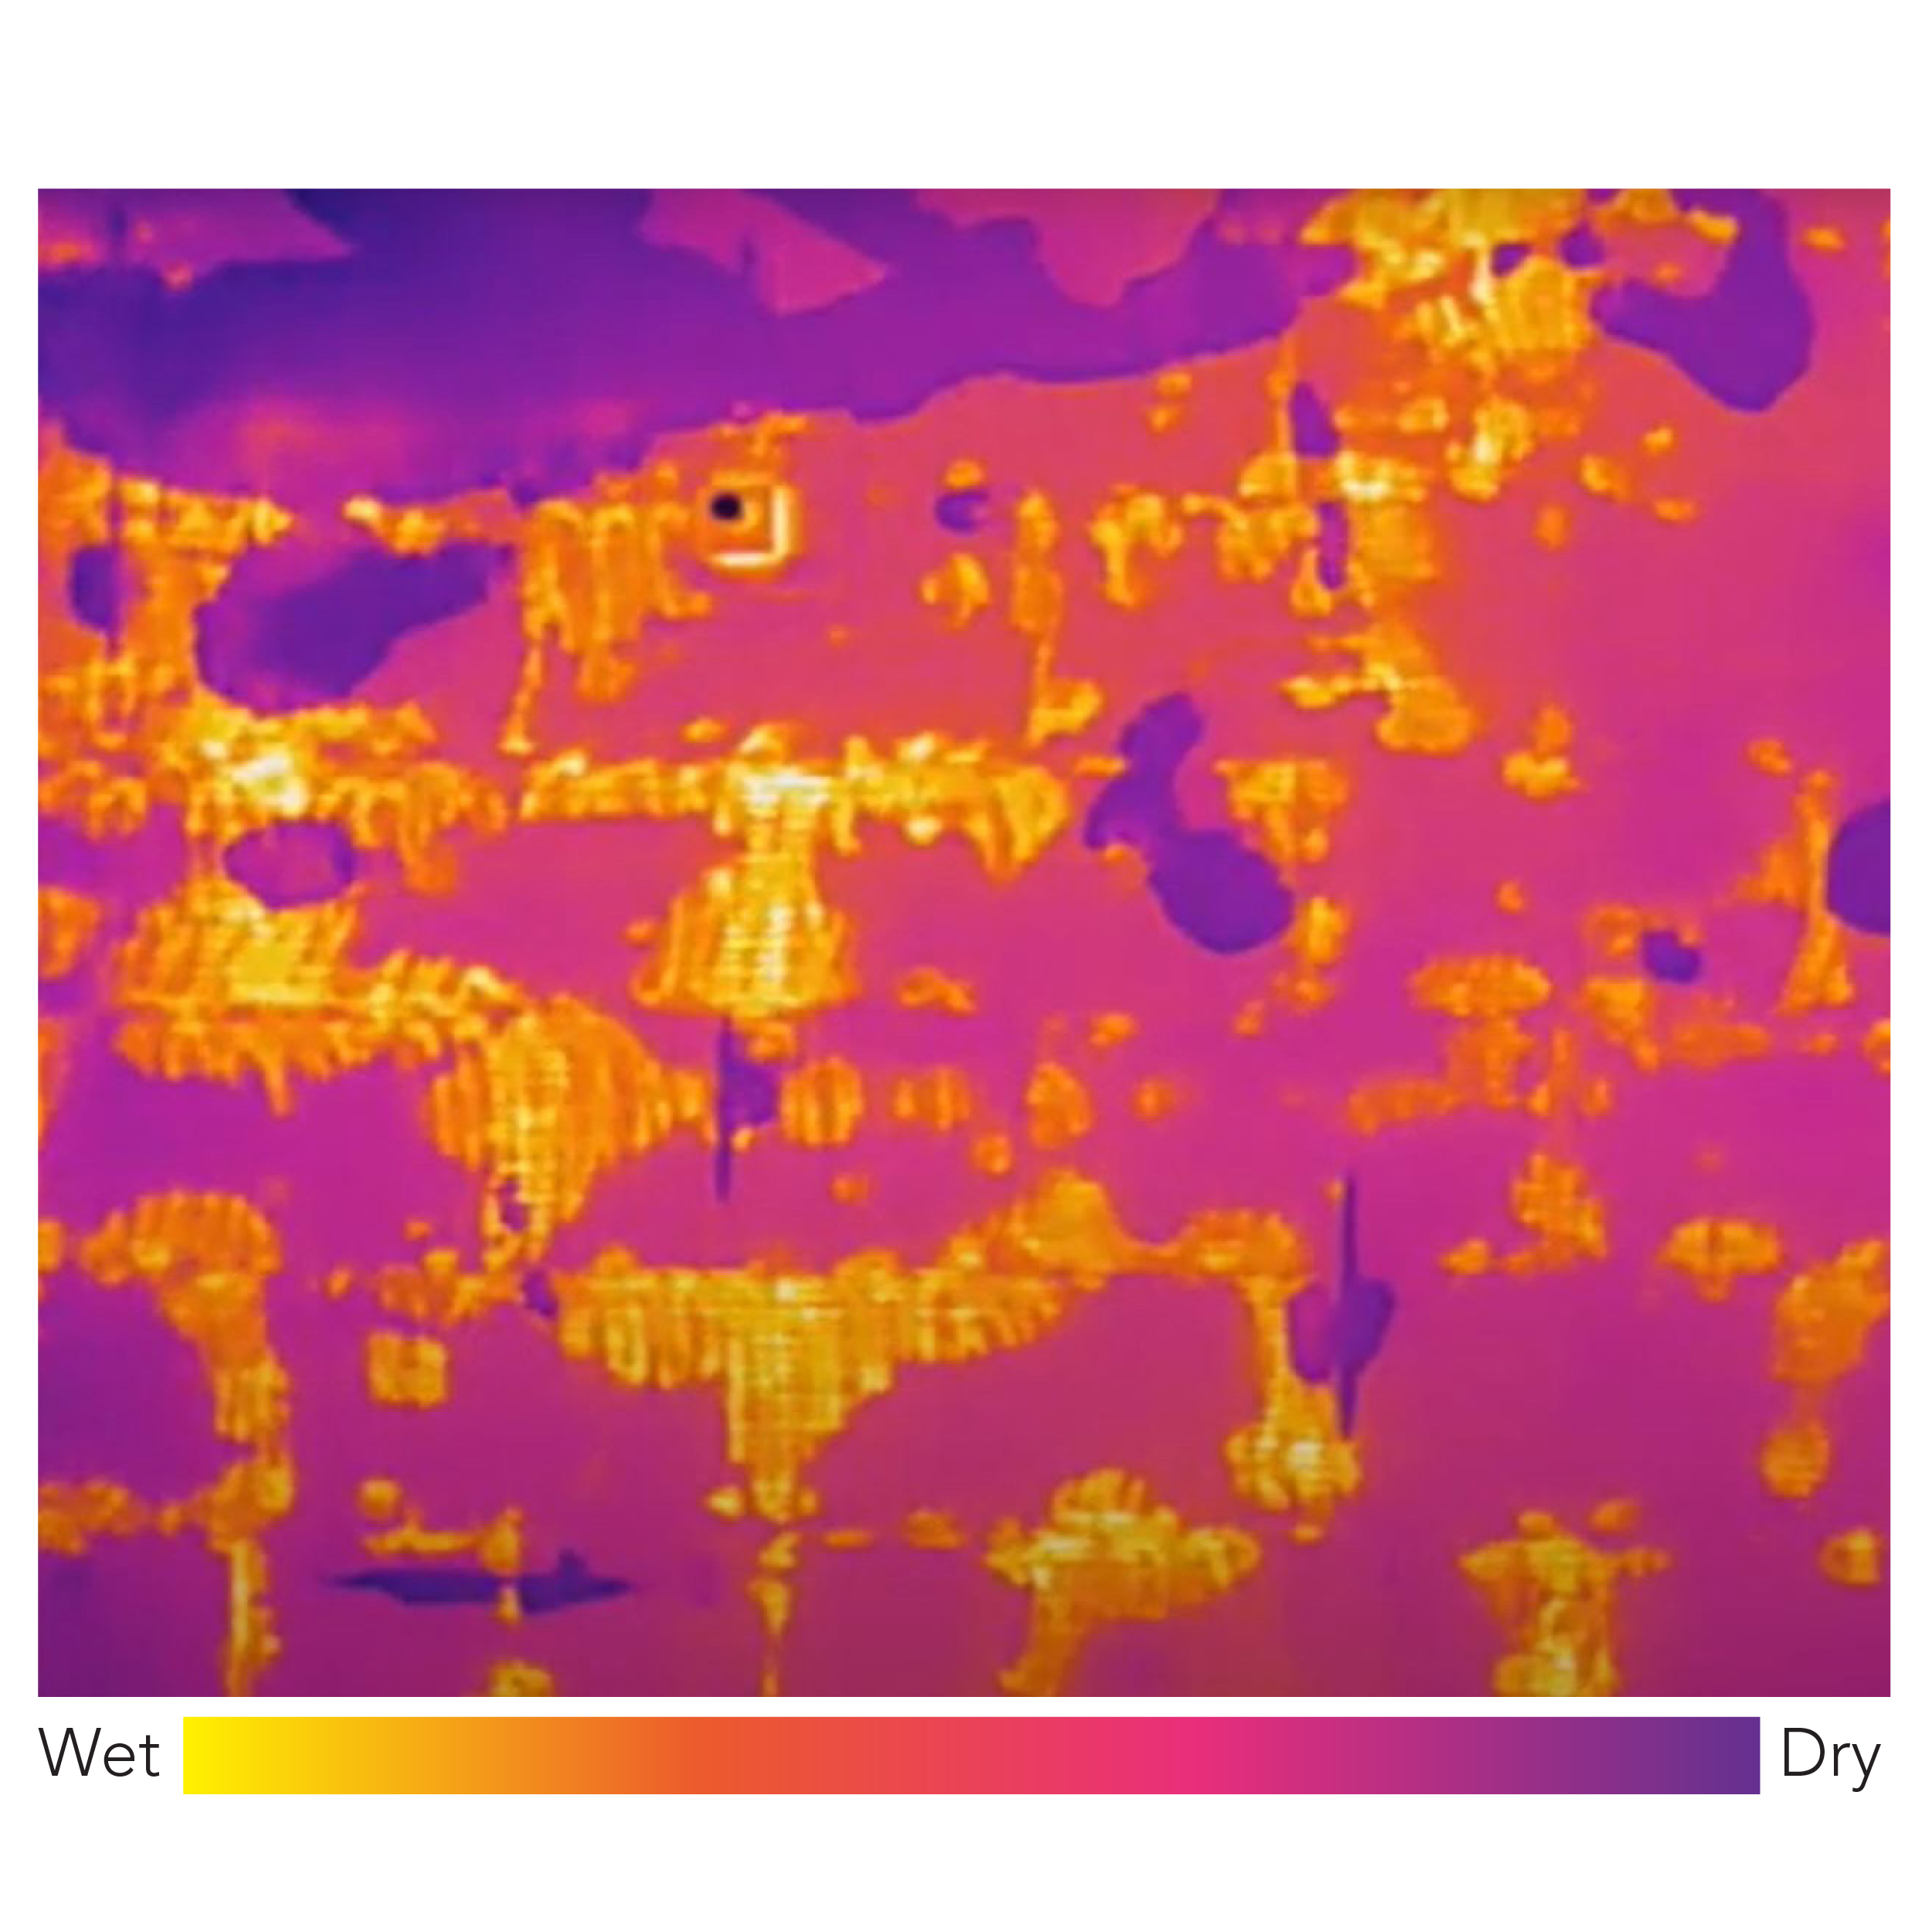 |
 |
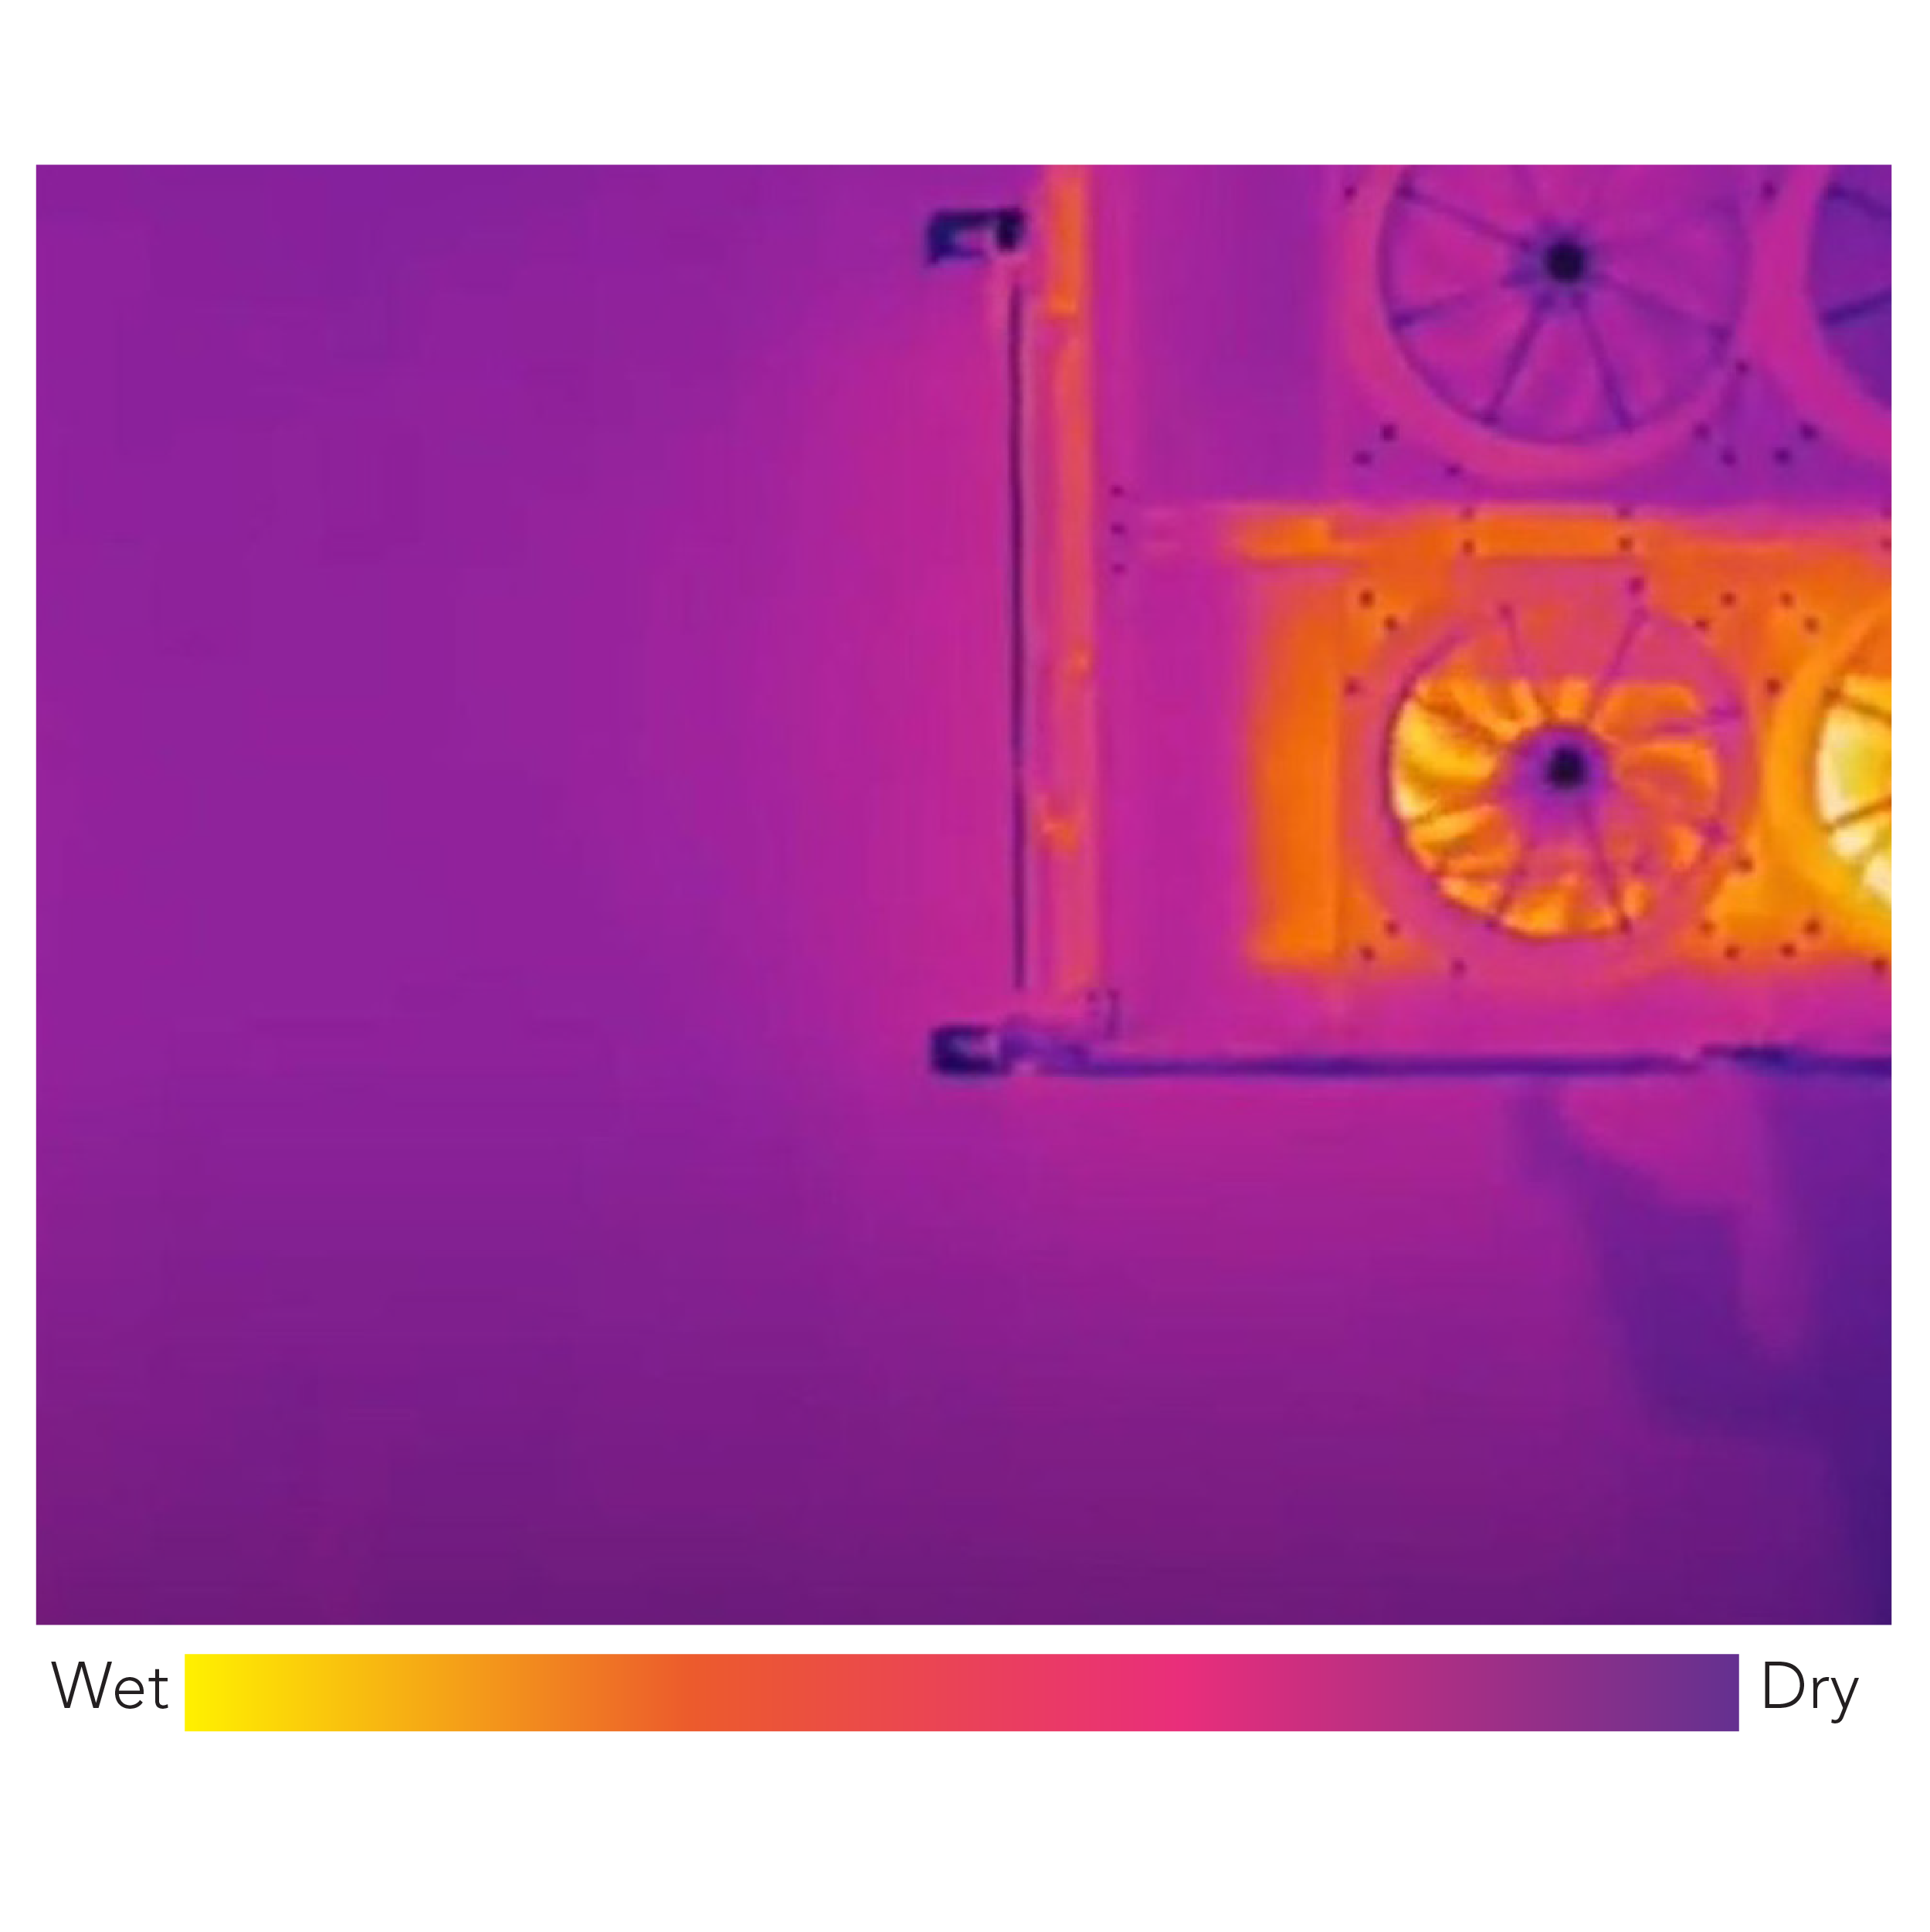
| The infrared image clearly shows moisture build-up beneath the roof membrane and within the roofing assembly. | When staggered ISO or the roof membrane is used as an air barrier, moisture-laden air from the interior spaces will penetrate the roofing assembly, resulting in performance issues and water damage. |
Quick Building Science Basic
When Air Moves So Does Moisture
|
|
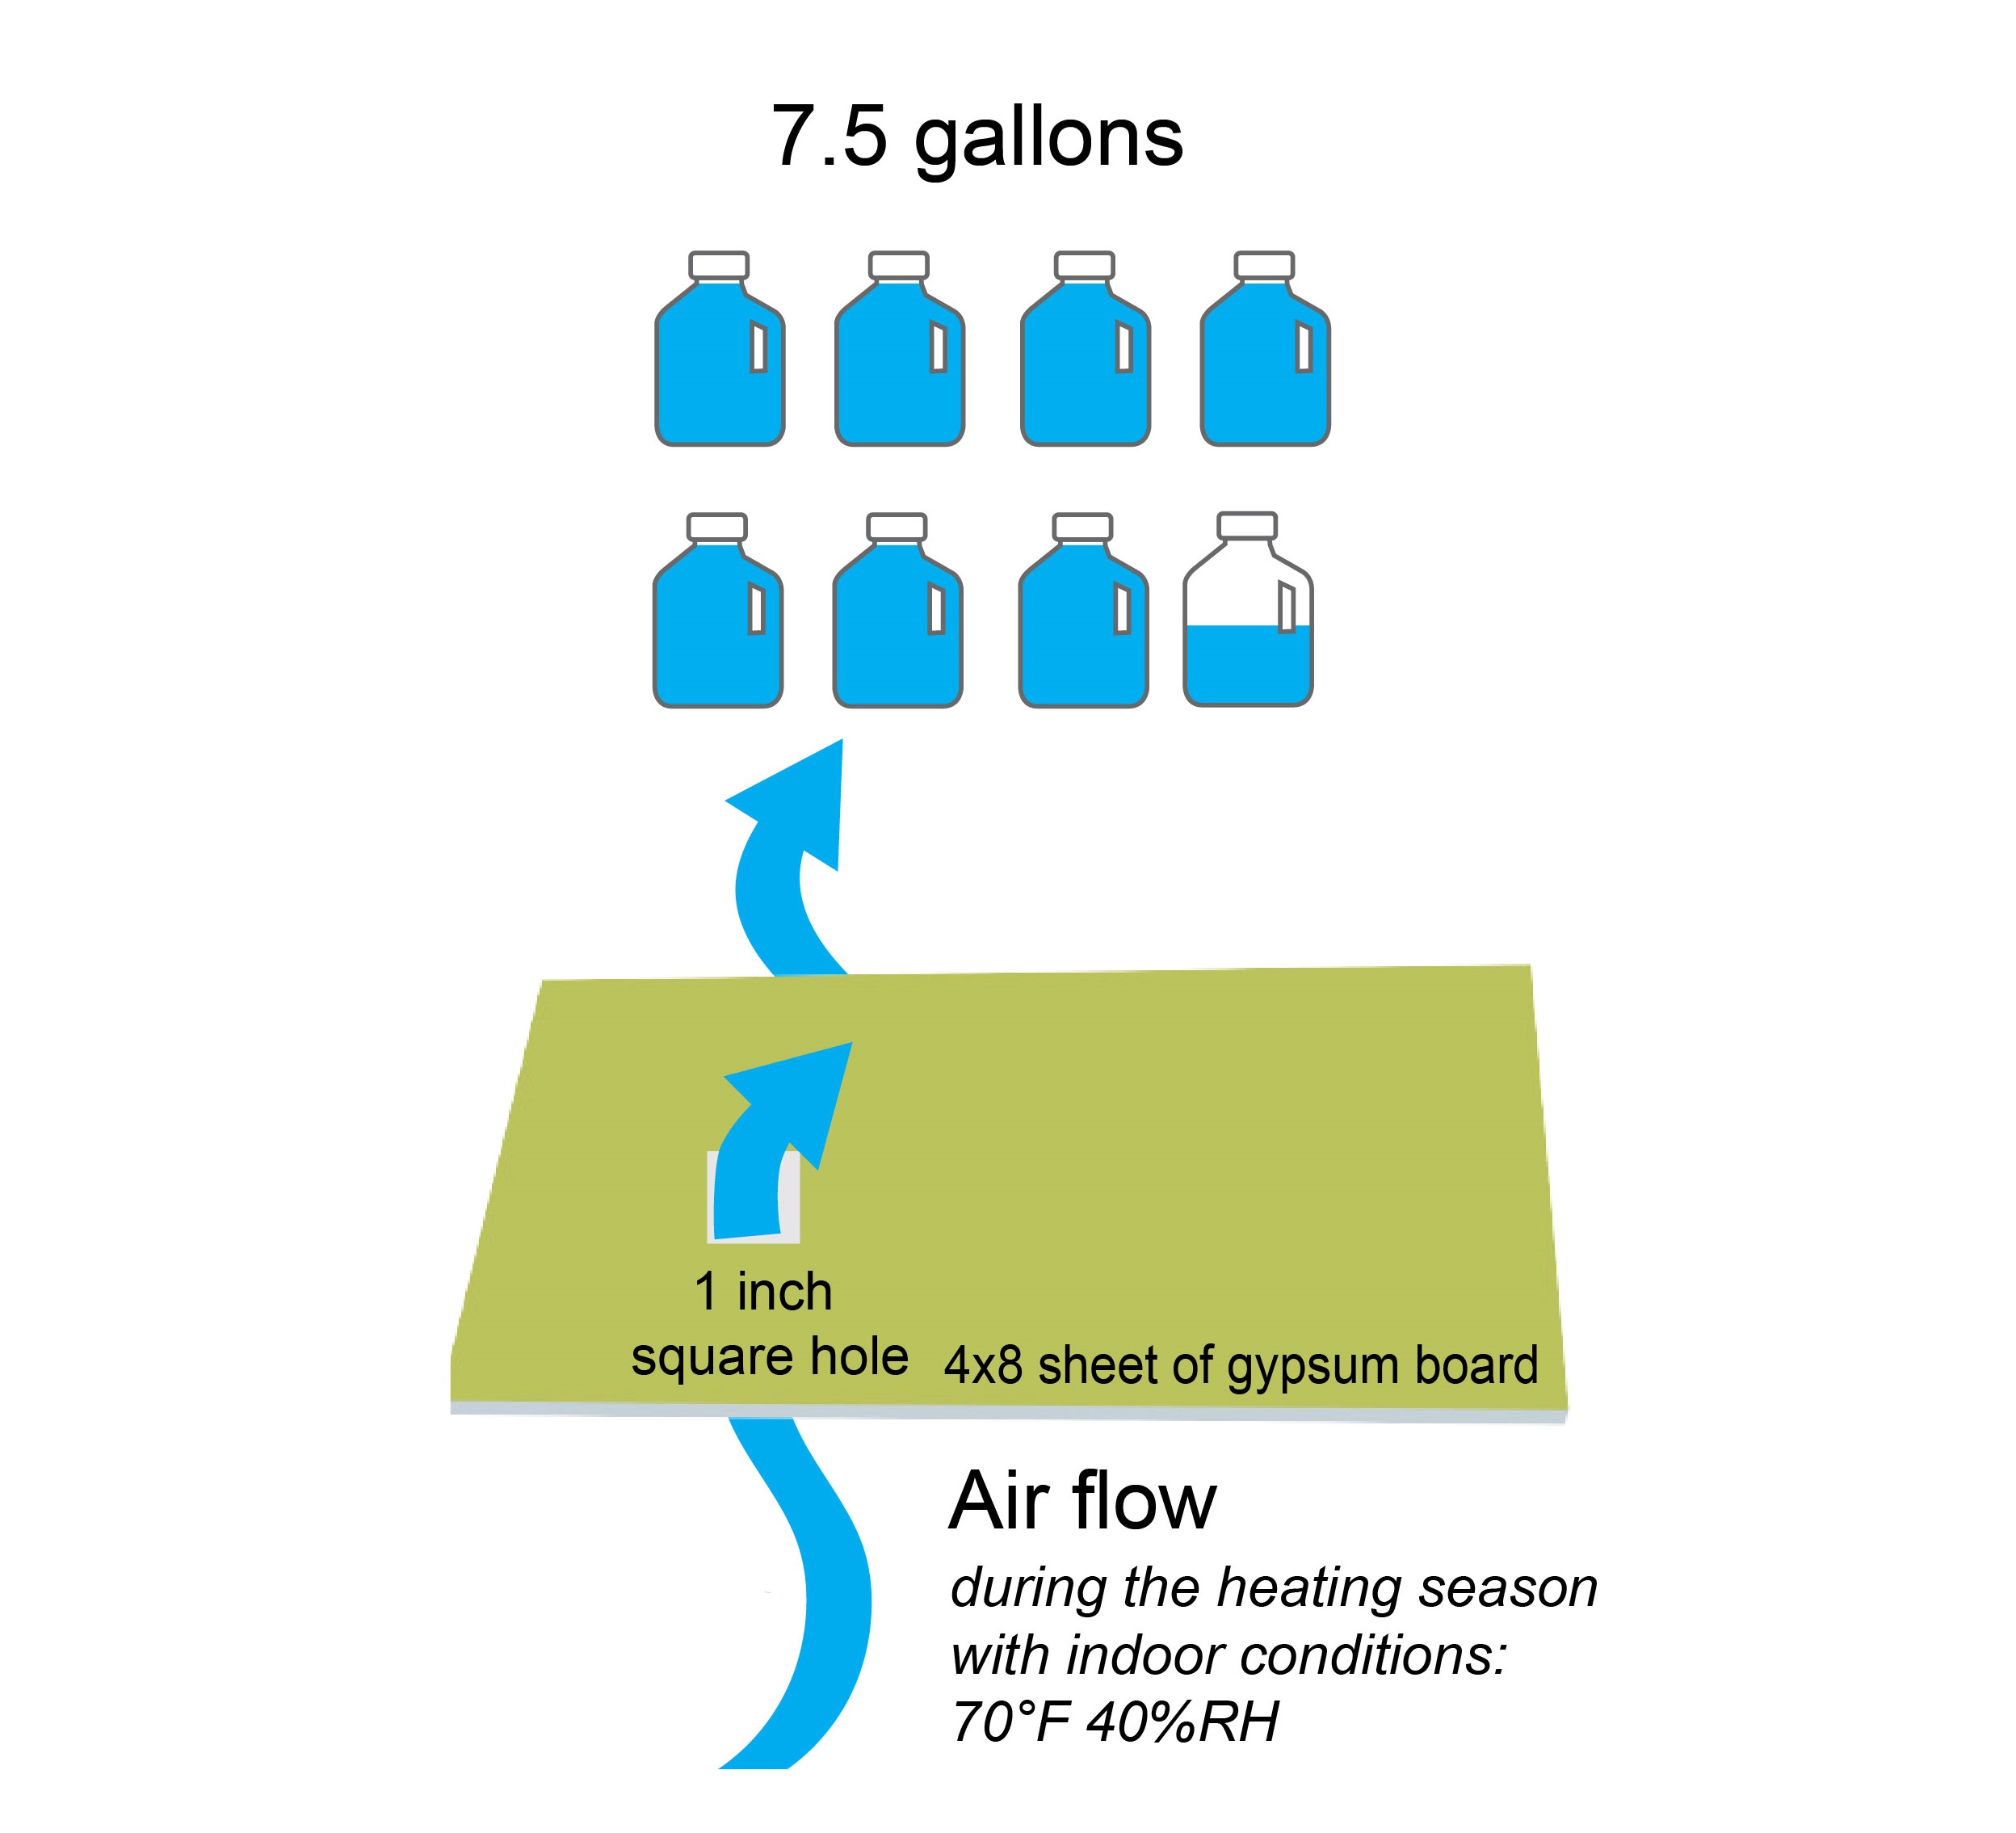 |
| Water piggybacks on air - when air moves, so does moisture. Air movement accounts for 70-90 percent of moisture vapor transport, making it the primary driver of moisture movement. | 95% more water vapor is transported by air flow. |
Solution: Moisture Control Membrane
 |
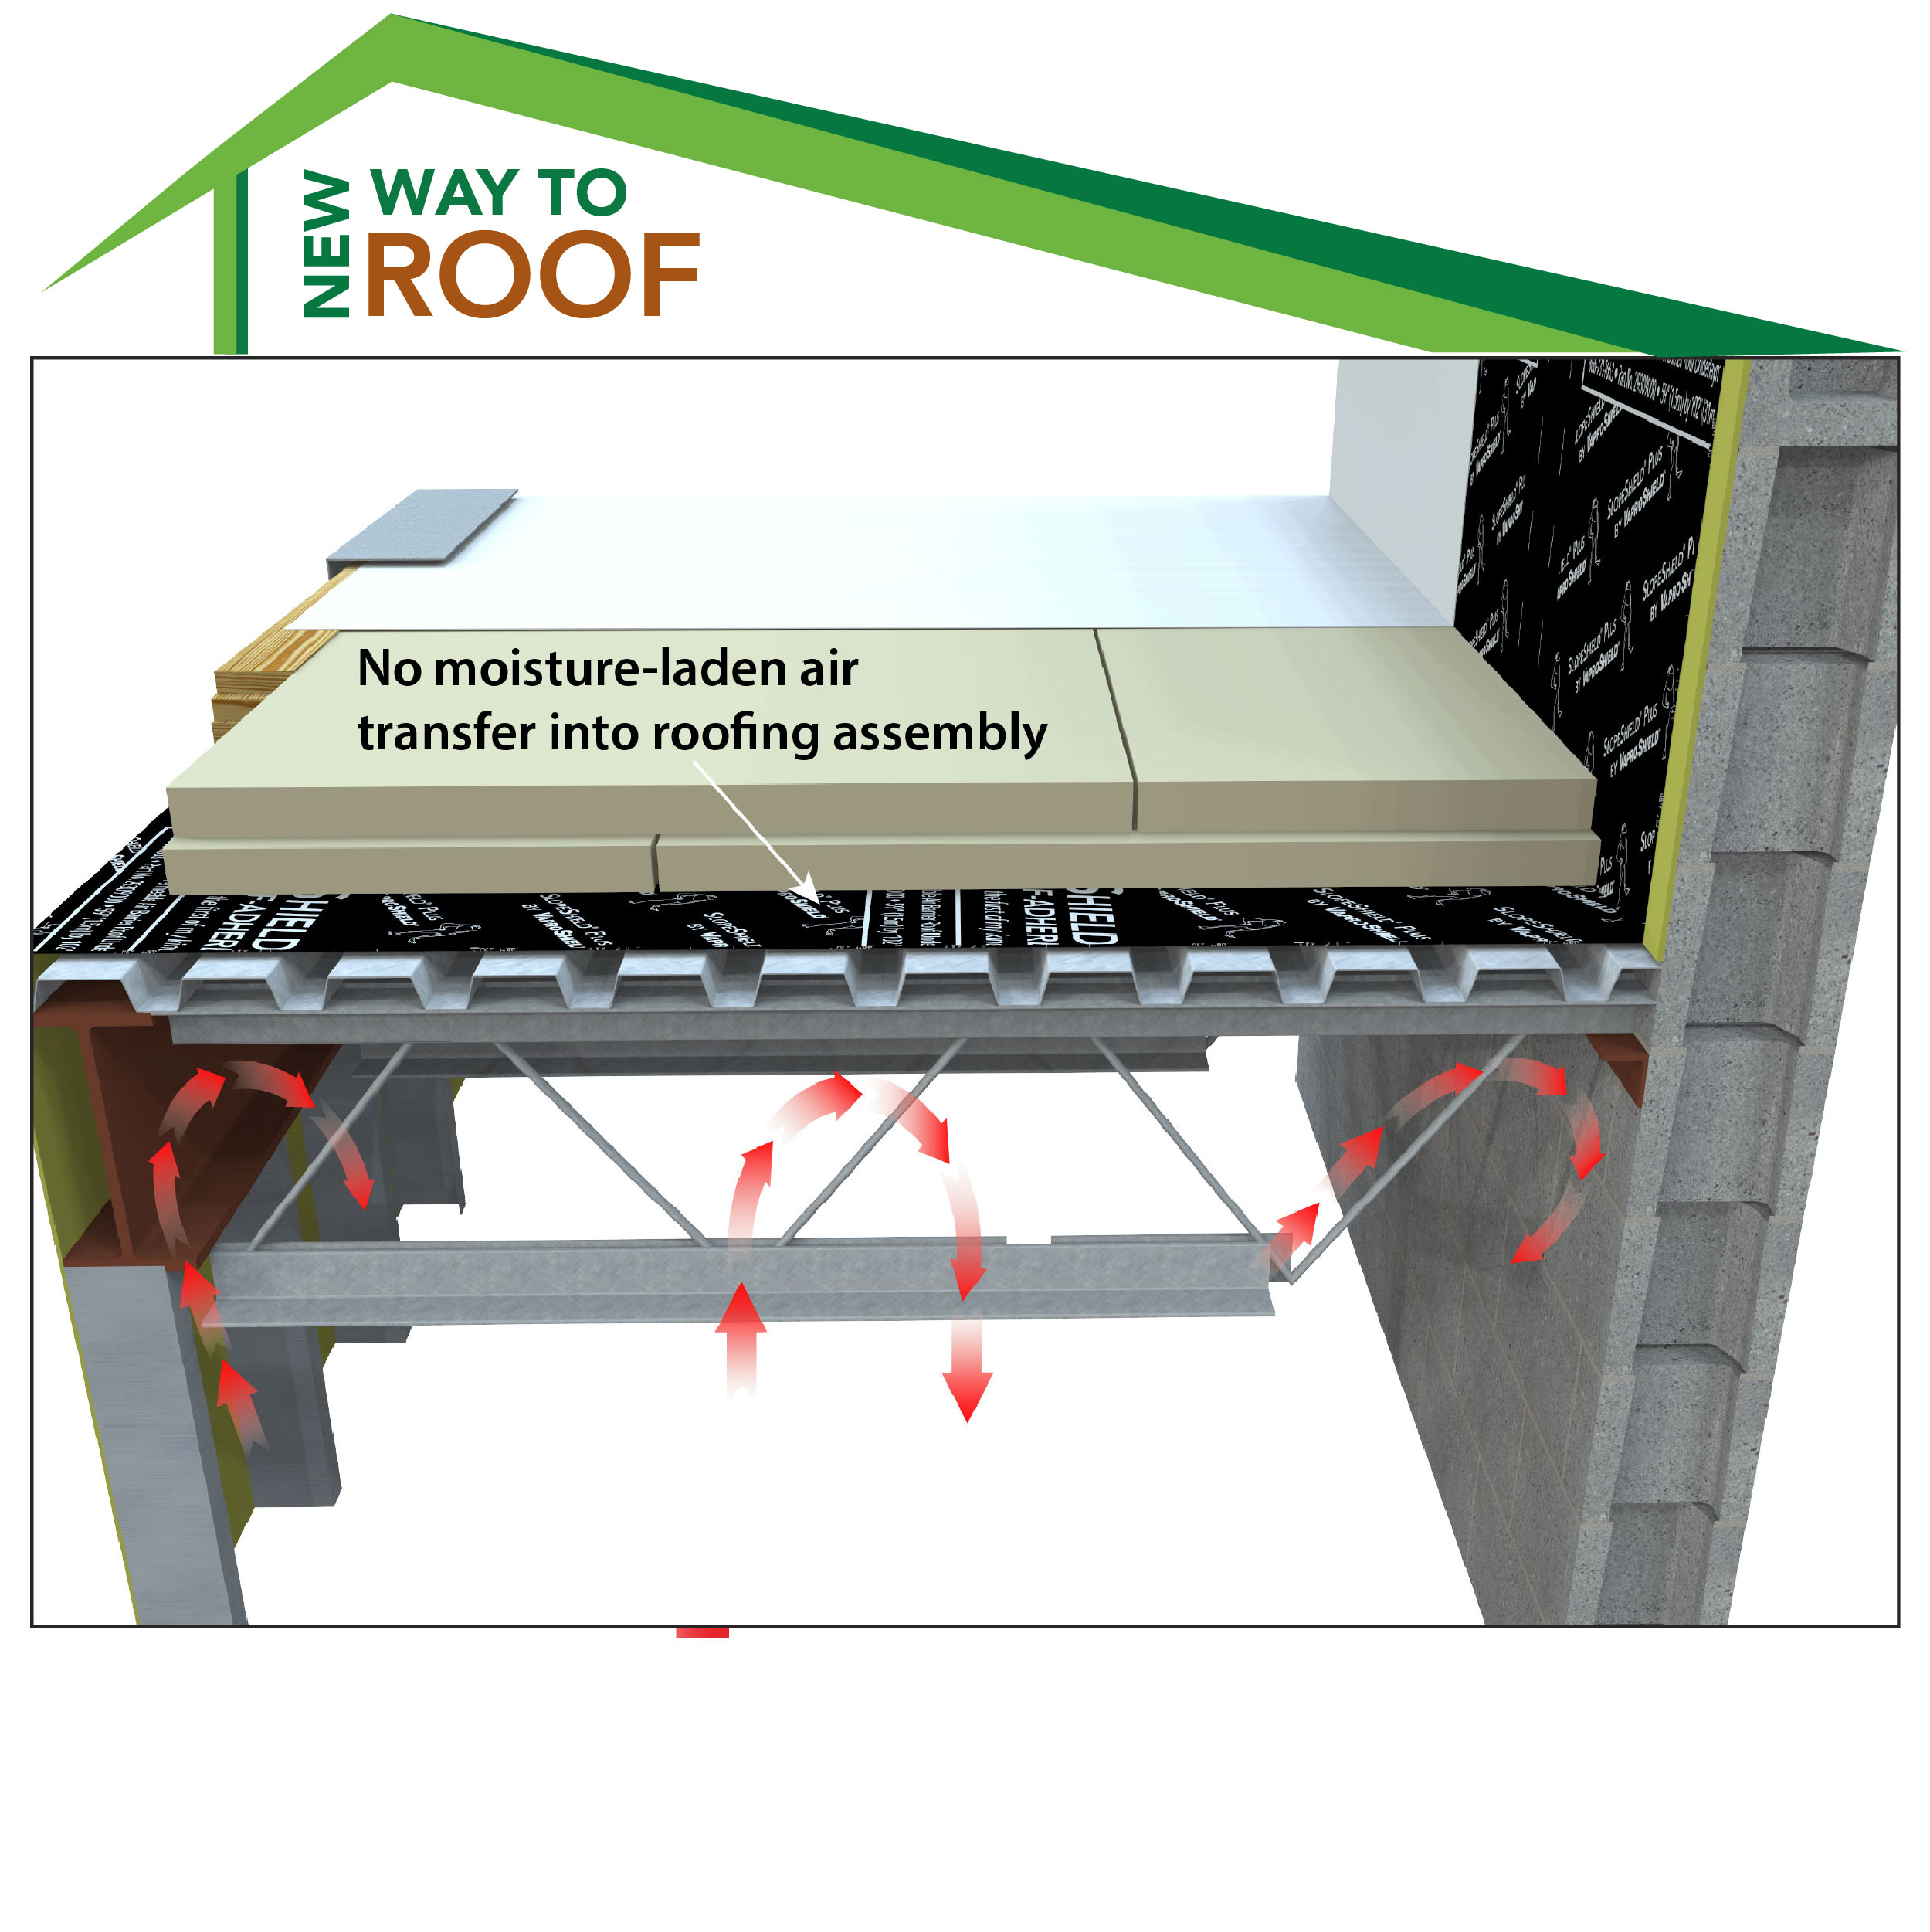 |
| This infrared image shows a properly designed and installed moisture control strategy for the roofing assembly. | Implementing Slopeshield Plus SA during the design phase, as a moisture control layer, blocks air and reduces moisture infiltration up to ~90%, enhancing roof resiliency and integrity. |
The SlopeShield Plus SA Difference
Moisture Protection Beyond the Surface
|
|
SlopeShield Plus SA functions as a continuous air barrier and permeable vapor retarder membrane:
|
|
Learn More About SlopeShield Plus SA for Your Application
Specify SlopeShield Plus SA in DIV 07 as Your Preferred Code-Compliant Continuous Air Barrier
|
|
|
|
|
|
Leadax Original Flashing Installation Instructions
Overview
- Leadax Original Flashing is installed and formed in a similar way to traditional lead flashing.
- Use your hands to pre-form Leadax Original flashing and the Leadax Dresser or Steel Pressure Roller to mold it into place.
- Temperature changes have little or no effect on the expansion or contraction of the product.
Roofing Materials
- Leadax Original flashing is suitable with all types of roofing materials (EPDM, bitumen, plastics and metals), only use High-Tack Hybrid Adhesive for fixation (not hot air)
- Leadax Original flashing can be used on all lead code 5 applications.
- For flat and low-slope roofs, seal edges and seams with High-Tack Hybrid Adhesive.
Preparation
- The ideal installation temperature is from 41°F (5 °C) and rising. Leadax Original flashing can be installed in temperatures as low as -4°F (-20°C), however forming Leadax Original flashing could be more difficult and require additional time.
- Ensure surface is dry and free of grease and dust before applying Leadax Original flashing.
Installation
- Installs up to 19.7ft (6m) without needing an overlap.
- Overlaps must be a minimum of 3.1” (80mm) and sealed with hot air or High-Tack Hybrid Adhesive.
- The recommended welding temperature is 800°F (425°C), depending on the ambient temperature. Use the Leadax steel pressure roller to press down the welding seam.
- In areas frequently exposed to wind, Leadax Original flashing can be secured using High-Tack Hybrid Adhesive.
- When molded or used as a facing material, it is recommended to secure with High-Tack Hybrid Adhesive.
- Use High-Tack Hybrid Adhesive to seal off any edges and seams.
- After application, remove the protective film from the face and reverse.
Subcategories