
pdf Printer Friendly (2.81 MB) (PDF)
Overview
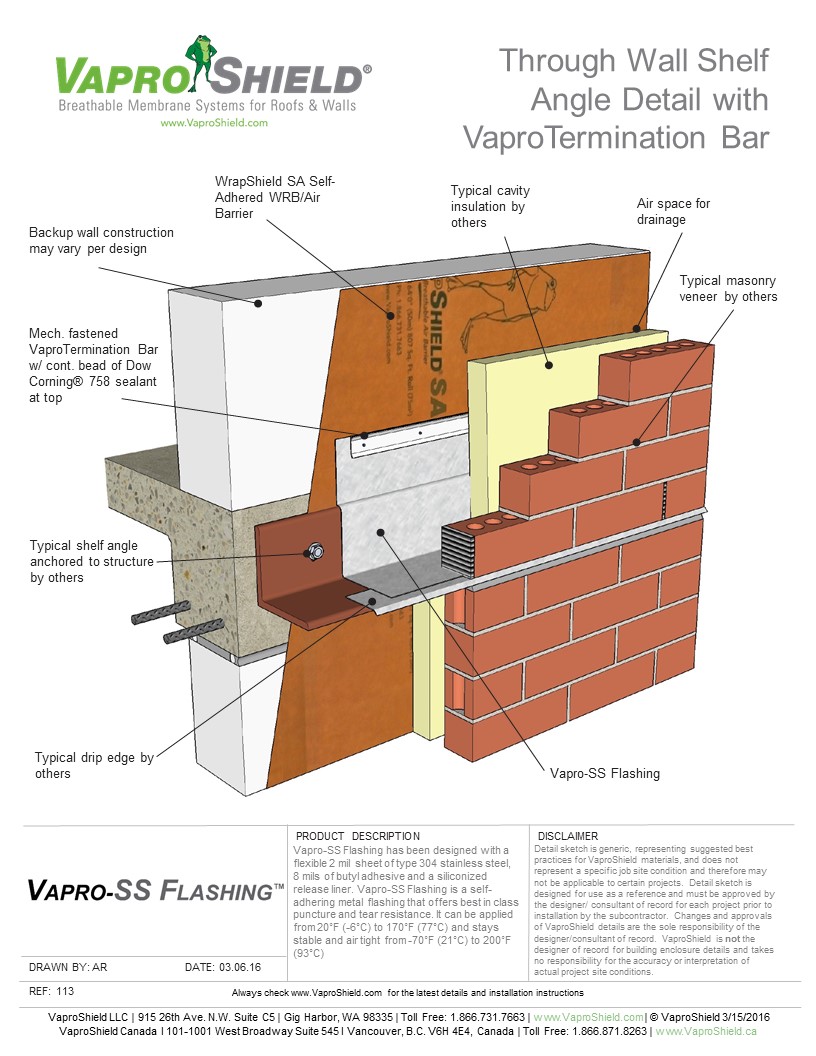
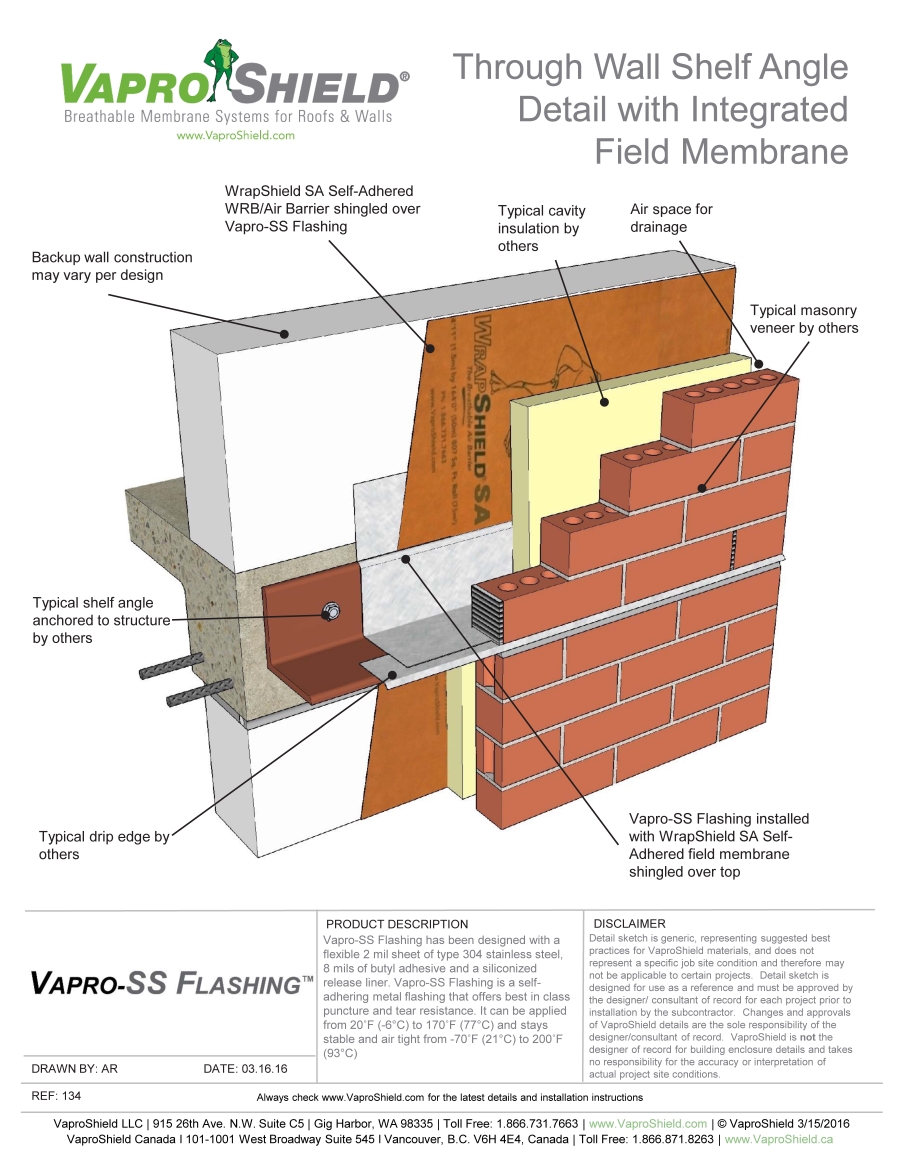
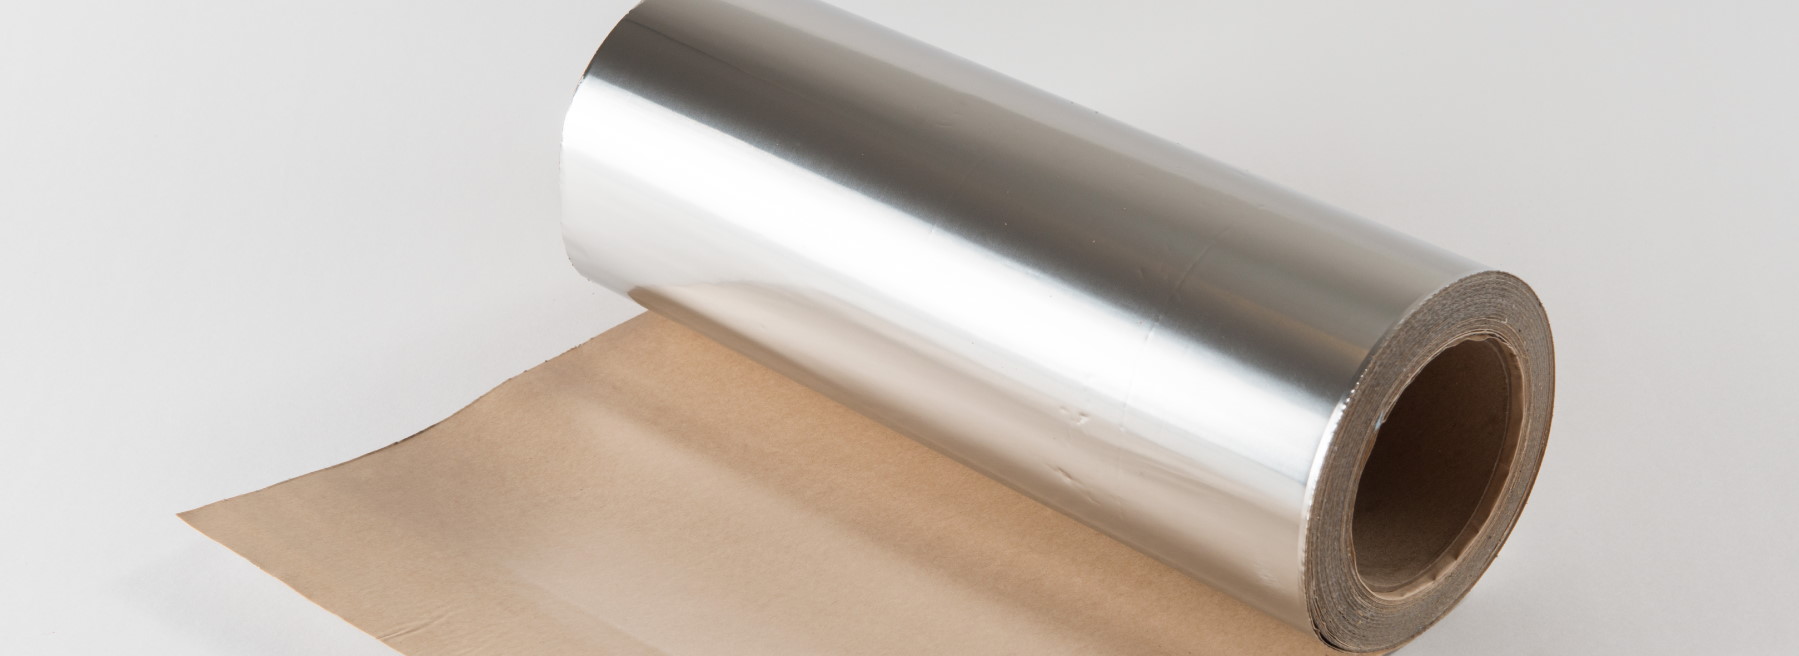
Vapro-SS Flashing has been designed with a flexible 2 mil (0.05 mm) sheet of type 304 stainless steel, 8 mils (0.20 mm) of butyl adhesive and a siliconized release liner. Vapro-SS Flashing is a self-adhering metal flashing that offers best in class puncture and tear resistance.
It is a multi-purpose self-adhered flashing that can perform in various applications, see below examples:
- Through-Wall Flashing for Masonry and Stone structural components
- Transition Membrane (air barriers, WRB, roofing membranes, plaza and below grade waterproofing)
- Curtain Wall Perimeter Flashing
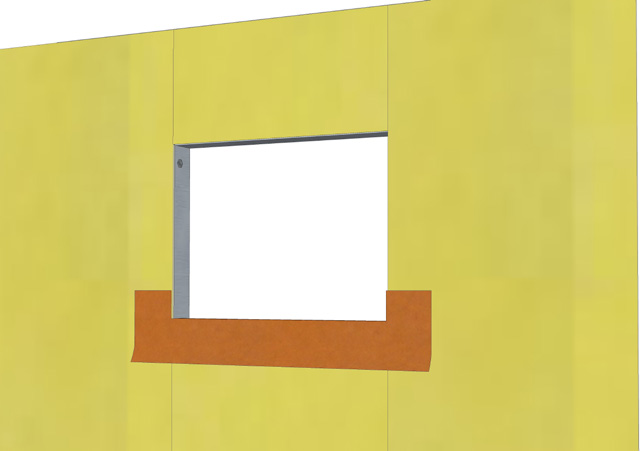
- Window and Door Pan Fabrication
- Jamb Closure Flashing
- Roof to Parapet Transition Flashing
Technical Data
- Flexible self-adhered flashing with a removable release liner that can be installed in temperatures ranging from 20 ˚F (-6 °C) to 170 ˚F (77 °C)
- Stays stable and air tight from -70 ˚F (-57 °C) to 200 ˚F (93 °C)
- Easily adheres to the majority of air barriers, WRB’s, sealants, insulations, below grade waterproofing and roofing membranes, which makes it an excellent transition flashing that is easy to install
- Provides a watertight bond, is mold resistant, fire resistant, and puncture resistant
- Available in 4, 6, 12, or 18 inches x 50 ft. (10, 15, 30 or 45 cm x 15.24 m).
Compatibility
- All VaproShield Materials
- Spray Polyurethane Foam
- Exterior Rigid Insulation
- Exterior Gypsum
- Plywood
- Concrete
- Metals
Storage and Handling
Store material in original packaging. Protect rolls from direct sunlight and inclement weather. Storage conditions:
- 0 ˚F (-18 ˚C) to 100 ˚F (38 ˚C)
- Cover within a few days of installation to protect it from damage from different trades, the environment and falling debris.
- If flashing is left unprotected and it is punctured or torn, contact VaproShield for replacement recommendations, 1-866-731-7663, ext. 5.
- Avoid placing the adhesive with other materials that have high plasticizer contents.
BEST PRACTICE INSTALLATION SEQUENCE
 |
 |
|
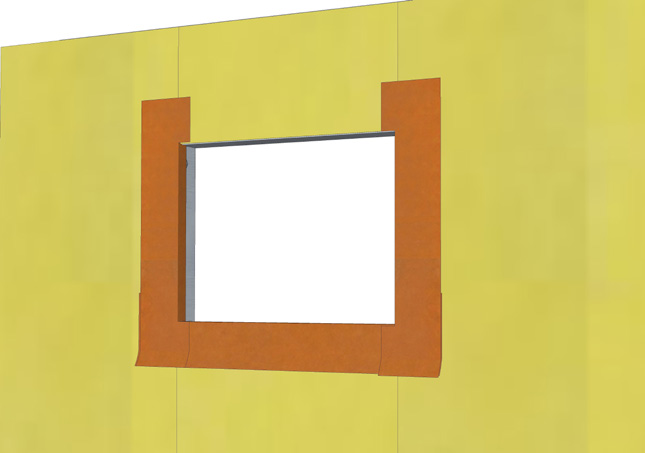
1. Install WrapFlashing SA Self-Adhered into sill with 2.75” folded into Rough Opening (R.O.) 9” left on face, with bottom 6” of release film to remain attached. |
2. Install jamb pieces with 2.75” folded into R.O. 9” to be left on face. |
 |
 |
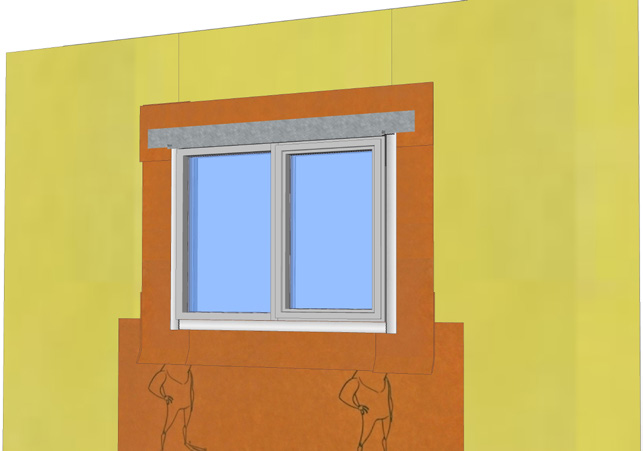
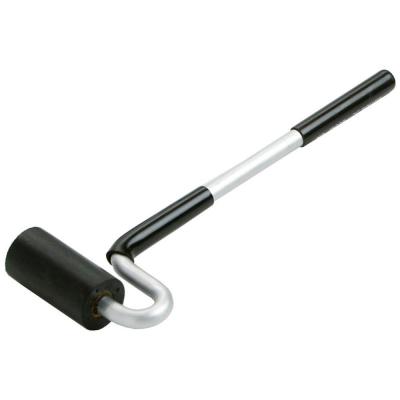
| 3. Install head piece with 2.75” folded into R.O. 9” to be left on face. Roll all WrapFlashing SA (orange) sections with weighted roller to ensure full contact. |
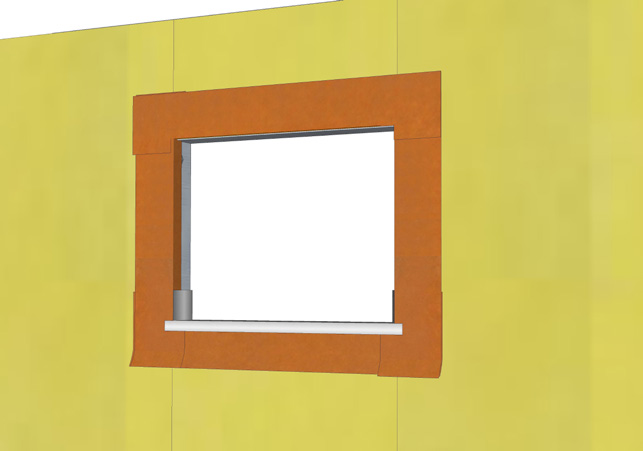
4. Install Vapro-SS Flashing at sill in shingle fashion with 3” up-turned legs at sill and head + 1” on face; jambs are 1” onto the face. See Cut Patterns Detail *To maintain continuity of air barrier system, while allowing for proper drainage at sill, a continuous interior window perimeter sealant joint with backer rod is required. **To determine width dimension of Vapro-SS Flashing required; Measure the depth that the window projects into the rough opening from the exterior face of the wall and add ½”. |
 |
 |
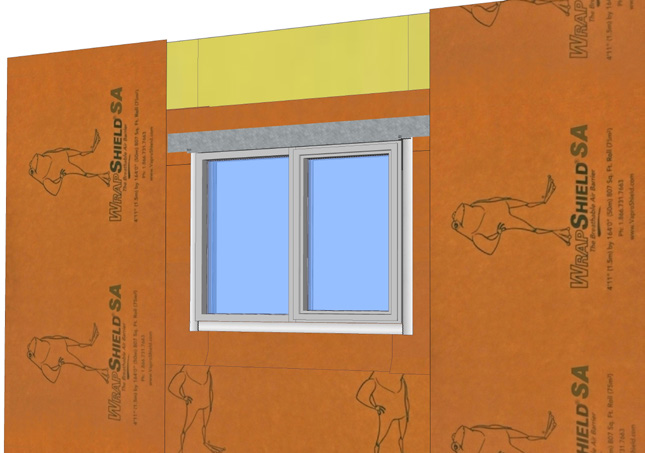
| 5. Install Vapro-SS Flashing at jambs in shingle fashion with 3” up-turned legs at sill and head + 1” on face; jambs are 1” onto the face. |
6. Install Vapro-SS Flashing on head in shingle fashion with 3” up-turned legs at sill and head + 1” on face; |
 |
 |
|
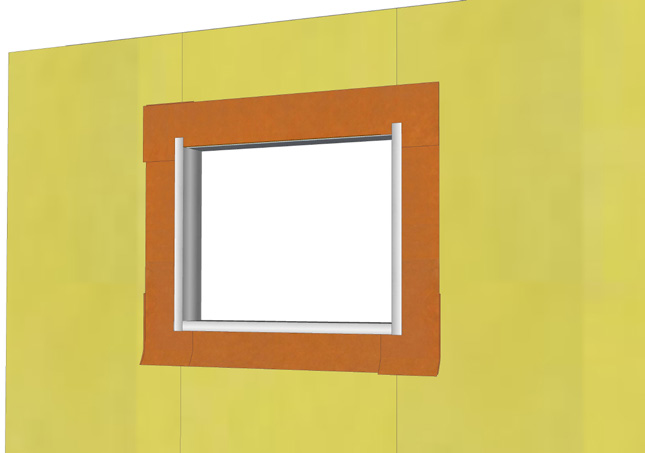
7. Install field membrane underneath 6” flap of sill flashing to create shingle effect, remove release film, adhere to membrane, roll to ensure adhesion at seams (overlaps). |
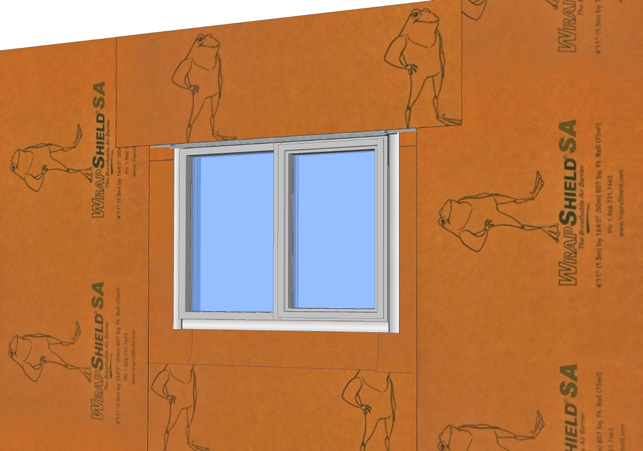
8. Install field membrane vertically to sheathing, maintaining 3” minimum overlap with R.O. flashing, roll to |
 |
|
|
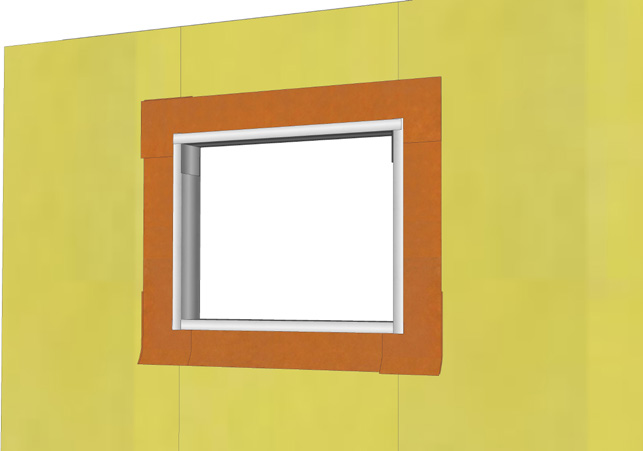
9. Install WrapShield SA field membrane over metal head flashing, maintaining 3” minimum overlap to adjacent field membrane. roll to ensure adhesion at seams (overlaps). |
|
|
*Roll all WrapFlashing SA (orange) sections with weighted roller to ensure full contact. |
|
Rough Opening Cut Patterns