


pdf
Printer Friendly
(1.45 MB)
(PDF)
pdf
Printer Friendly Spanish
(1.92 MB)
(PDF)
pdf
Printer Friendly French
(1.79 MB)
(PDF)
Overview
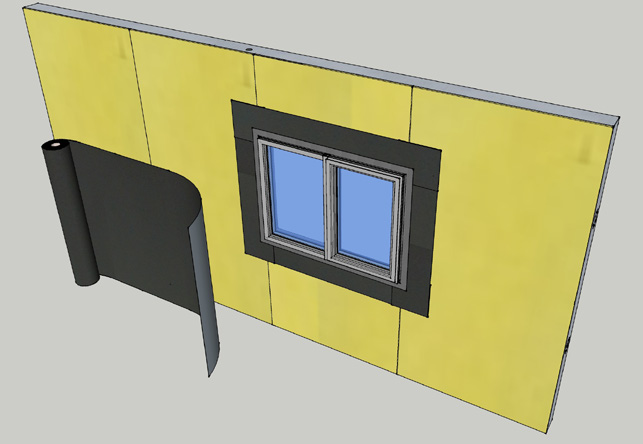
RevealShield IT Integrated Tape is a high performance, mechanically attached Weather Resistive Barrier (WRB) and Air Barrier (AB) material specifically designed for open joint cladding systems where the reveals between cladding panels or boards are exposed to UV light. The black UV stable coating provides long term performance against UV degradation while protecting the walls from liquid water intrusion.
Recommended for applications requiring a high level of vapor permeability, RevealShield IT Integrated Tape provides the protection necessary behind an open joint rain screen design. The integrated tape located at the horizontal overlaps makes it easier than ever to limit air infiltration with a mechanically attached membrane.
Best Practices
- Install RevealShield IT Integrated Tape with approved fasteners in a horizontal, shingle fashion.
- Plan prior to installation to minimize waste and ensure all interfaces and penetrations are identified and detailed correctly to protect against water and air infiltration.
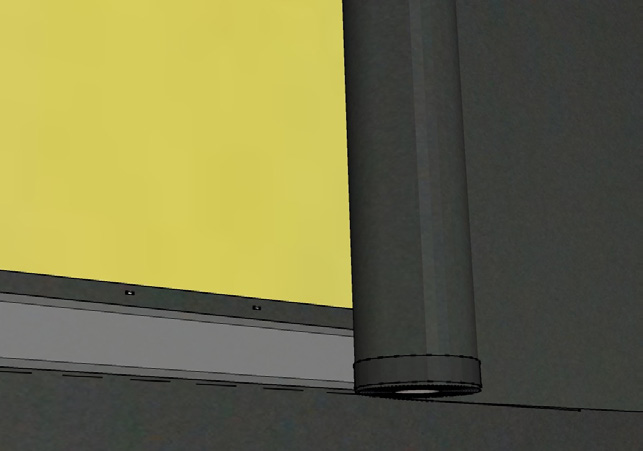
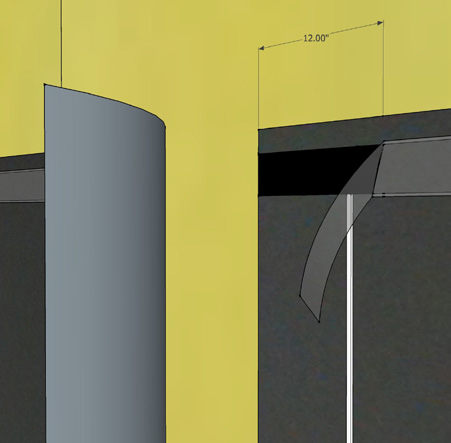
- Horizontal overlaps must be at 6” to properly seal the Integrated Tape joint.
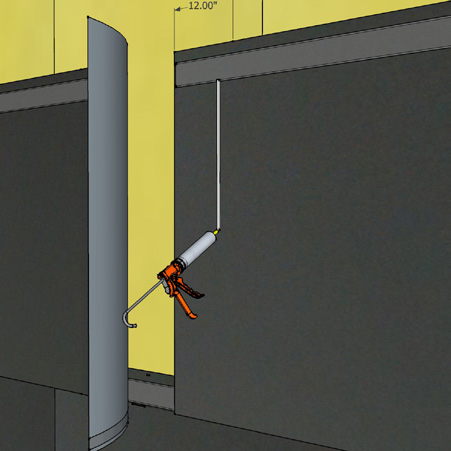
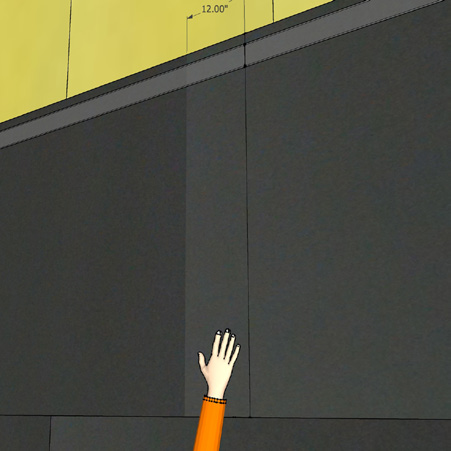
- Vertical overlaps are to be 12” minimum and require VaproBond adhesive sealant, to provide an air barrier seal. Vertical overlaps are to be staggered a minimum of 24” and should not occur directly above or below windows or doors.
- Inside and outside corners can be continuous, or if a vertical joint occurs within 24” horizontally, an overlap of 12” minimum in both directions is required, providing a double layer at the corner.
- Cladding attachment components are to be counted in the overall attachment requirements.
- RevealShield IT Integrated Tape must be correctly shingled with all openings, penetrations and flashings to deflect liquid water to the main drainage plain and ultimately to the exterior of the building.
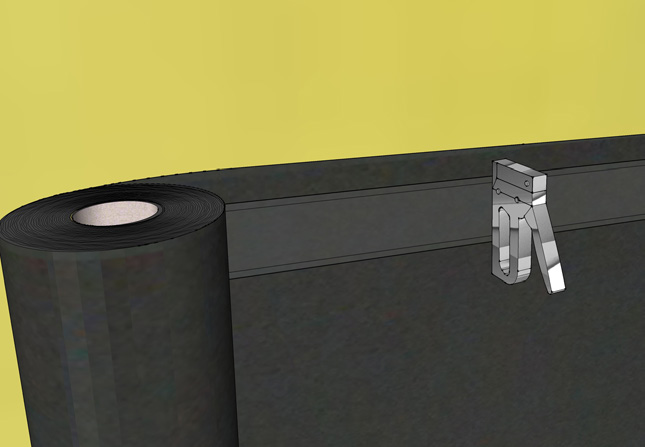
- Always install RevealShield IT Integrated Tape in a “shingle fashion” with the upper courses lapped on top of the courses below, use the dotted line provided at 6” below the top edge.
- Immediately roll the integrated tape horizontal seams with floor roller to ensure full contact to prevent moisture and air infiltration.
- Sustains six (6) months (180) days UV and climate exposure prior to cladding installation.
- If desired adhesion is not attained between membranes due to site conditions, VaproShield recommends applying a bead of VaproBond as an additional solution to pressure rolling.
Substrate Information
RevealShield IT Integrated Tape can be installed over multiple substrates including: plywood, OSB, framing lumber, gypsum sheathing, rigid insulation, and semi-rigid insulation (mineral fiber).
RevealShield IT Integrated Tape can be installed over wet substrates to further limit water intrusion and to allow the substrate to dry during construction. The following procedures are recommended:
- The roof of the structure should be completely dried-in by either temporary measures or permanent installation, in order to prevent water intrusion throughout
the remainder of construction. - Window and door rough openings should be protected against water intrusion by temporary or permanent measures throughout the remainder of construction.
- Proper means and methods of drying the entire structure sufficiently prior to closing up the building enclosure are the responsibility of the General Contractor.
Requirements For All Open Joint Systems
Open joint cladding systems will allow liquid water to contact the secondary protective layer of the WRB/AB anytime there is a rain event. High quality workmanship by the installers of the WRB/AB is absolutely necessary. Fastener penetrations that do not provide an adequate water and air tight seal alone will require additional measures such as sealant or self-sealing tapes at these locations. Please consult the VaproShield Technical Dept. for recommendations.
- All windows, doors and other penetration flashings need to be installed in shingle fashion to direct water to the exterior.
- Maximum open joint size between cladding components is up to 2” horizontal and ½” vertical open joints.
- Maximum percentage of WRB/AB open area allowed is 40% of total wall area.
- Ensure a minimum 1/2” inch deep rain screen drainage cavity system is incorporated in all RevealShield WRB/AB installations.
Fastening Guidelines
RevealShield IT Integrated Tape is mechanically fastened to the substrate. Stainless steel staples or cap nails may be used as temporary fasteners during installation but only at locations that will be covered by the shingling of the next layer of material. See the sequential installation details below.
DO NOT place fasteners in the Integrated Tape overlap area prior to removing release film and sealing Integrated Tape seam. Fasteners placed in the tape area can tear the release film during removal, resulting in a poor seal. Place fasteners in the overlap area after the Integrated Tape release film is removed and the horizontal joint is sealed.
Exposed fasteners for the RevealShield IT Integrated Tape WRB/AB will require VaproCaps and #6,#7, or #8 size corrosion resistant bugle headed screws of the appropriate thread design and length for the underlying substrate and framing material.
VaproCaps™ are washers that have been extensively tested for both water and air leakage. Substitutions are not recommended.
Cladding attachments that penetrate the WRB/AB should be factored into the overall fastening quantity and placement. Quantity and placement of fasteners will vary depending on the following variables:
- Length of time the installed RevealShield IT Integrated Tape WRB/AB will be exposed prior to cladding attachments installation such as: furring strips, battens, hat channels, masonry ties, metal extrusions, etc.
- Spacing between the cladding attachments (i.e. 16", 24", 32" o.c., etc.)
- Type and material chosen for exterior cladding
- Local weather conditions
- Plywood and OSB sheathing applications: Use coarse threaded bugle head design wood screws in the above mentioned sizes, install with VaproCaps only in the sheathing, without contacting the underlying framing members.
Gypsum Sheathing and Metal Framing: Use self-drilling fine threaded screws in the above mentioned sizes and shape with VaproCaps installed into the underlying metal framing or strapping.
Fasteners for VaproBattens™, furring strips, cladding clips, hat channels, etc. should be evaluated for liquid water holdout properties before selection or installation. Gasketed fasteners are recommended whenever possible.
BEST PRACTICE INSTALLATION SEQUENCE FOR REVEALSHIELD IT INTEGRATED TAPE
 |
|||
| 1. Begin installation at the base of the wall, progressing in a shingle fashion upwards |
|||
 |
 |
||
| 2. Install with SS staples in the top 2" above the Integral Tape. Avoid stapling in the tape area. | 3. Line up the bottom of the upper course of material with the dotted line, creating a 6" overlap. | ||
 |
 |
||
| 4. Overlap vertical seams by 12" minimum. Apply VaproBond adhesive sealant bead just below Integrated Tape line at the vertical seam joint. | 5. Apply VaproBond adhesive sealant in a single bead down the membrane to the bottom of the sheet. | ||
 |
 |
||
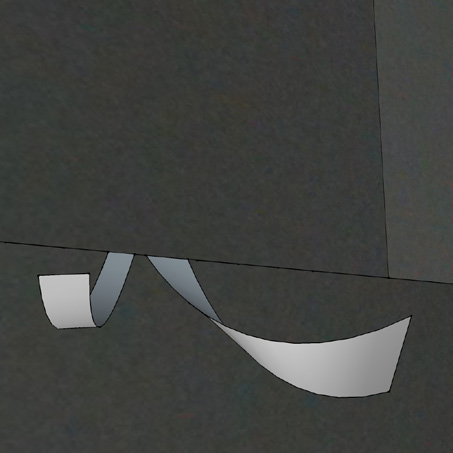
| 6. Lay overlapping layer of WrapShield IT onto vertical sealant joint and smooth with hand pressure | 7. Join horizontal seams by peeling back both release films, starting from where horizontal joint meets vertical joint. | ||
 |
 |
||
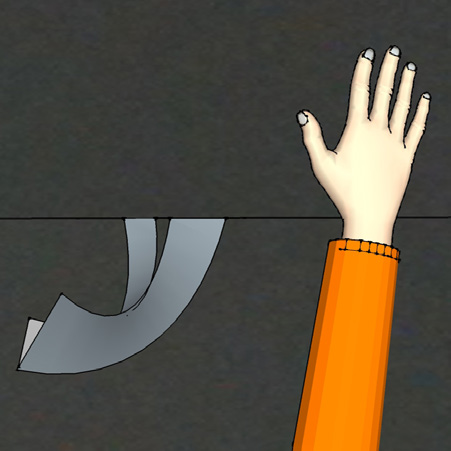
| 8. Line up both release films together so they can be pulled down the wall with one hand. | 9. Use the opposite hand to smooth the two layers together as the release film is removed. | ||
 |
 |
||
| 10. Smooth out wrinkles with hand pressure. | 11. Immediately roll the integrated tape horizontal seams with floor roller to ensure full contact. | ||