
pdf Printer Friendly PDF (3.11 MB)
Overview
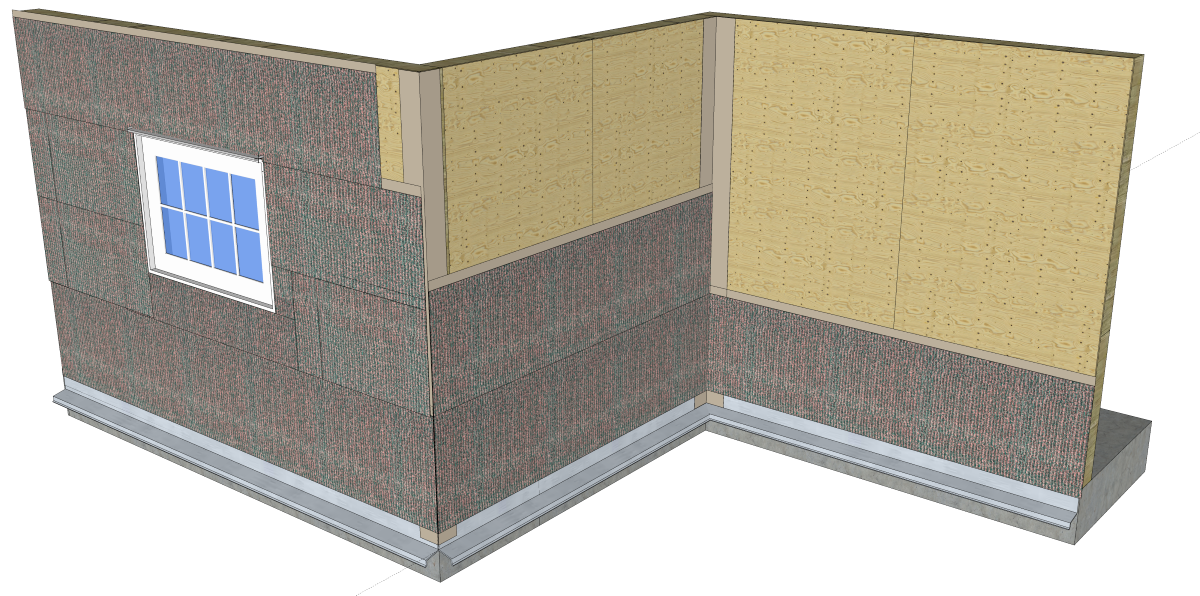
RainScreen SA (RSSA) consists of multiple layers of spun-bonded polypropylene with specially formulated adhesive and factory bonded 3mm or 7mm drainage mesh.
Rolls are 29 ½” wide or 26 ½" wide with a 2” selvedge.
The drainage mesh easily detaches for shingle fashion method of integration of window flashing, pipe and conduit penetration sealing.
Installation Best Practices
- Install material in a shingle fashion, horizontally, from bottom to top.
- Installation layout should be planned prior to application to minimize waste, this process will assist locating penetrations that will need to be correctly detailed to ensure a weather and airtight installation. Snap chalk lines to ensure a level installation.
- RainScreen SA lends itself to a plank and pump jack installation method, scaffolding or scissor/boom lift access.
- During the installation process, RainScreen SA must be protected at the leading edge to ensure liquid water does not travel behind the membrane.
- Trim drainage mesh to maintain a consistent cavity depth, do not install double layers of the drainage mesh as this could transfer through to the cladding components and negatively impact the installation aesthetics.
- The pressure sensitive primerless adhesive provides repositioning ability, prior to rolling in place with good initial tack to ease installation.
- Install vertical 12" RSFlashing strips at inside and outside corners prior to installing horizontal courses of RSSA material.
- Stopping and starting each horizontal run at corners will limit wrinkles and ensure a level and tight installation.
- Always install material in a “weatherboard or shingle fashion” with the upper courses lapped over the 2" selvedge of the course below.
- All penetrations including windows and doors must be flashed in proper sequence to ensure a “weatherboard or shingle fashion” end result.
- When reattaching drainage mesh, use a stapler or hammer tacker to reposition mesh until cladding is installed.
- Roll membrane and drainage mesh with two-handed roller to ensure proper adhesion to the substrate especially in cold climate applications. Install cladding as soon as practical. A maximum of 60 days of exposure to the elements is allowed prior to cladding installation.
- If desired adhesion is not attained between membranes due to site conditions, VaproShield recommends applying a bead of VaproBond as an additional solution to pressure rolling.
Storage
Store material rolls on end in original packaging. Protect rolls from direct sunlight and inclement weather until ready for use.
Substrate Information
Substrates must be clean and free of any contaminants.
Substrate surface must be dry to the touch with the ambient temperature above 20°F (-6°C).
PRIMER IS NOT RECOMMENDED OR REQUIRED
Substrates
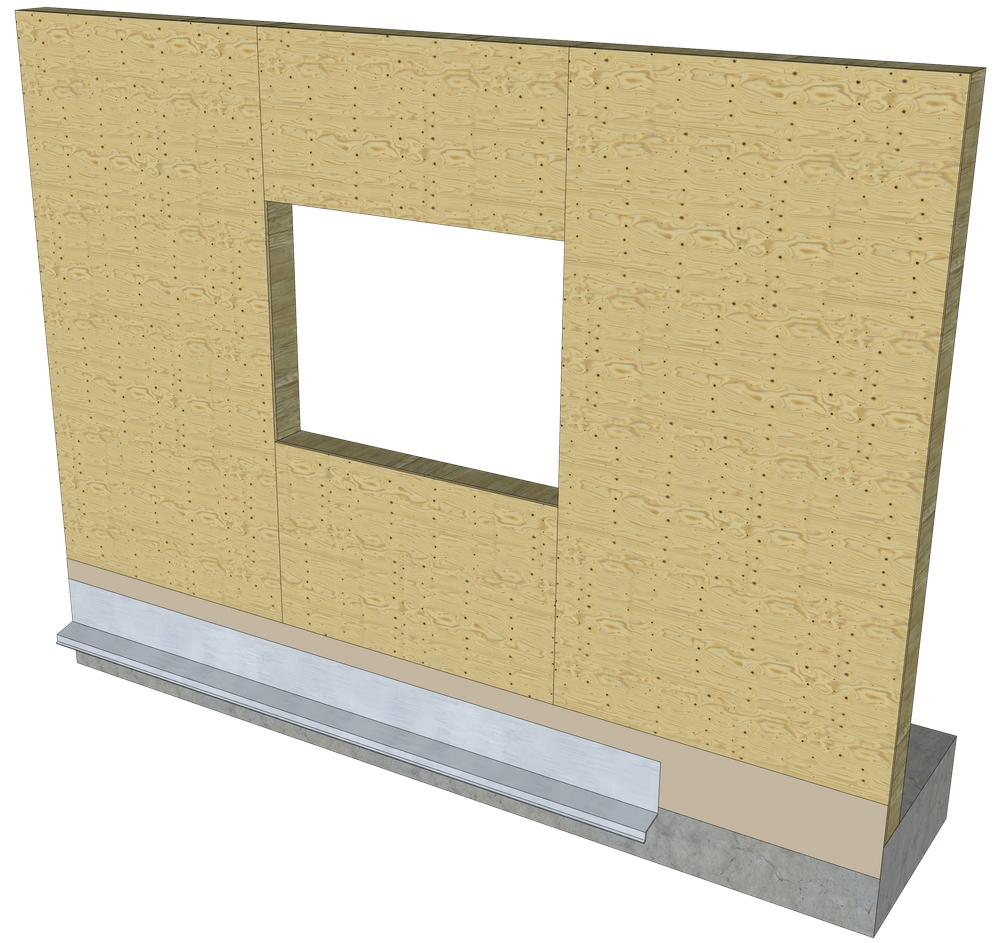
- Exterior Gypsum Sheathing
- Brick
- Rigid Insulation
- Plywood
- OSB
- Metal (Steel, Aluminum)
- Concrete
- Fiberglass Window and Door Frames
Adhesive Curing Time
Full adhesion will vary depending on job site weather conditions.
Floor Line Movement
View details for floor line and seismic joints here.
Penetrations and Flashing
Important Note:
VaproShield recognizes there are many acceptable ways to flash a window or other penetrations in the WRB/AB of the enclosure. Best practices require continuity in the installed assembly for both air and water resistance. This includes correct sequencing for a shingle fashion method of installation. The following installation sequence demonstrates the best practices for flashing a window rough opening. For additional installation details, click here.
Best Practice Installation Sequence for RainScreen (RSSA)
 |
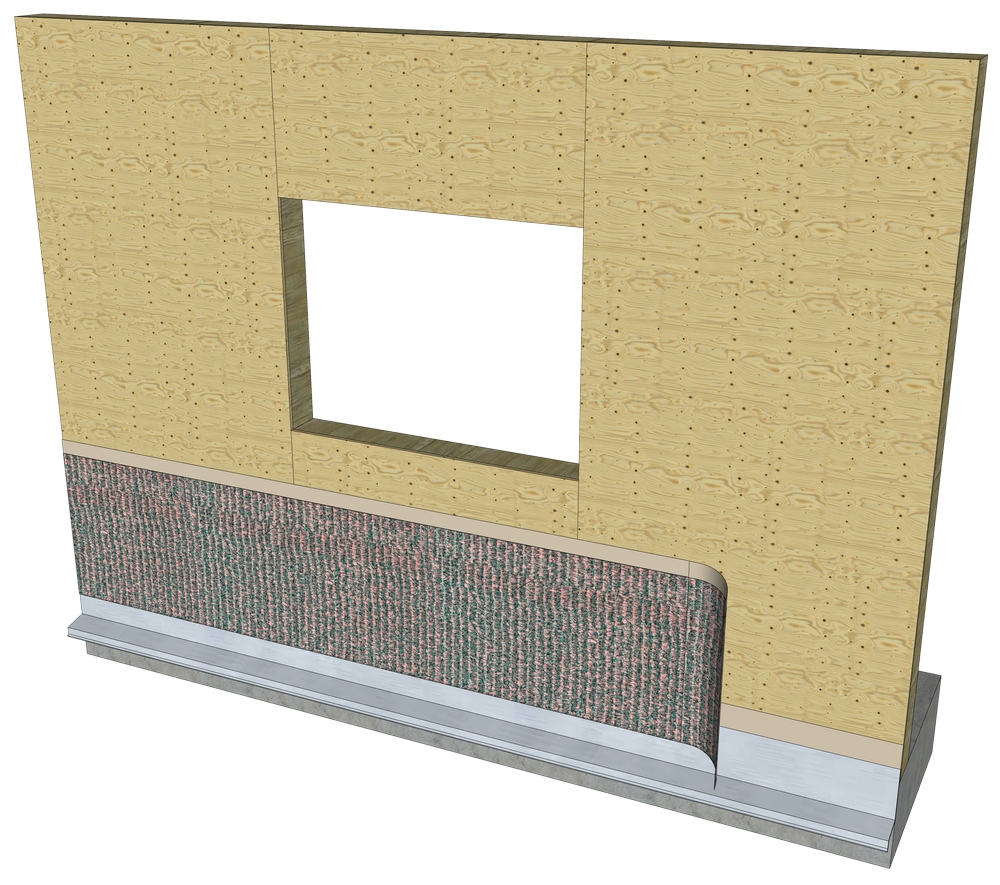 |
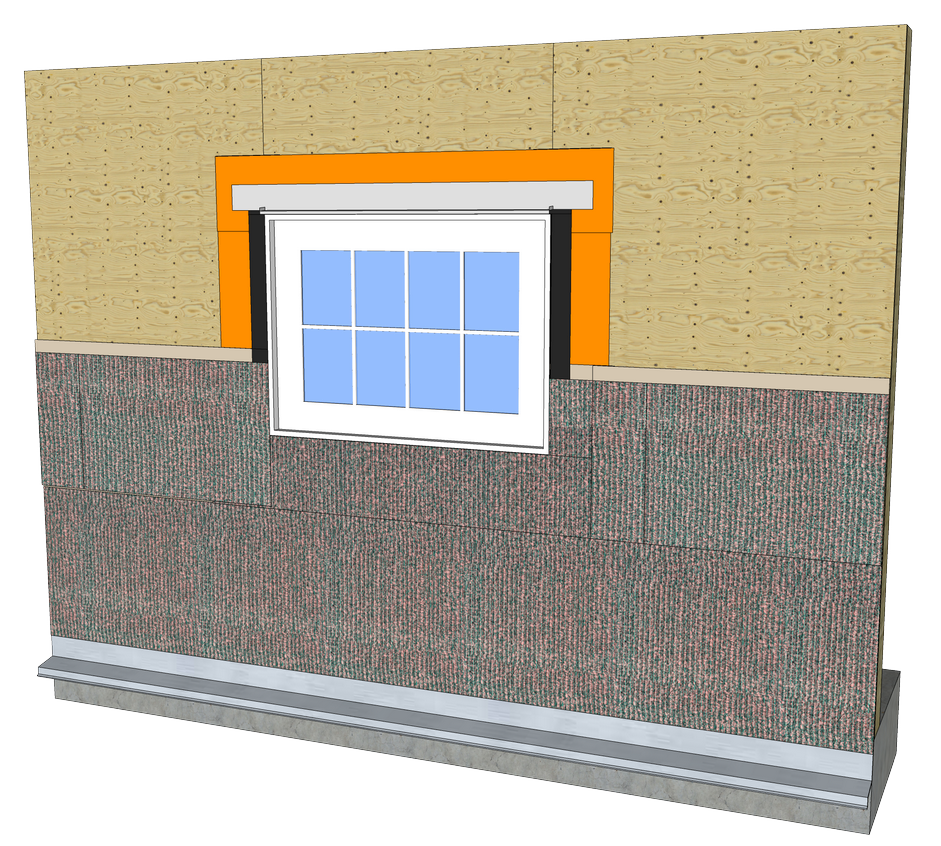
| 1. Install WrapFlashing SA course at base of wall to foundation. Install metal flashing by others. | 2. Install first course of RSSA field material overlapping base flashing by 2" min. |
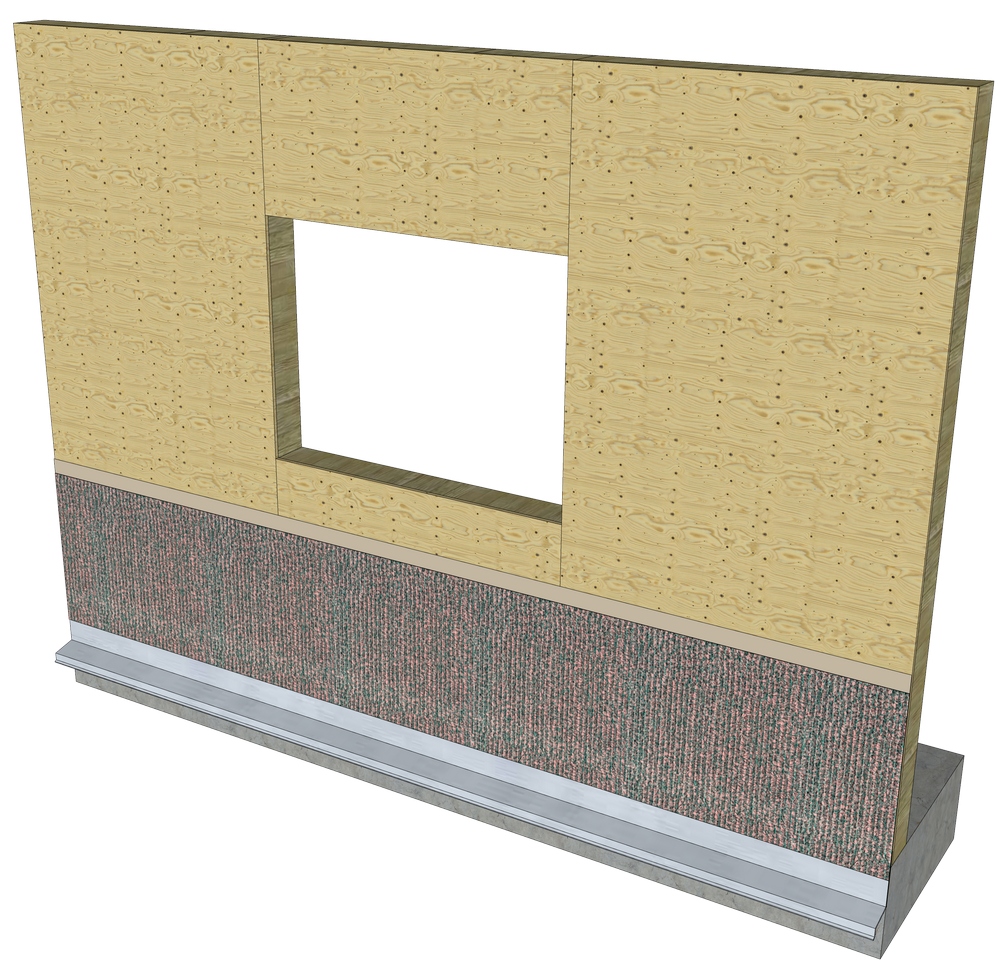 |
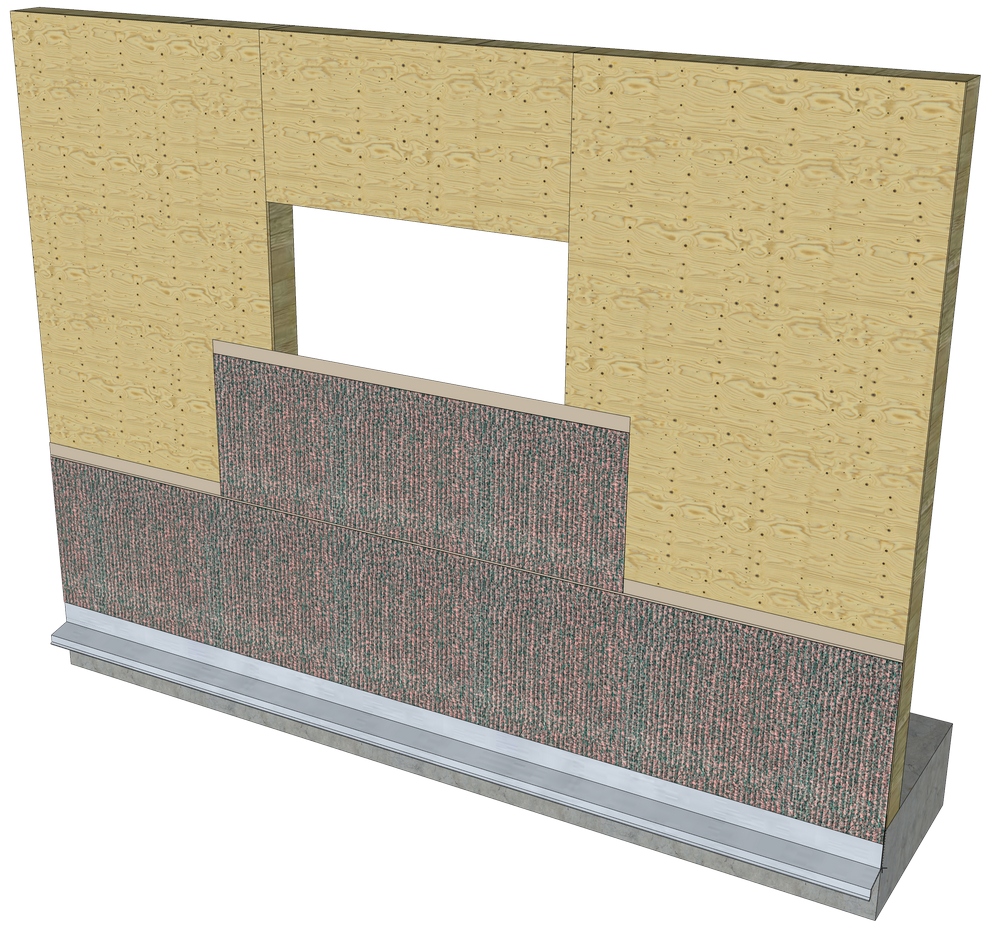 |
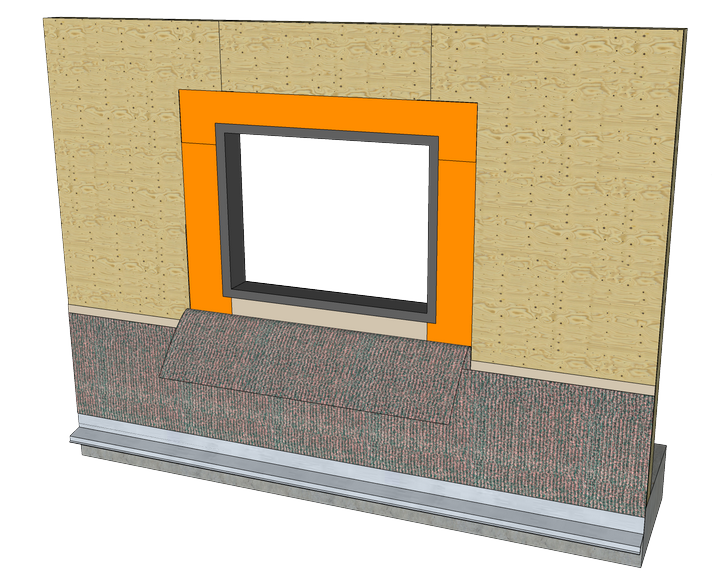
| 3. Measure window width and add 24". Cut next piece of RSSA to this dimension. | 4.Install cut piece over window rough opening leaving 12" each side. |
 |
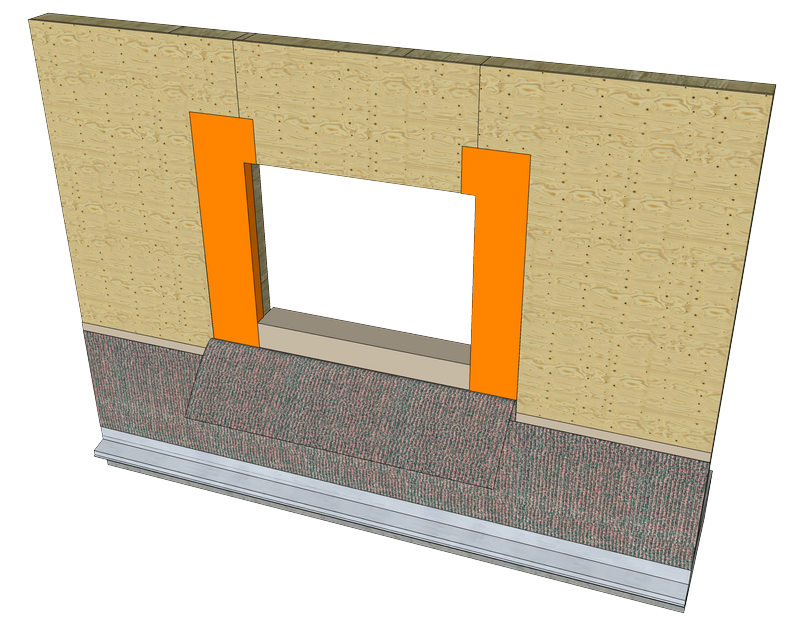 |
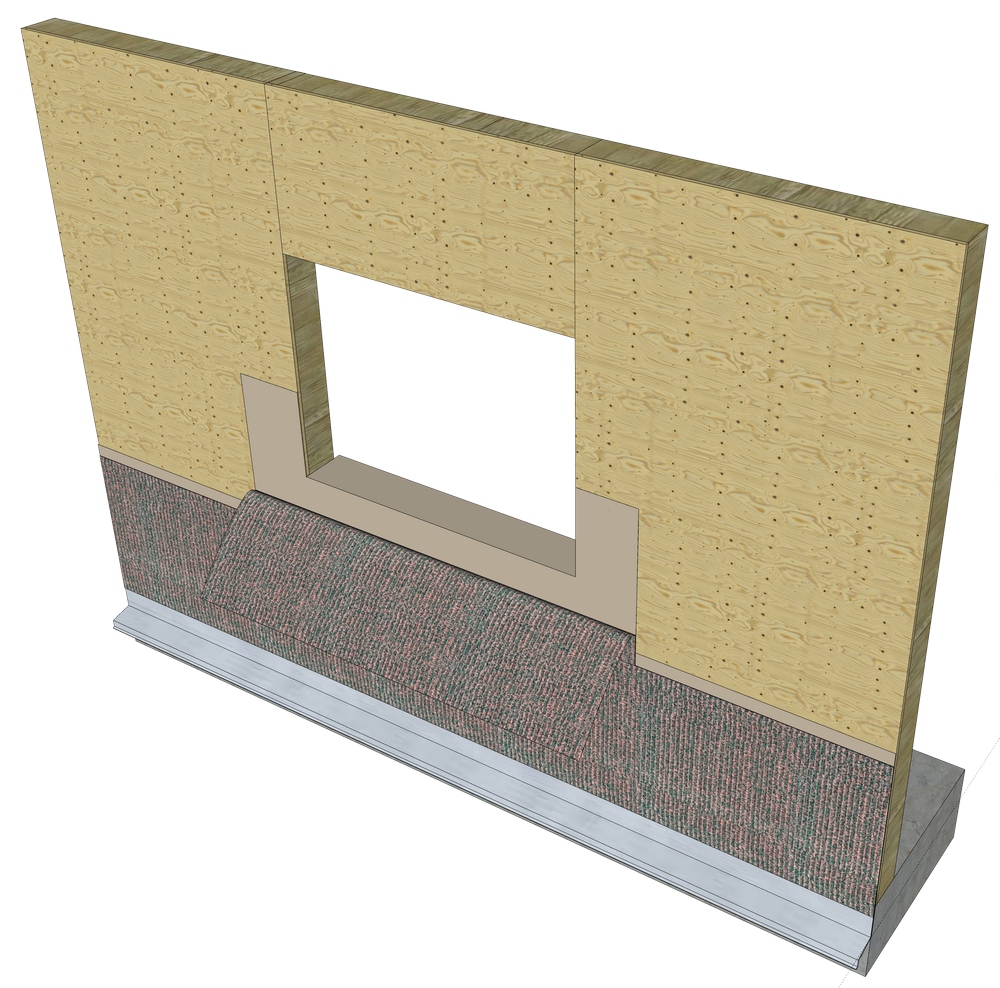
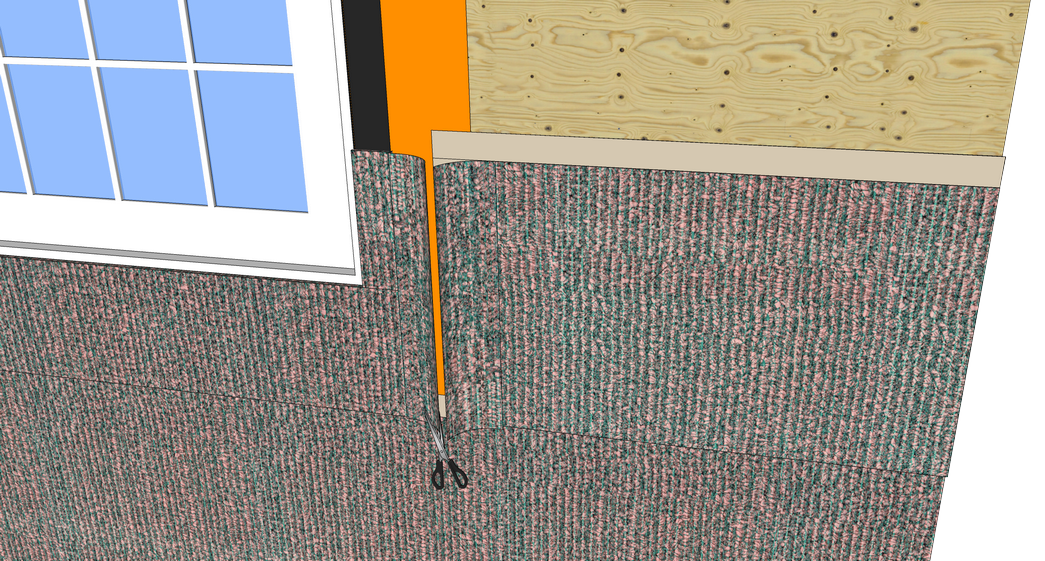
| 5. Carefully detach mesh and fold down 2" below sill. Cut WRB/AB material flush with jambs and fold into sill. | 6. Install WrapFlashing SA at jambs as shown. Cut at sill and head and fold into rough opening. |
 |
 |
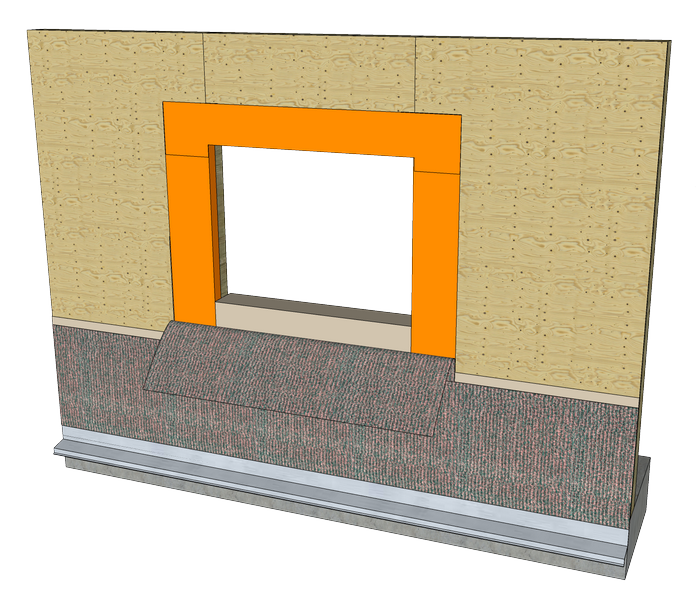
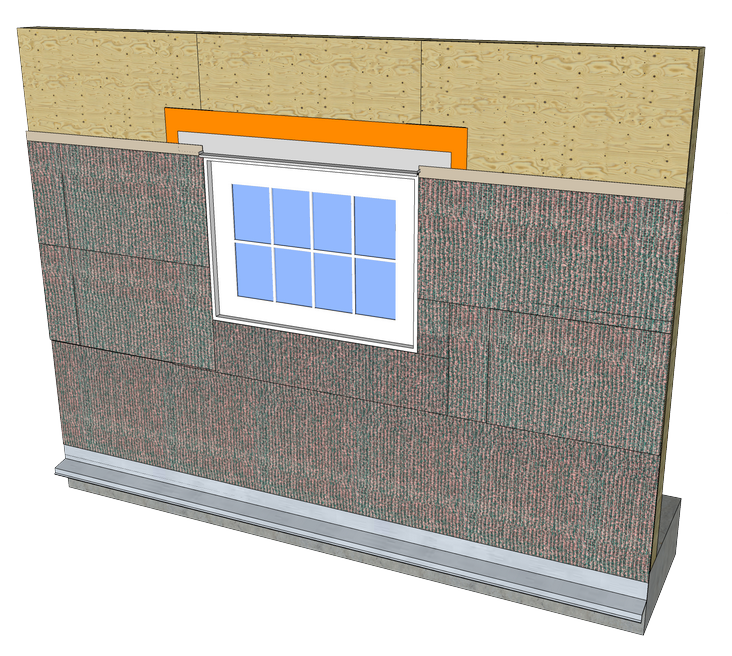
| 7. Install WrapFlashing SA at head as shown. Cut at jambs and fold into rough opening. | 8. Install VaproLiqui-Flash in rough opening as shown. |
 |
 |
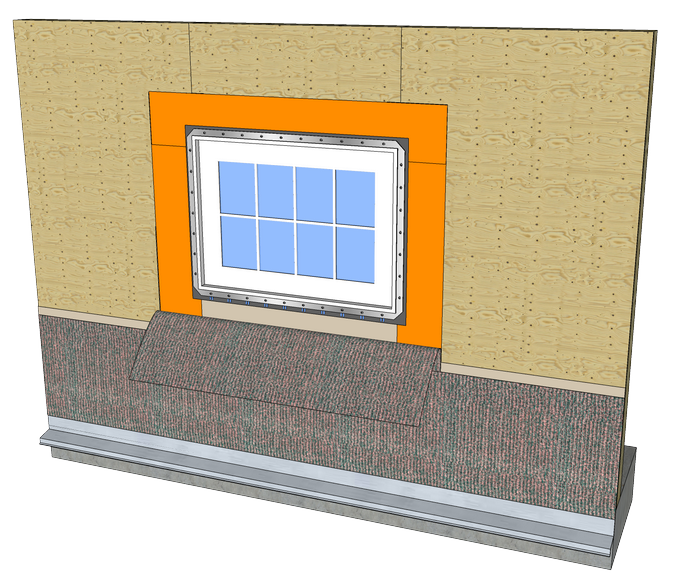
| 9. Install window per manufacturer's instruction. | 10. After window installation, seal nail flanges at jambs and head with VaproLiqui-Flash or VaproTape. |
 |
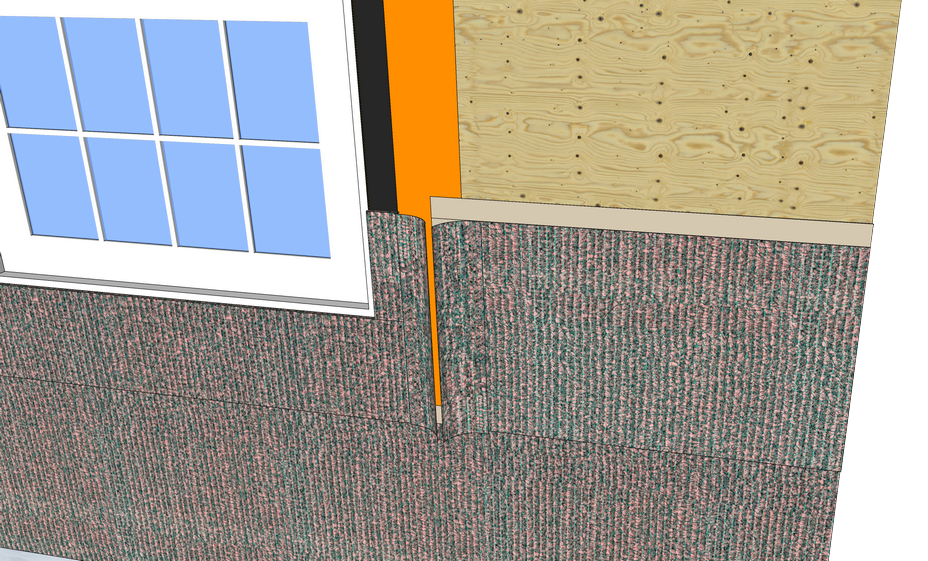 |
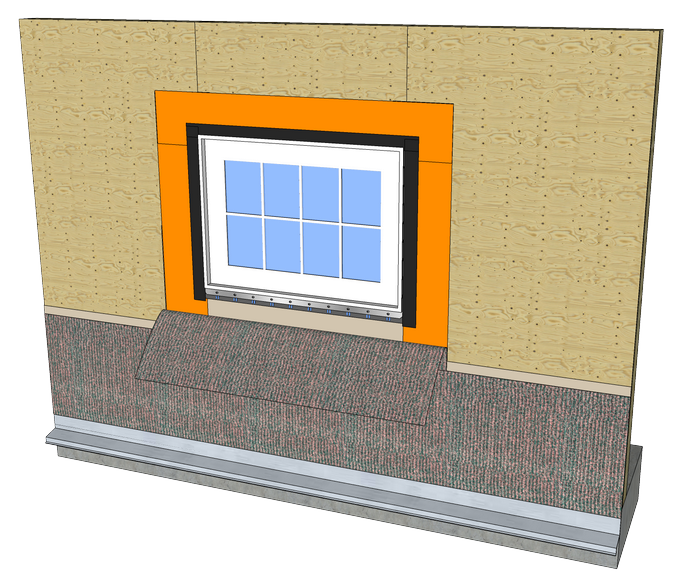
| 11. Fold drainage mesh back onto wall trimming around window frame. Tack mesh in place with stapler or hammer tacker. | 12. Install adjacent pieces of RSSA material. Pull mesh back and overlap WRB/AB a minimum of 3". |
 |
 |
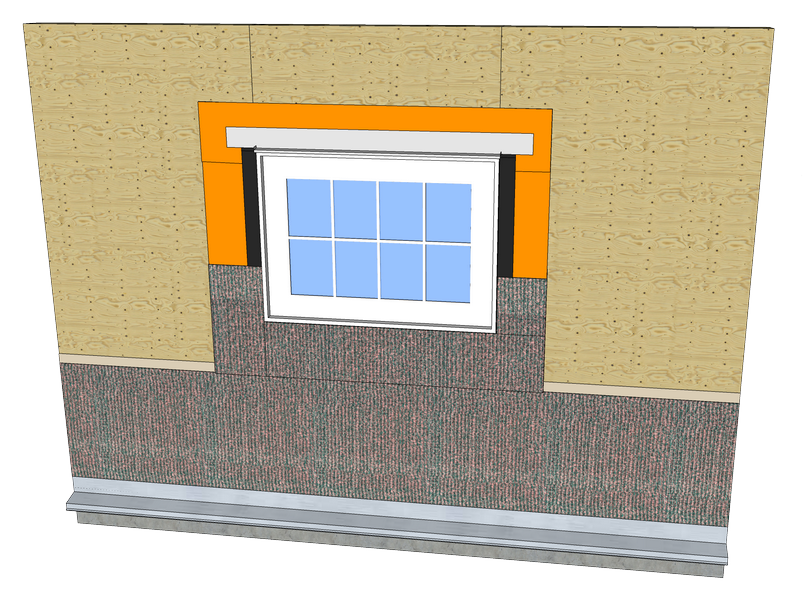
| 13. Overlap mesh from each side and cut at the same time vertically. Tack mesh in place with staples or hammer tacker. | 14. Install metal head flashing with end dams, (by others). |
 |
 |
| 15. Install next horizontal course of RSSA overlapping selvedge of course below. Trim flush with window frame. | 16. Install next horizontal course of RSSA over head flashing. Notch and trim if required to fit. |
Inside and Outside Corners