
Printer Friendly (PDF)
Overview
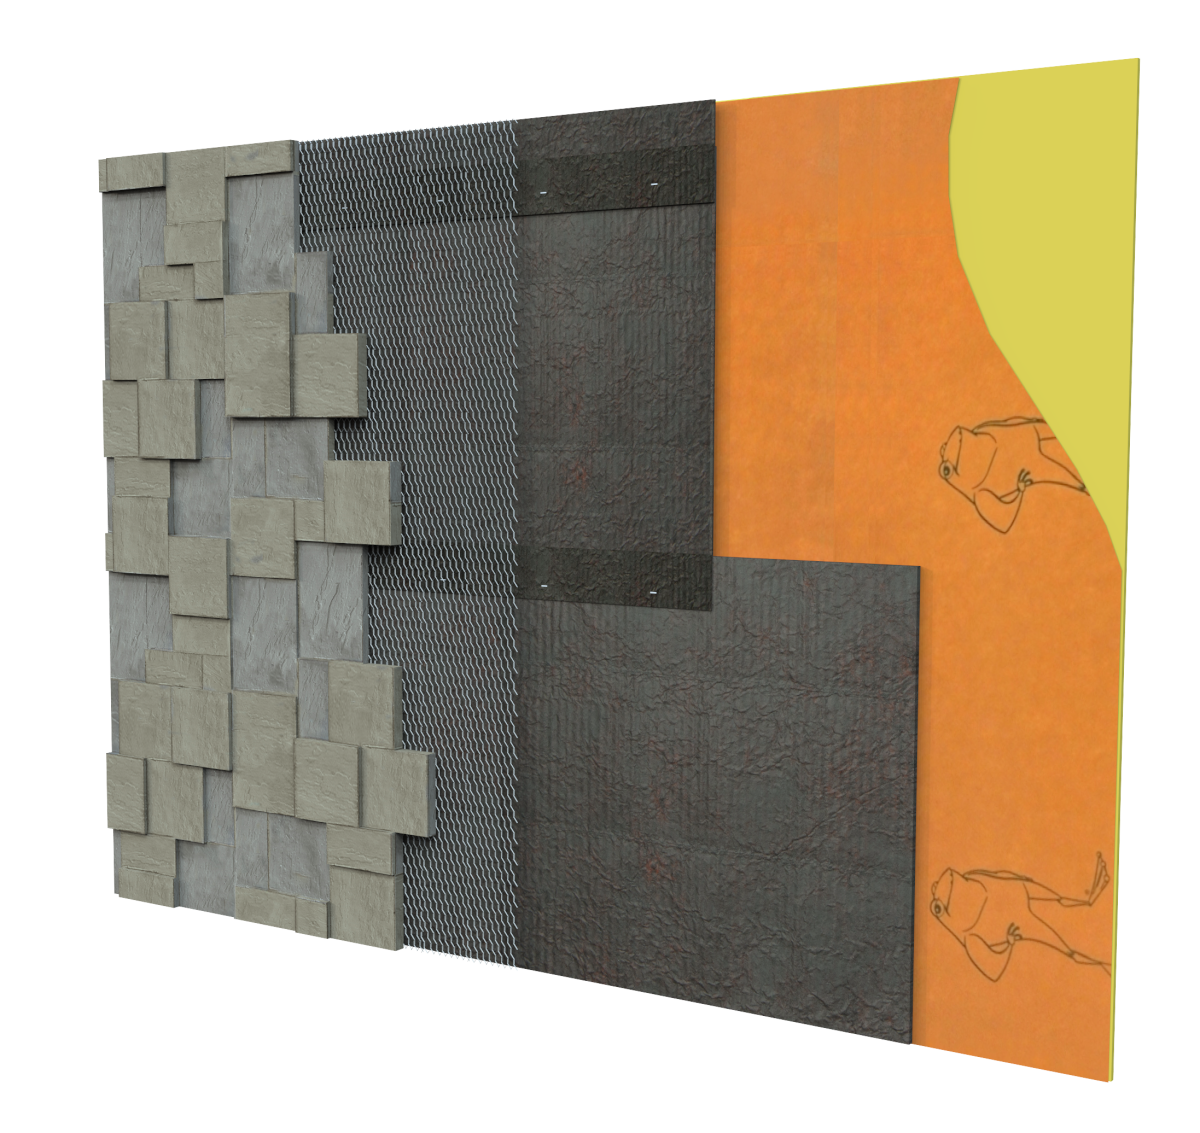
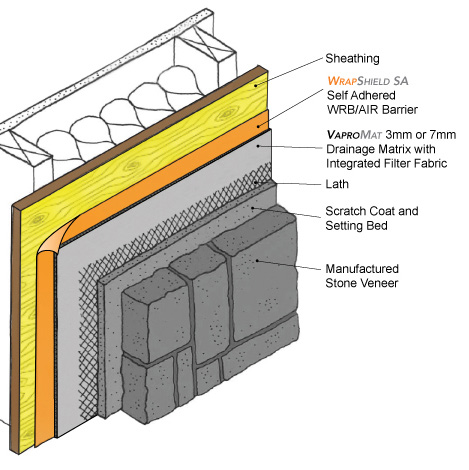
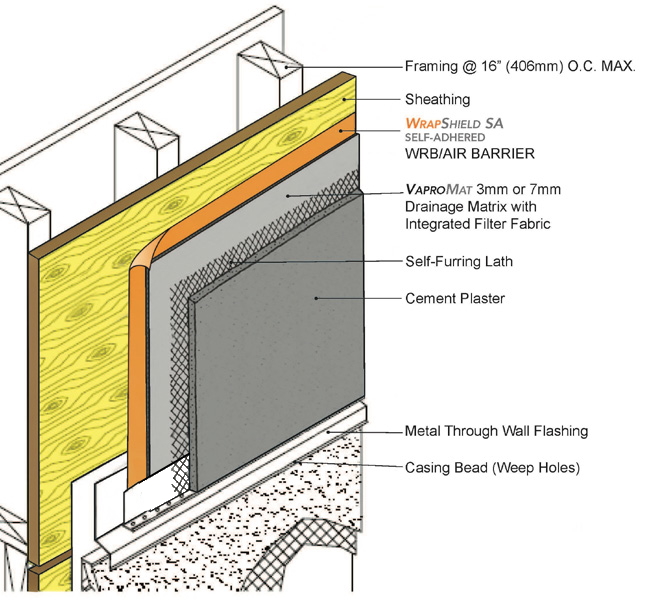
VaproMat is designed to be installed over the WrapShield SA Self-Adhered Weather Resistive Barrier (WRB)/Air Barrier (AB) membrane as a system to provide a positive drainage cavity behind claddings.
Air Barrier Installation
Air barrier installation requires all seams, joints, overlaps and penetrations WRB/AB membrane to be sealed for complete air barrier continuity.
Best Practices Overview
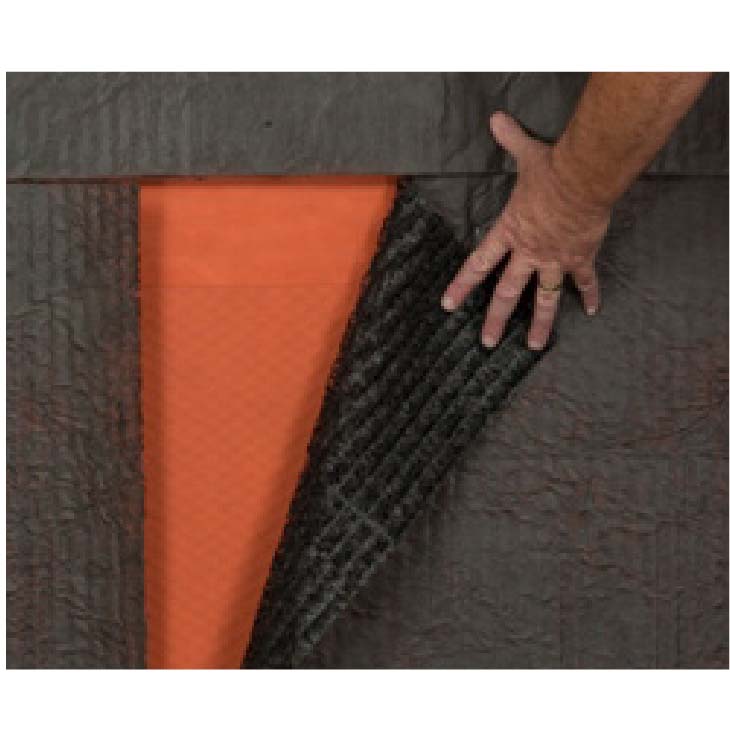
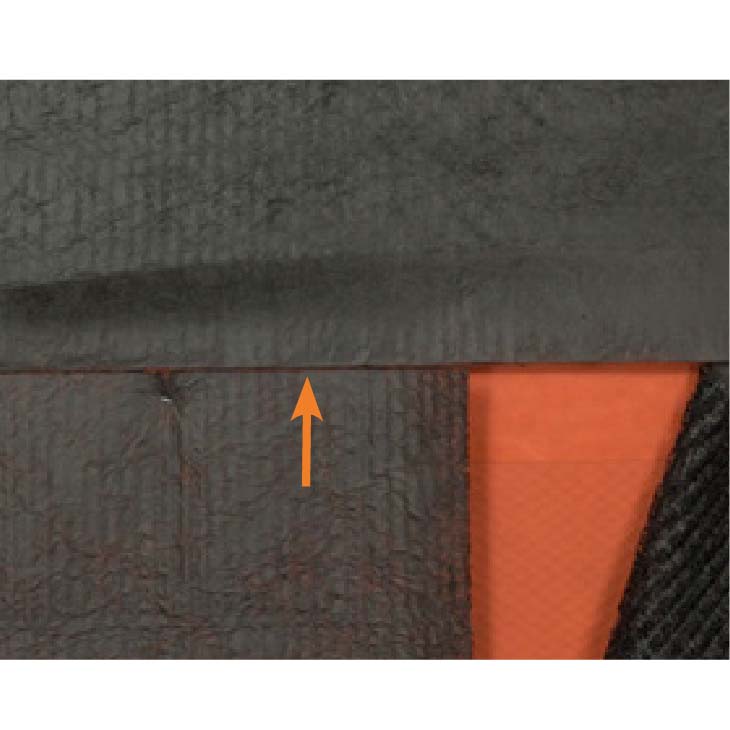
- Always install VaproMat, filter fabric side out, vertically with seams butted together, overlapping the 6” filter fabric selvage edge. Do not overlap the drainage matrix.
- Refer to WrapShield SA Self-Adhered Installation Instructions for proper installation.
- Building layout should be planned prior to installation to minimize waste and ensure all interfaces and penetrations are identified and correctly detailed to protect against water and air infiltration.
- Proper sequencing is critical. Protect rough openings and large penetrations with VaproLiqui-Flash System. Refer to VaproLiqui-Flash installation instructions.
- Maximum exposure prior to cladding installation is 6 months (180 days).
- Install lathe and weep screeds “proud” or over the VaproMat material.
Installation Guide for Manufactured Stone of Thin-Set Natural Stone
Install VaproMat in Conjunction with Stone
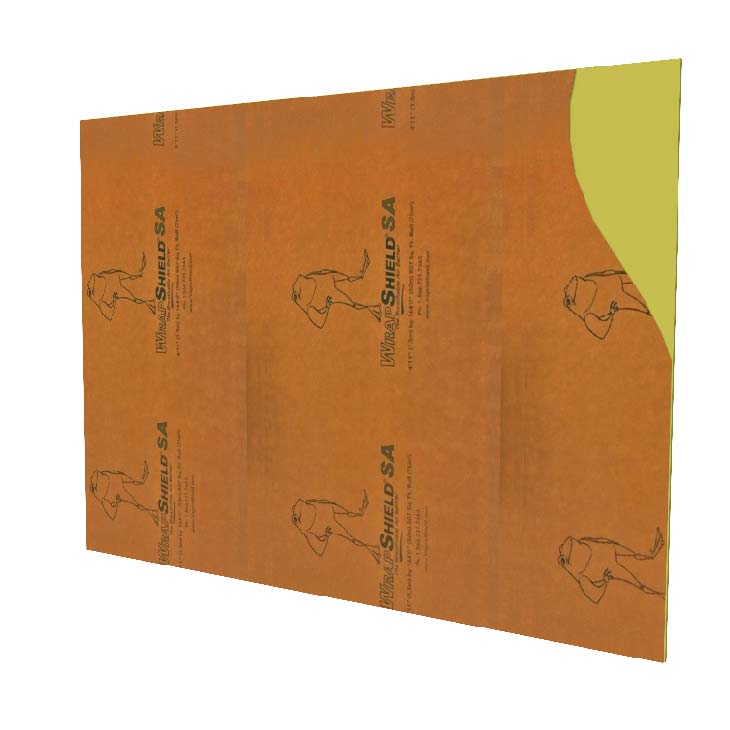
- Install VaproShield’s WrapShield SA Self-Adhered WRB/Air Barrier according to installation instructions.
- Install head flashing and thru-wall flashing prior to VaproMat installation, insuring correct lapping for moisture and air holdout.
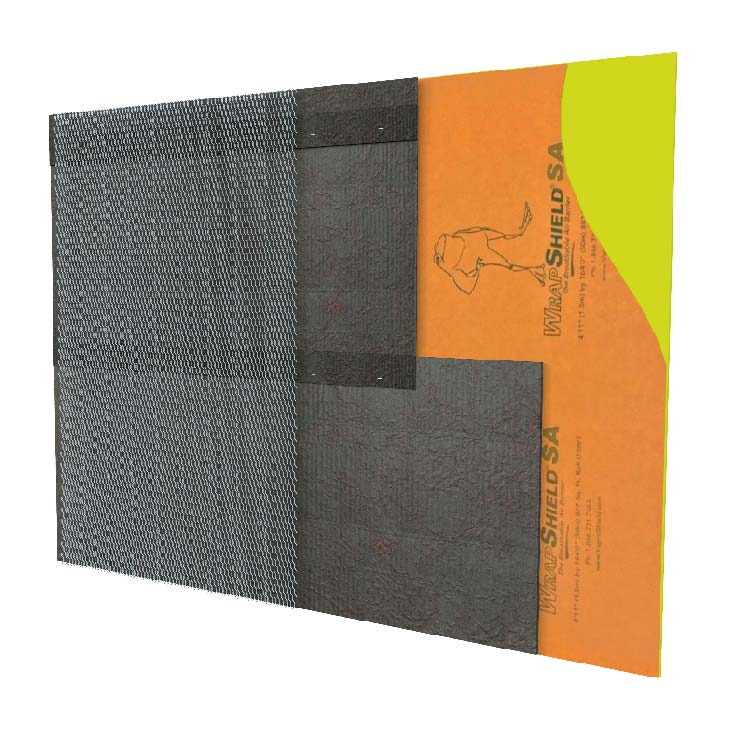
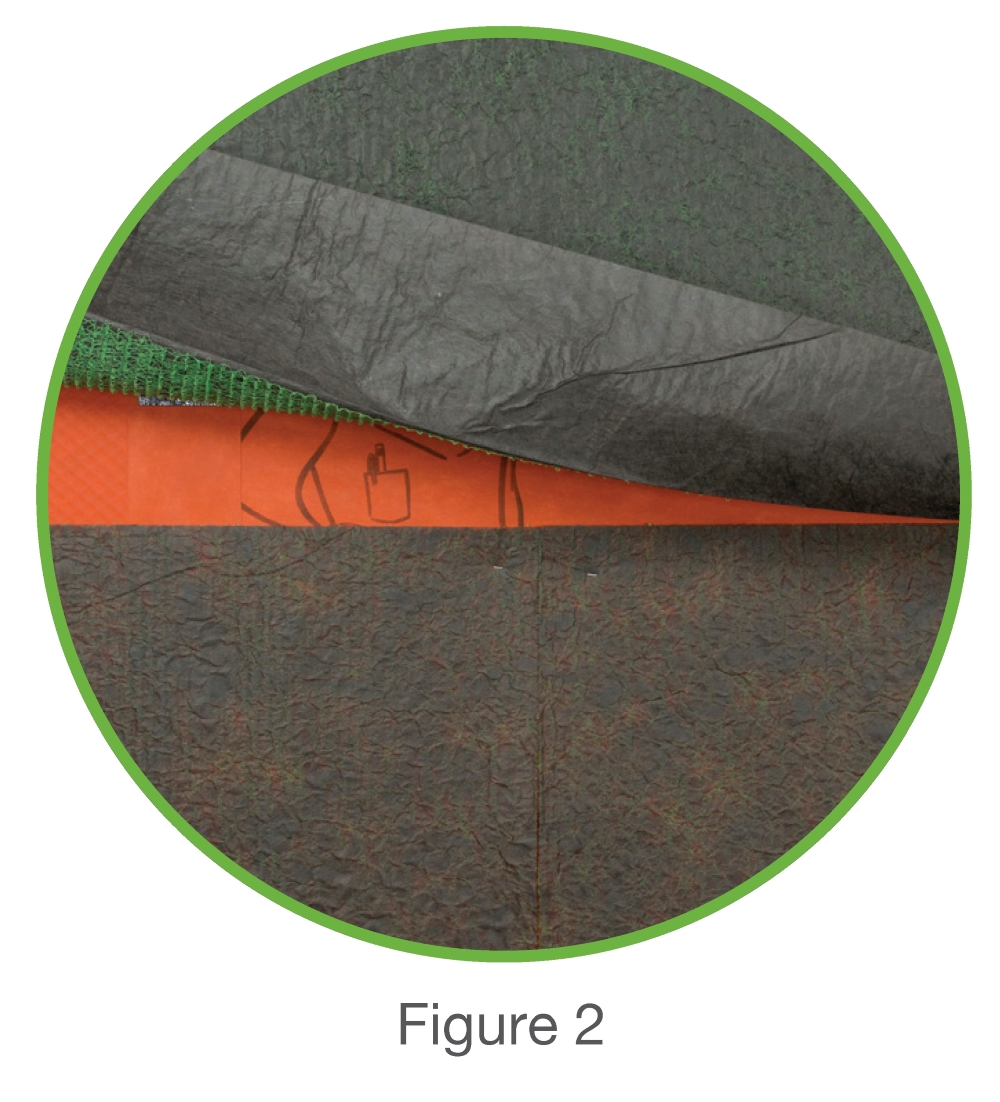
- Place VaproMat horizontally against exterior wall, filter fabric side out. The drainage matrix should face the building interior. Ref. Figure 2. Starting at the bottom of the wall, position the first piece of VaproMat at the bottom edge of the stone where the weep screed is located (weep screed installed by others).
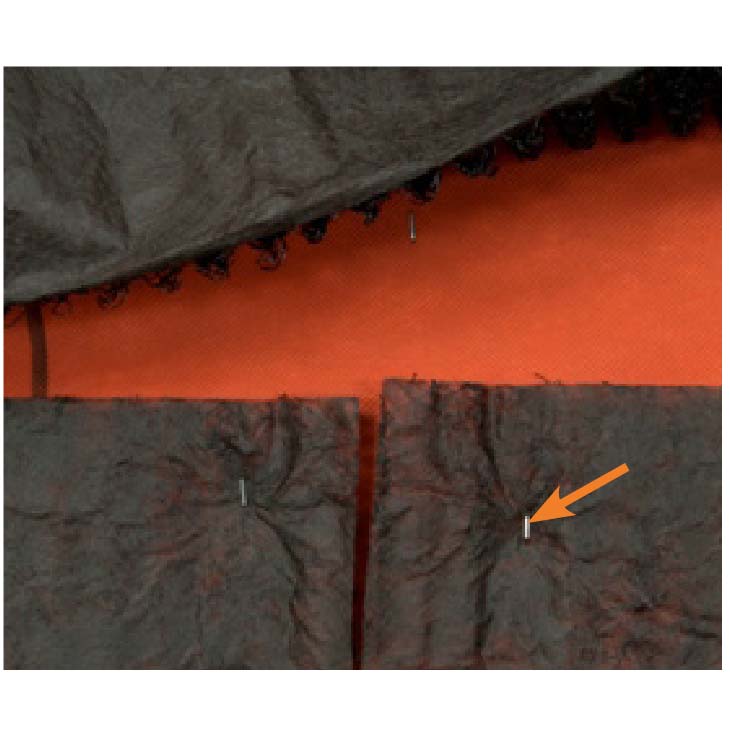
- Mechanically fasten VaproMat with stainless steel staples (SS) at the top 6” filter fabric selvage edge every 12”. Ref. Figure 3. Remaining VaproMat material will be held in place by stone lathing fasteners.
- Vertical seams of VaproMat drainage matrix butt together and do not overlap.
- Horizontal seams of the drainage matrix butt together with overlapping 6” filter fabric selvage edge in shingle fashion.
- Progress up the wall and terminate VaproMat ½” below thru-wall flashing. Repeat process for next floor.
- Trim VaproMat around all penetrations, windows and doors.
- Install expanded metal lathe over the VaproMat according to the manufacturers’ recommendations. Consult the Adhered Stone Manufacturers Stone Guidelines. All lathe including weep screeds are installed “proud” or over the VaproMat material.
- Apply thin-set and stone according to manufacturers’ recommendations. Guidelines should include a weep method for ventilation and drainage as recommended.
Installation Guide for Stucco
Install VaproMat in Conjunction with Stucco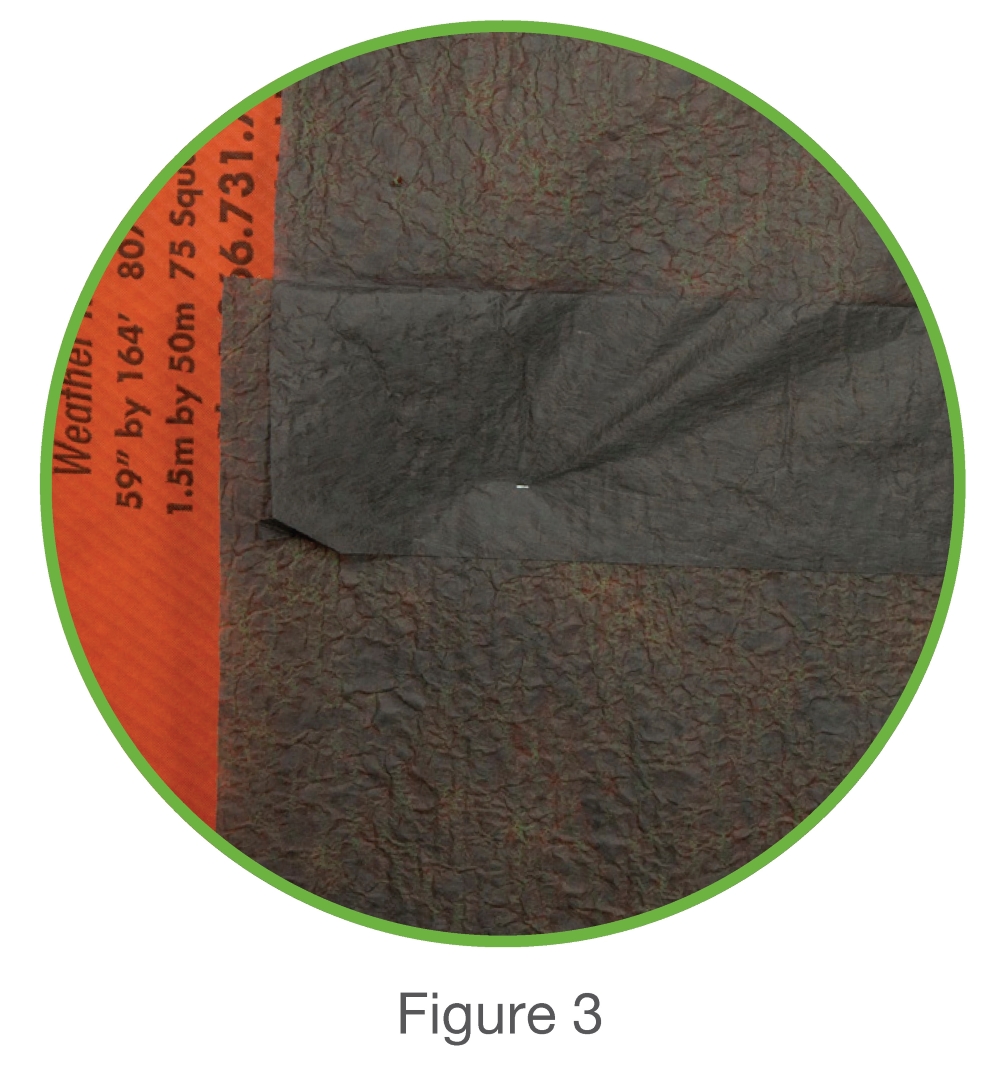
- Install VaproShield’s WrapShield SA Self-Adhered WRB/Air Barrier according to installation instructions.
- Install head flashing and thru-wall flashing prior to VaproMat installation, insuring correct lapping for moisture and air holdout.
- Place VaproMat horizontally against exterior wall, filter fabric side out. The drainage matrix should face the building interior. Ref. Figure 2. Starting at the bottom of the wall, position the first piece of VaproMat at the bottom edge of the stucco where the weep screed is located (weep screed installed by others).
- Mechanically fasten VaproMat with stainless steel staples (SS) at the top 6” filter fabric selvage edge every 12”. Ref. Figure 3. Remaining VaproMat will be held in place by stucco lathing fasteners.
- Vertical seams of VaproMat drainage matrix butt together and do not overlap.
- Horizontal seams of the drainage matrix butt together with overlapping 6” filter fabric selvage edge in shingle fashion.
- Progress up the wall and terminate VaproMat ½” below thru-wall flashing. Repeat process for next floor.
- Trim VaproMat around all penetrations, windows and doors.
- Install expanded metal lathe over the VaproMat according to the manufacturers’ recommendations. Consult NW Wall and Ceiling Bureau, www.nwcb.org, for details regarding drainage stucco systems. All lathe include weep screeds are installed “proud” or over the VaproMat material.
- Apply stucco according to manufacturer's recommendations. Guidelines should include a weep method for ventilation and drainage as recommended by Northwest Wall and Ceiling Bureau details www.nwcb.org.
Installation Guide for Wood Siding, Cedar Shingles, and Fiber-Cement Lap Siding
Install VaproMat in Conjunction with Siding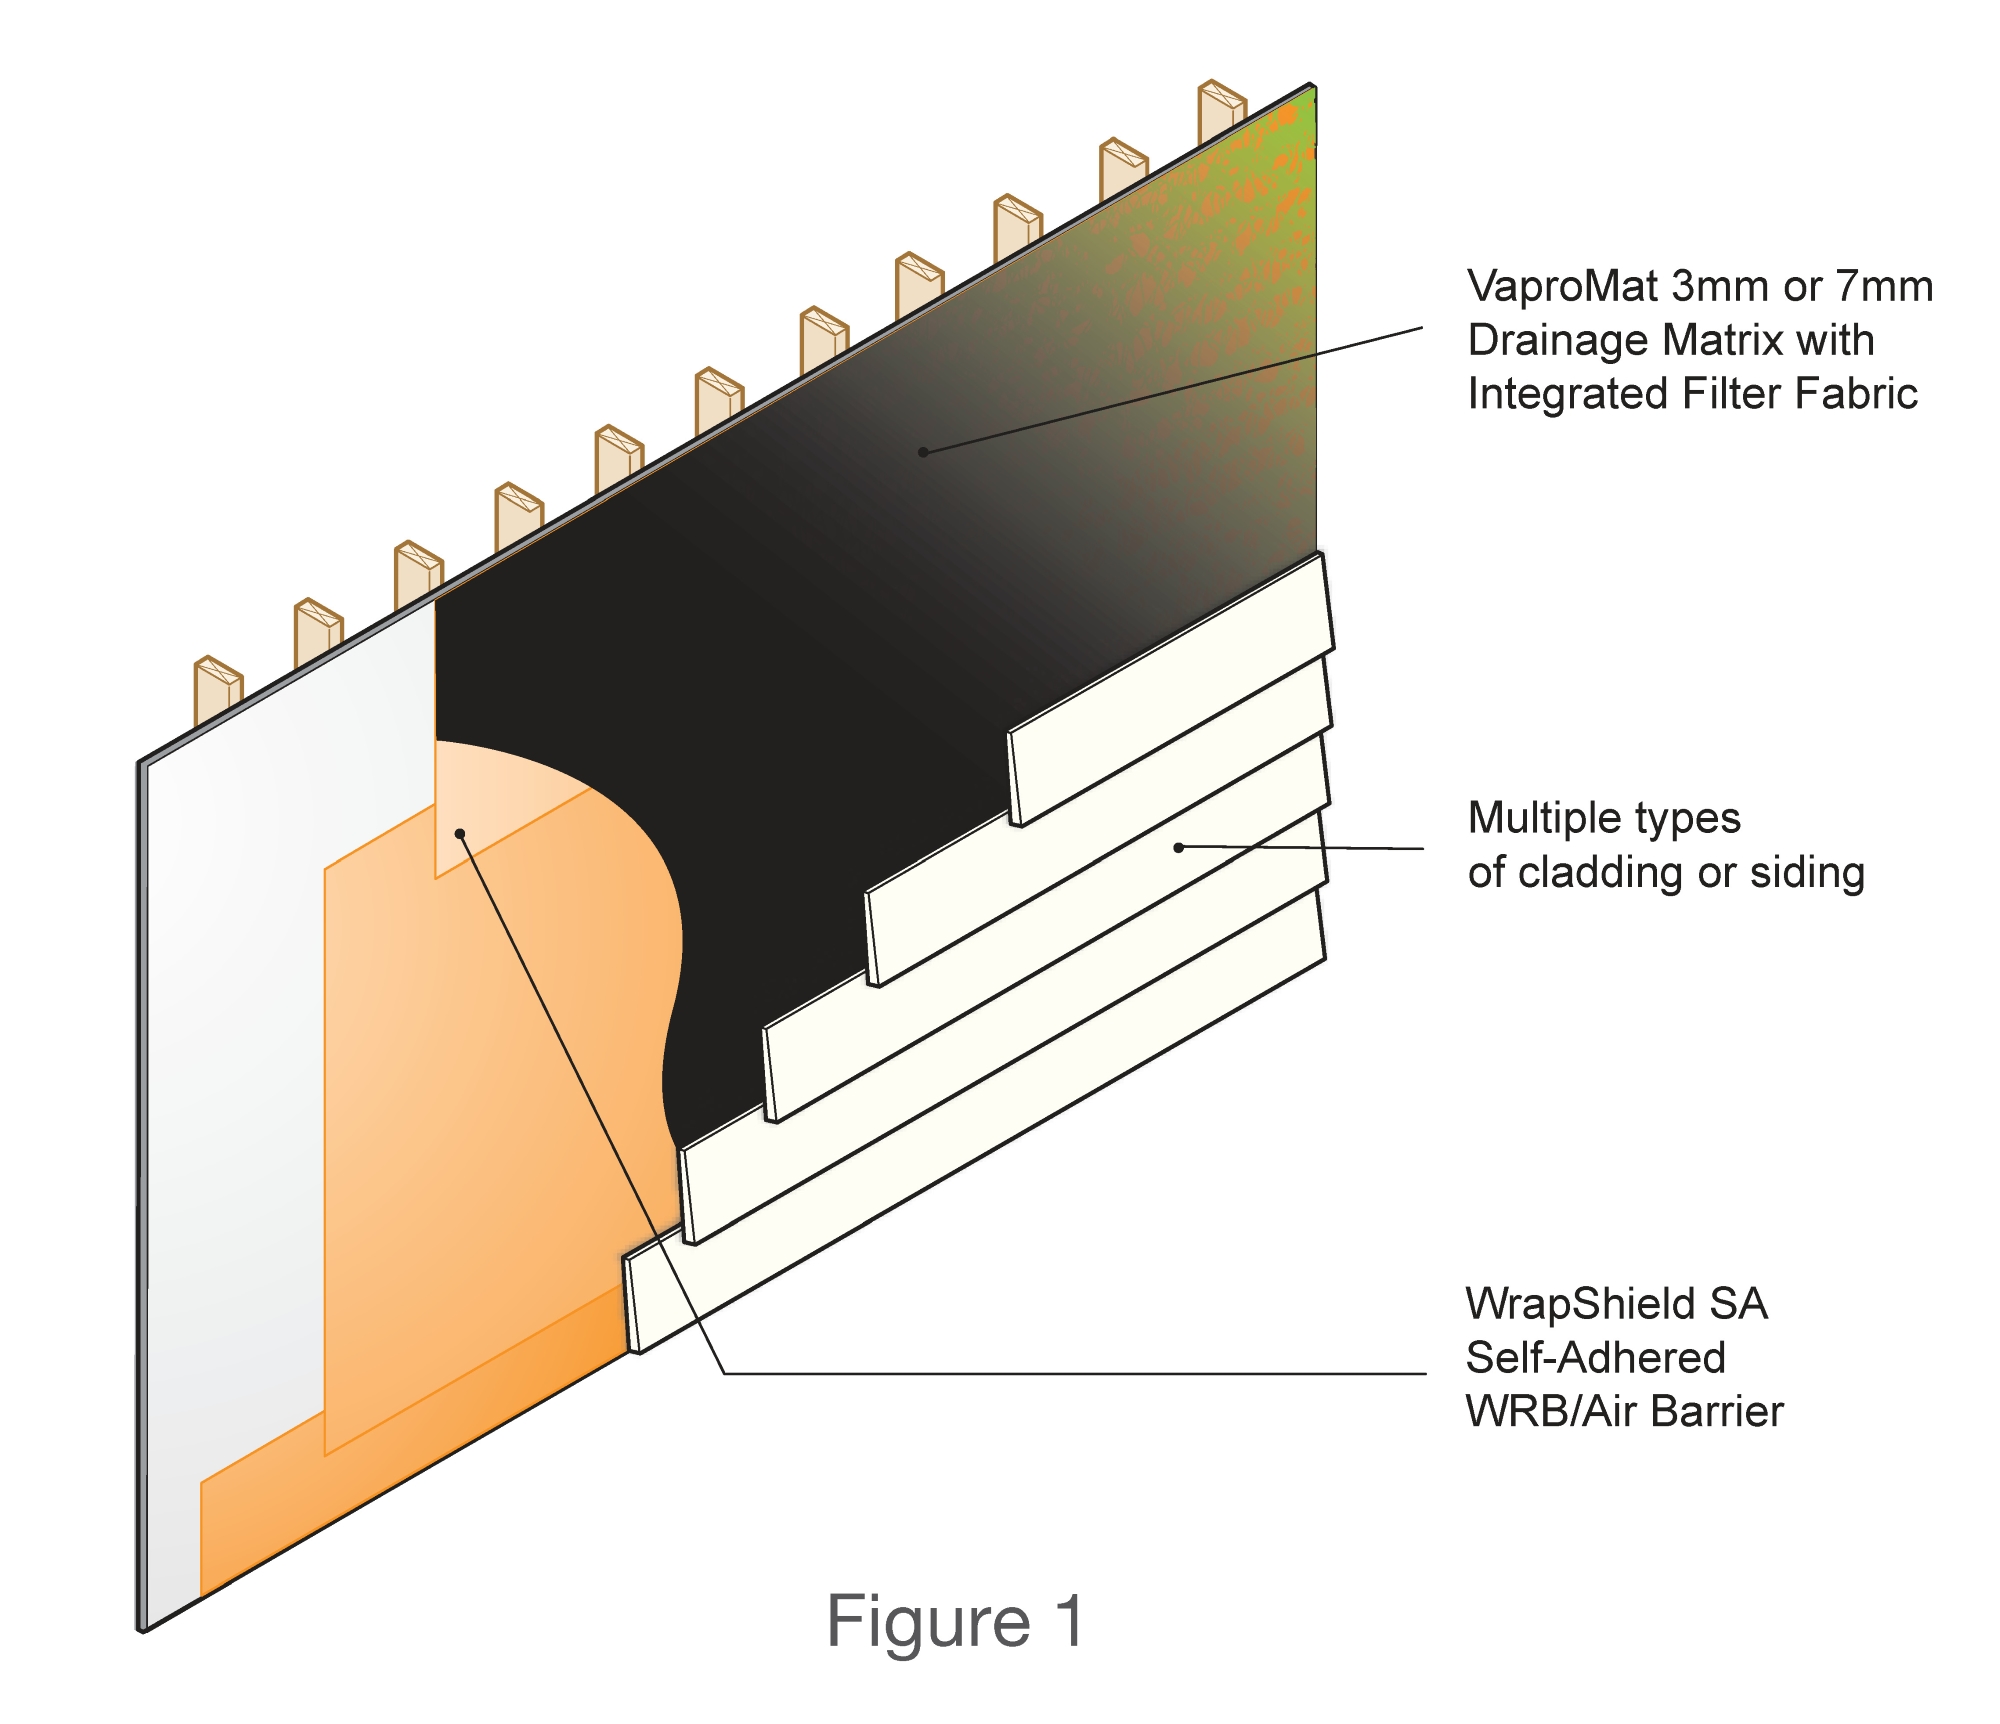
- Install VaproShield’s WrapShield SA Self-Adhered WRB/Air Barrier according to installation instructions.
- Install head flashing and thru-wall flashing prior to VaproMat installation, insuring correct lapping for moisture and air holdout.
- Place VaproMat horizontally against exterior wall, filter fabric side out. The drainage matrix should face the building interior. Ref. Figure 2. Starting at the bottom of the wall, position the first piece of VaproMat at the bottom edge of the siding.
- Mechanically fasten VaproMat with stainless steel staples (SS) at the top 6” filter fabric selvage edge every 12”. Ref. Figure 3. Remaining VaproMat will be held in place by the siding fasteners.
- Vertical seams of VaproMat drainage matrix butt together and do not overlap.
- Horizontal seams of the drainage matrix butt together with overlapping 6” filter fabric selvage edge in shingle fashion.
- Progress up the wall and terminate VaproMat ½” below thru-wall flashing. Repeat process for next floor.
- Trim VaproMat around all penetrations, windows and doors.
- Install siding, shingles and fiber-cement siding according to manufacturers’ recommendations.
- When choosing siding fasteners, allow for thickness of VaproMat (3mm or 7mm). Pneumatic nail guns can be used if nails meet manufacturer's recommendations and air pressure and depth gauge is set to fasten nail snug with surface. Do not over fasten!